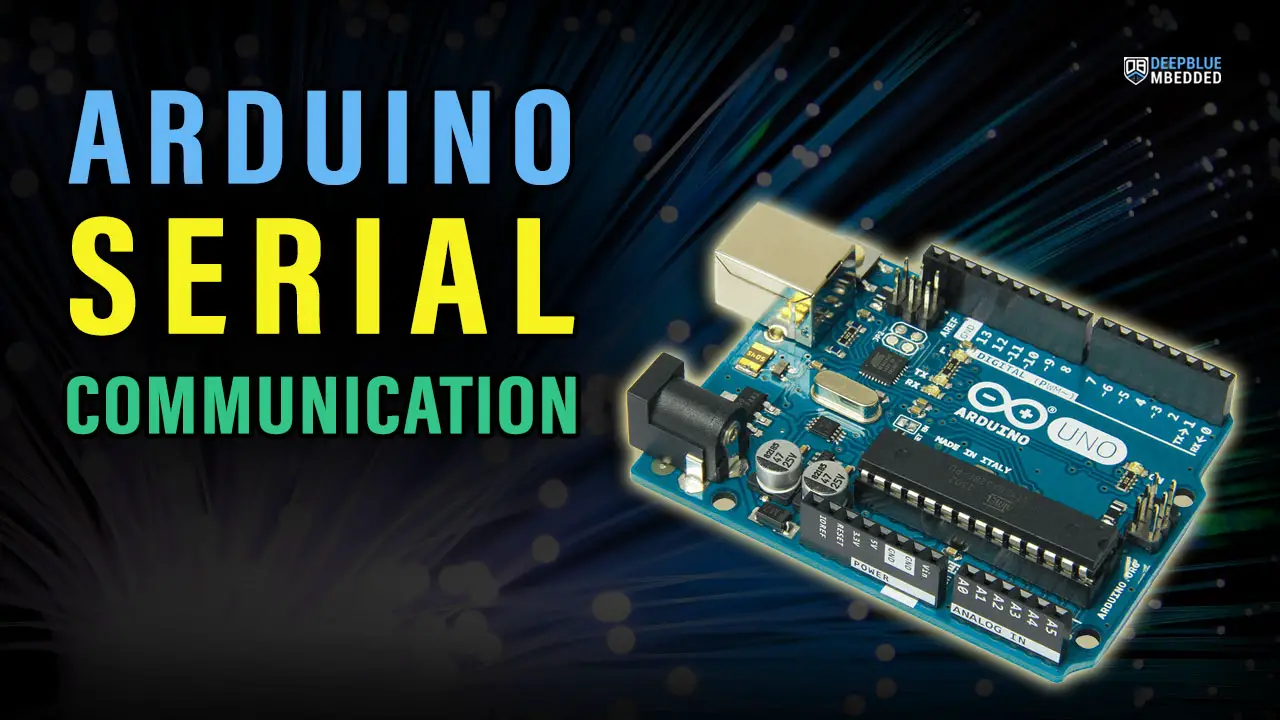
In this tutorial, we’ll discuss the Arduino Serial Communication Ports (Protocols) that we can use for communicating with other sensors, modules, and microcontrollers. The Arduino’s microcontroller supports 3 serial communication ports (UART, SPI, and I2C).
We’ll get an overview of the serial communication ports (protocols) available in the Arduino, their IO pins, specifications, differences, use cases, and applications. Each serial communication port can be used to establish a communication channel between two Arduino boards, an Arduino with another microcontroller, or between Arduino and various sensors & modules. Which is the most common use case as we’ll see hereafter.
Table of Contents
- What is Serial Communication?
- Arduino Serial Communication – UART
- Arduino Serial Communication – SPI
- Arduino Serial Communication – I2C
- Arduino Serial Communication Ports Comparison
- Wrap Up
What is Serial Communication?
In Embedded Systems, Telecommunication, and Data Transmission applications, Serial Communication is known to be the process of sending data one bit at a time (bit-by-bit) sequentially, over the serial bus. It takes a complete clock cycle in order to transfer each bit from one end to the other.
Conversely, parallel communication is known to be the process of sending several bits, even bytes, as a whole only in a single clock cycle. However, even if you transfer fewer data per cycle with a serial transmission, you can do it at much higher frequencies which results in higher net transfer rates than parallel communication.
There are so many different serial communication protocols, each of which is working in a unique way. However, they all do share one thing in common. Which is having Shift Registers somehow/somewhere in their hardware implementation as the working horse (core).
Shift Registers are used to shift out the data to be transmitted bit-by-bit each clock cycle. Shift registers are basically some D-Flip-Flops serially connected while sharing the same clock line. Here is a graphical animation that demonstrates how a shift register works.
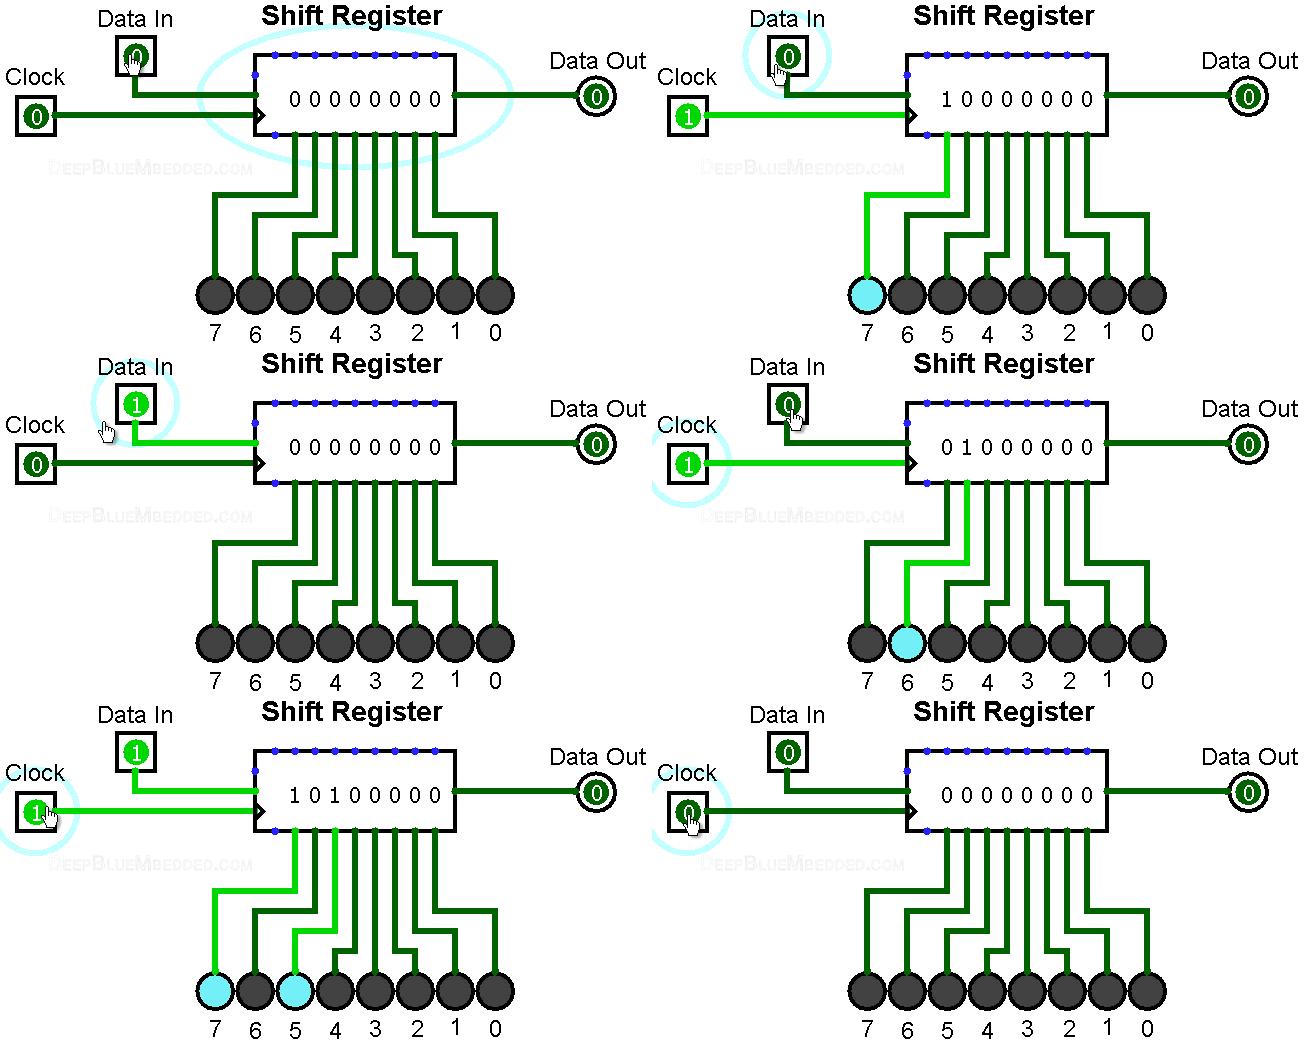
Generally speaking, serial communication at the end of the day comes down to connecting a couple of shift registers together! We just connect the data output of a shift register to the data input of the other shift register enables us of sending digital data serially from one end to another.
In the following animation, I’m connecting a couple of 4-Bit shift registers. One at the transmitter device and the other at the receiver device. The serial bus consists of a couple of wires (data line, and clock line). Each clock, a bit is sent from the transmitter’s TX pin and received by the receiver’s RX pin.
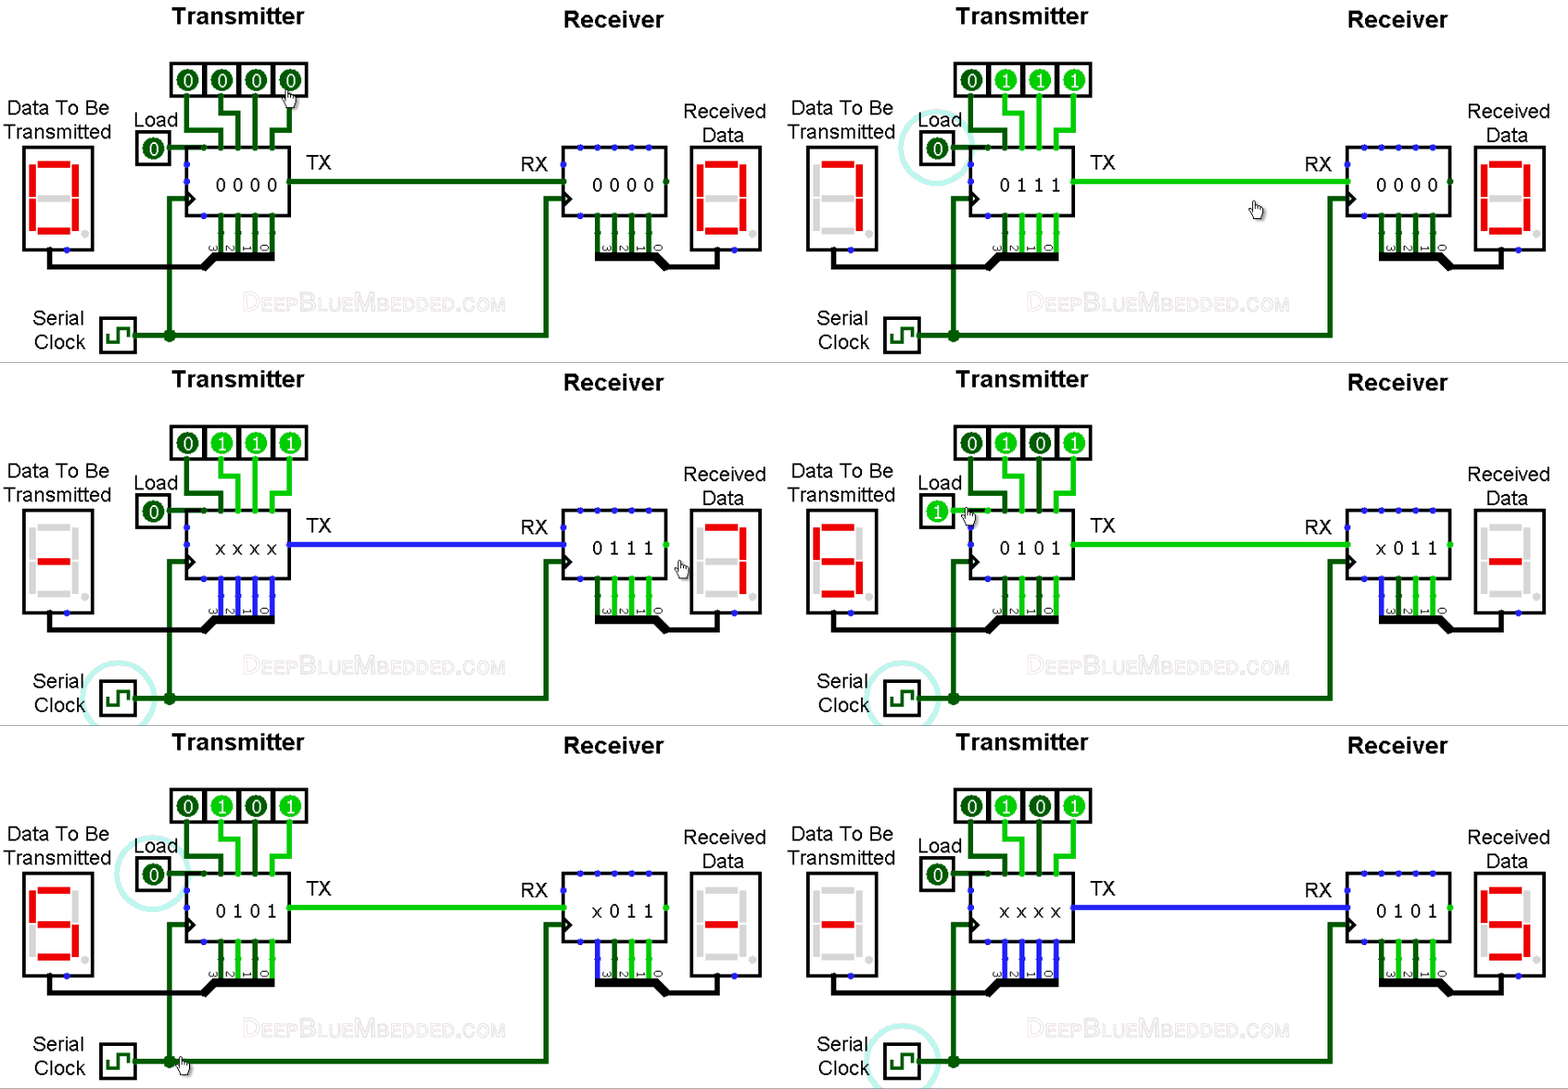
As you might have noticed, it takes 4 clocks to send the 4-Bit data from the transmitter to the receiver. This is simply the short answer to the “How does Serial Communication Work?”. This is the basic idea behind serial communication that you need to know first to start building up your understanding of the topic.
In fact, there are so many options and configurations for each serial communication protocol that sets it apart from the others. This includes various data transmission rates, operating modes, error detection & correction mechanisms, data flow control, and much more that adds to the overall complexity associated with each protocol.
This is more than enough for the scope of this tutorial, but if you want to learn more about serial communication fundamentals, and its underlying hardware, and to go deeper into the topic, then the tutorial linked below is a very good starting point for you.
This article will give more in-depth information about serial communication fundamentals and UART serial communication ports hardware & software.
Arduino Serial Communication – UART
UART (Universal Asynchronous Receiver-Transmitter) is the most popular serial communication protocol in embedded microcontrollers. In Arduino, we typically use the UART module for serial communication with the PC via a USB-TTL converter to print serial messages on the serial monitor.
There are actually two forms of UART Hardware as follows:
- UART – Universal Asynchronous Receiver/Transmitter
- USART – Universal Synchronous/Asynchronous Receiver/Transmitter
The Synchronous type of transmitter generates the data clock and sends it to the receiver which works accordingly in a synchronized manner. On the other hand, the Asynchronous type of transmitter generates the data clock internally. There is no incoming serial clock signal, so in order to achieve proper communication between the two ends, both of them must be using the same baud rate. The baud rate is the rate at which bits are being sent bps (bits per second).
Arduino UART Pins
The Arduino UNO has only one UART module which has two pins (RX for receiving serial data and TX for transmitting serial data). The UART pins’ mapping is as follows: RX is Arduino pin 0, and TX is Arduino pin 1 respectively.

Arduino UART Applications
Besides serial communication with your PC for debugging and such, the UART is also used for interfacing various sensors and modules such as:
- Bluetooth Modules (e.g. HC-05)
- WiFi Modules (AT CMD)
- GSM/GPRS Modules
- GPS Modules
- Lidar Sensors
- and much more
If you need an extra UART module in your application, you can use the SoftwareSerial library which is a software-emulated UART module. It’ll bit-bang the UART serial pattern on any 2 pins of your choice. But note that it’ll cost you a lot of CPU load and it’s not going to be reliable at high speeds. Because at the end of the day, it’s not a real UART hardware module.
This article will give more in-depth information about Arduino UART serial communication, and Arduino UART code examples for communication with a PC and between 2 Arduino boards.
Arduino Serial Communication – SPI
SPI (Serial Peripheral Interface) is pronounced as “S-P-I” or “Spy”. Which is a serial, synchronous, single-master, multi-slave, full-duplex interface bus typically used for serial communication between microcomputer systems and other devices, memories, and sensors. Usually used to interface Flash Memories, ADC, DAC, RTC, LCD, SDcards, and much more.
In typical SPI communication, there should be at least 2 devices attached to the SPI bus. One of them should be the master and the other will essentially be a slave. The master initiates communication by generating a serial clock signal to shift a data frame out, at the same time serial data is being shifted into the master. This process is the same whether it’s a read or write operation.
Arduino SPI Pins
The SPI communication bus consists of 3 main lines (Serial Data Out, Serial Data In, and Serial Clock). The SPI master device needs also an extra IO pin to select the slave to which it’d like to communicate. This means we need an extra IO pin for each slave device added to the bus which is definitely going to limit the maximum addressable devices on the bus.
The SPI bus lines are named according to a conversion that eases the wiring and usage for users, which goes as follows:
- MOSI (Master Output Slave Input)
- MISO (Master Input Slave Output)
- SCK (Serial Clock)
- SS (Slave Select) “Only Required For SPI Slave Devices”

Arduino SPI Applications
There are so many applications in which you’d need to use the Arduino SPI bus to interface various sensors and modules which include, but are not limited to, the following examples:
- SPI TFT Display Interfacing
- Dot Matrix Display Interfacing
- External SPI Flash Memory
- External SPI ADC Modules
- nRF24L01 Wireless Modules
- SPI Camera Modules
- and much more
Arduino Serial Communication – I2C
I2C, I2C, or IIC (Inter-Integrated Circuit) is also a very popular serial communication protocol that’s widely used by different sensors and modules in embedded systems. It consists of 2 pins only (one for serial data and one for the serial clock).
The I2C is a multi-master multi-slave protocol that supports a large number of devices on the same 2-wire bus. Each device has a unique ID that others can use to directly address that specific device. And it’s considered the most efficient serial communication bus in terms of the number of IO pins needed to establish a communication network of multiple devices.
Arduino I2C Pins
The Arduino UNO (Atmega328p) microcontroller has only one I2C module, which has 2 pins: (SDA and SCL) as shown below.

Arduino I2C Applications
There are so many modules and sensors that we can interface with Arduino using the I2C bus, which include:
- RTC Clock
- OLED Display Screens
- I2C IO Pins Expander
- Temperature / Humidity Sensors
- External EEPROM Memory Chips
- MPU6050 IMU (Gyro+Accelerometer)
- and much more
Typically, you won’t need more than one I2C module on your Arduino microcontroller. Because if you need to add a new extra device to the I2C bus, it’s as simple as hooking it up to the SCL and SDA lines and you’re good to go. Unlike the UART which is a single master single slave communication port.
The I2C Pins (SDA and SCL) are the Arduino analog input pins A4 and A5 respectively. If you’re going to use the Arduino I2C communication, you’ll not be able to use those 2 pins as analog input channels for the ADC or whatever.
Arduino Serial Communication Ports Comparison
And now let’s summarize and compare the technical features and specifications for the 3 serial communication ports (protocols) that we’ve discussed in this tutorial (UART, I2C, and SPI).
| Feature | UART | I2C | SPI |
| Name | Universal Asynchronous Receiver Transmitter | Inter-Integrated Circuit | Serial Peripheral Interface |
| Interface Diagram | |||
| Pin Names | TX, RX | SDA, SCL | MOSI, MISO, SCK, SS |
| Type of Communication | Asynchronous | Synchronous | Synchronous |
| Clock | No | Yes (master generates clock signal) | Yes (master generates clock signal) |
| Number of Masters | Only 1 Master | Multi-Master Bus | Only 1 Master |
| Number of Slaves | Only 1 Slave | Multi-Slave Bus | Multiple Slaves (Each Slave Requires 1 IO to control its SS signal). Which dictates the limit of addressable slaves on the bus. |
| Data Rate | Common Baud Rates: (1200, 2400, 4800, 19200, 38400, 57600, and 115200). It can go up to 2Mbps in more powerful MCUs. | Standard Mode: 100kbps Fast Mode: 400kbps Fast Mode Plus: 1Mbps High-Speed Mode: 3.4Mbps Ultra Fast Mode: 5Mbps | It is the fastest serial communication port of all. It can go up to 50Mbps in high-end microcontrollers. |
| Distance | Highest (Several Meters) | Multiple (each with a unique address) | Short (Several cm) |
| Addressing | It’s a single master single slave bus, no need for addressing. | Each device has a unique 7-bit or 10-bit address. | The master addresses each slave using a unique IO pin to control its SS signal. |
| Advantages | Simple and easy to use. Widely used in many devices. Does not require a clock signal. Can communicate over long distances. | Supports multiple devices on a single bus. Multi-Master support with hardware arbitration. Built-in error-checking mechanism. Low power consumption. | Fastest data rate. Multi-Slave support. Easier to use than I2C. |
| Disadvantages | Only supports point-to-point communication. A limited number of devices can be connected. No error-checking mechanism is built-in. A bit slower than other serial communication ports. | Limited distance due to capacitance. Can be slower than other protocols. More complex than UART & SPI. | Requires more pins than other serial communication ports. More slaves mean more IO pins are needed to control the SS lines. Only one master can exist on the SPI bus. SPI bus can’t go for a long distance, unlike UART for example. |
| Reference | UART Reference | I2C Reference | SPI Reference |
Wrap Up
To conclude this tutorial, we’d like to highlight the fact that the Arduino microcontroller is equipped with all 3 major serial communication ports that we’ll be heavily using for interfacing various sensors & modules in future tutorials. Each serial communication port (protocol) has its own set of features and specs that makes it more suitable for certain applications than others.
This tutorial is a fundamental part of our Arduino Series of Tutorials because we’ll build on top of it to go deeper into each serial communication port (protocol) in the next few tutorials. Each of (UART, I2C, and SPI) will have its own dedicated tutorial with a lot of practice examples.
If you’re just getting started with Arduino, you need to check out the Arduino Getting Started [Ultimate Guide] here.
And follow this Arduino Series of Tutorials to learn more about Arduino Programming.
This is the ultimate guide for getting started with Arduino for beginners. It’ll help you learn the Arduino fundamentals for Hardware & Software and understand the basics required to accelerate your learning journey with Arduino Programming.
FAQ & Answers
The Arduino microcontroller’s support (UART, SPI, and I2C) serial communication ports (protocols). Each serial communication port (protocol) has its own set of features and specs that makes it more suitable for certain applications than others.
Arduino has 3 serial communication ports (protocols) supported by the hardware microcontroller itself. Namely, they are (UART, SPI, and I2C). Software-Emulation (bit-banging) can also help to add a new serial communication port to your Arduino project at the cost of a higher CPU load.
The easiest way to add serial communication to Arduino is to use the UART serial port. The built-in Serial library will help you achieve this, and you only need 2 pins that are designated with (RX and TX) on your Arduino board.
