In this tutorial, you’ll learn how to interface E-Paper Display With Arduino. We’ll set up the required Arduino E-Paper Display Library and create some e-paper display examples (text & bitmap images on the e-paper screen).
This guide tutorial is an excellent starting point for your Arduino + E-Paper display project idea. Without further ado, let’s get right into it!
Table of Contents
- Arduino E-Paper Display
- Arduino E-Paper Display Interfacing
- Arduino ePaper Library (GxEPD2)
- Arduino E-Paper Display Examples (GxEPD2)
- Arduino ePaper Library (WaveShare)
- Arduino E-Paper Display Examples (WaveShare)
- Wrap Up
Arduino E-Paper Display
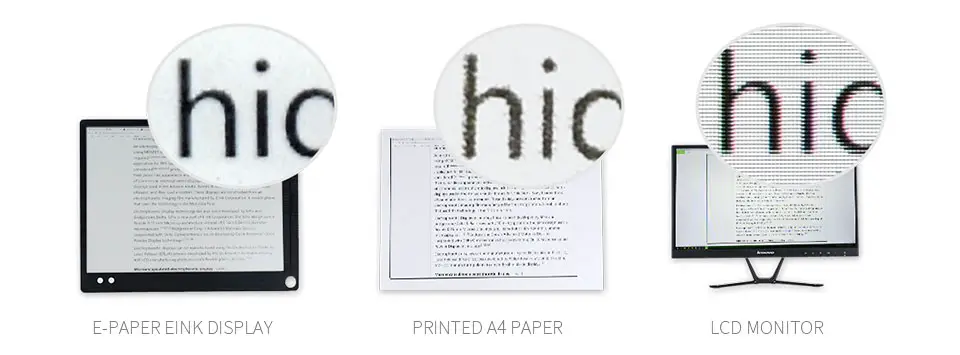
E-Paper, or electronic paper, is a relatively new display technology that mimics the appearance of ink on paper, that’s why it’s often called e-ink display. Unlike traditional LCD or LED screens, e-paper displays do not emit light but reflect ambient light, providing a comfortable and natural reading experience.
This unique characteristic makes e-paper an ideal choice for various applications where readability, power efficiency, and visibility in bright conditions are essential. E-paper displays are commonly found in devices like e-readers, electronic shelf labels, price tags, etc.
How E-Paper / E-Ink Display Works
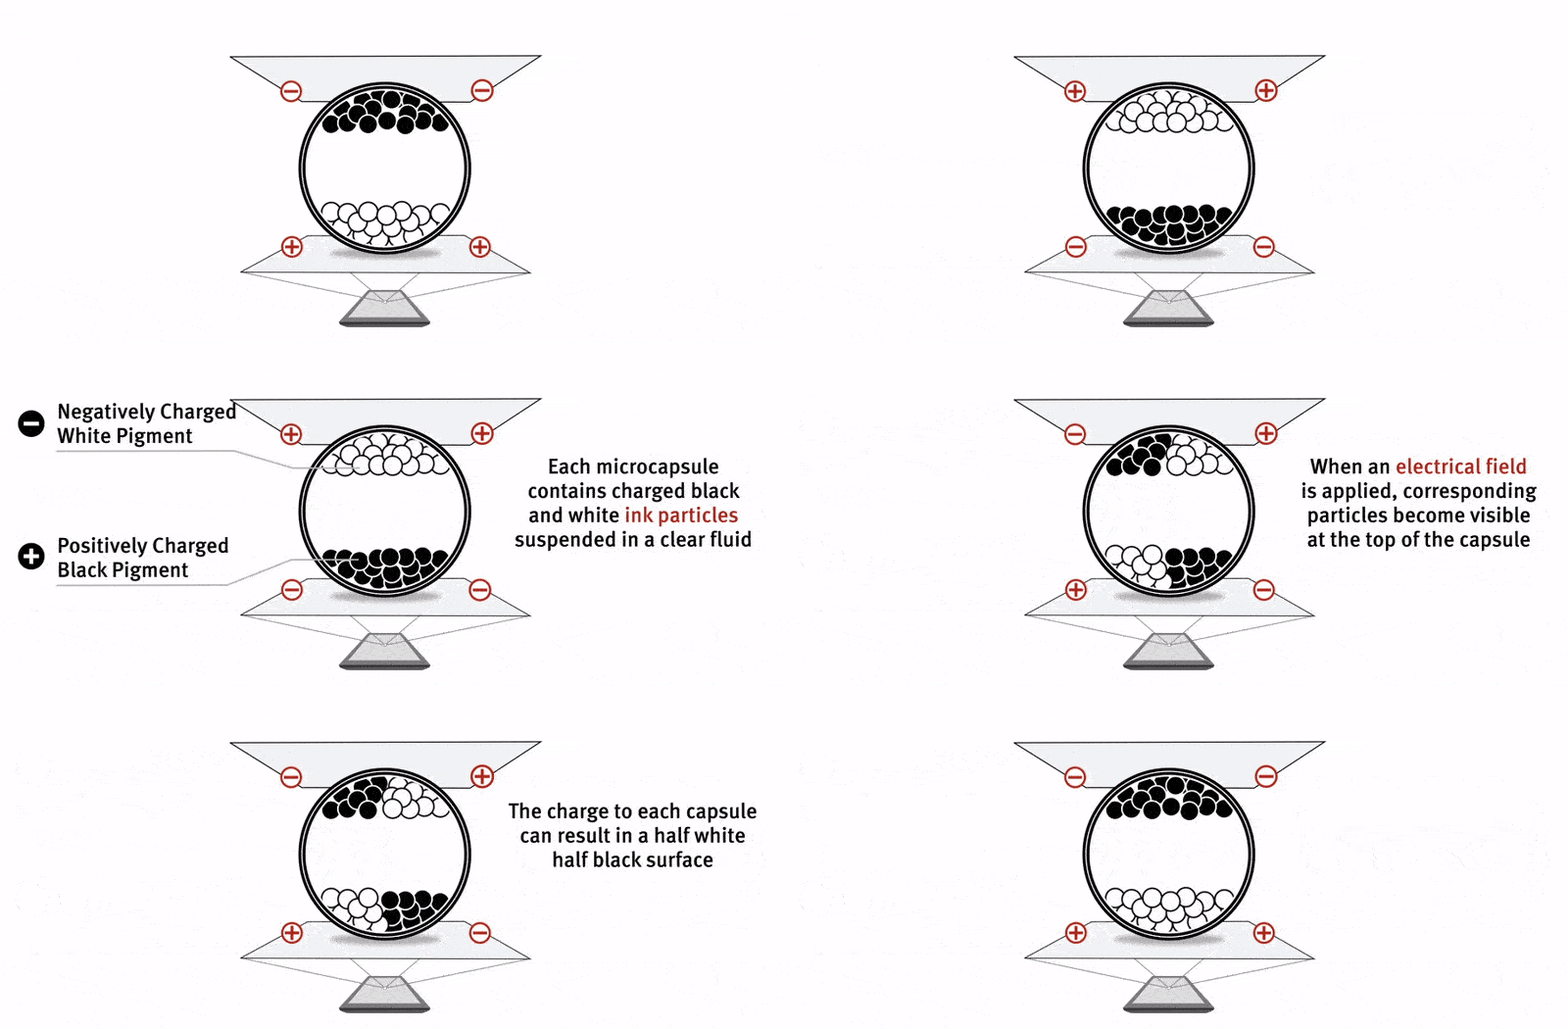
The core component of an e-paper display is a layer of micro-capsules or micro-cups, each containing tiny particles suspended in a clear fluid. These particles are usually charged with different polarities and colors, such as black and white.
When an electric field is applied to the microcapsules, the charged particles move to the top or bottom of the capsule, becoming visible to the viewer. By selectively applying electric fields to different pixels of the display, it is possible to display text and images.
E-Paper Display (E-Ink) Pros & Cons
Advantages (Pros) of E-Paper Display Units:
- Low Power Consumption: E-paper displays consume power only when changing the displayed content. Once an image is set, it can remain on the screen indefinitely without drawing additional power.
- Readability: The reflective nature of e-paper provides excellent readability, even in direct sunlight. This makes it ideal for outdoor and brightly lit environments.
- Eye Comfort: E-paper displays reduce eye strain compared to backlit screens, making them comfortable for extended reading sessions.
- Wide Viewing Angles: E-paper displays maintain consistent image quality regardless of the viewing angle.
Disadvantages (Cons) of E-Paper Display Units:
- Slow Refresh Rate: E-paper displays typically have slower refresh rates compared to LCD or OLED screens, making them unsuitable for dynamic content like video playback.
- Limited Color Range: Most e-paper displays are monochromatic, though some color versions exist. However, the color range and saturation are often limited.
- Higher Cost: E-paper technology can be more expensive to manufacture, leading to higher costs for devices using e-paper displays compared to traditional graphical LCDs.
E-Paper Display (E-Ink) Applications
- E-Readers
- Shelf Labels
- Store Price Tags
- Wearable Devices
- etc…
Buy an E-Paper 2.9″ Display: you can find it here on ( Amazon.com / AliExpress / eBay )
Arduino E-Paper Display Interfacing
1. Arduino E-Paper Display Wiring
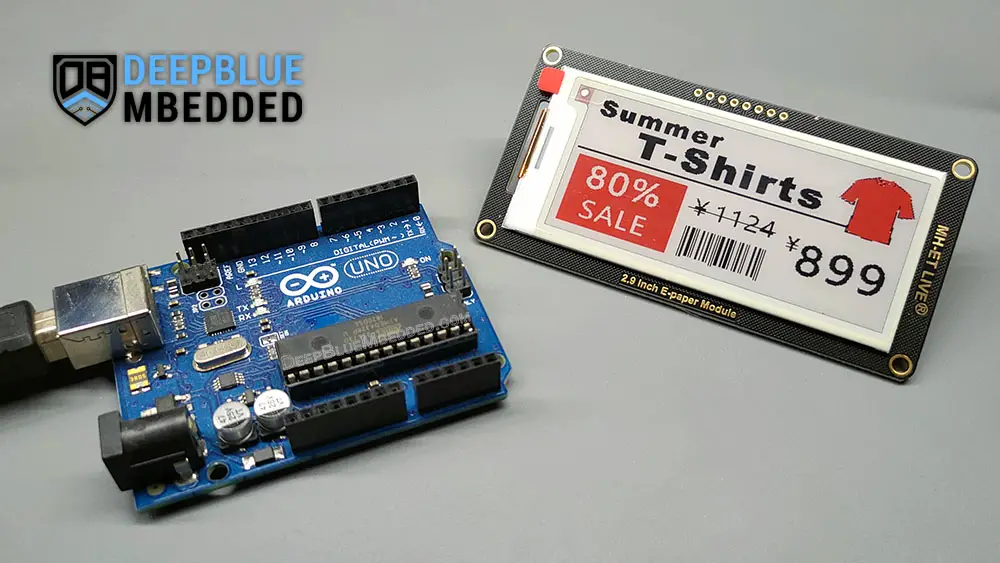
For interfacing an e-paper display module with Arduino Uno, you can follow the wiring (connection) described in the table below. However, for other Arduino boards (Mega, Mini, etc), you need to check the corresponding “SPI pins” which is the serial interface used for connecting e-paper display modules.
| e-Paper Display | Arduino UNO | Arduino Mega2560 |
| Vcc | 5V | 5V |
| GND | GND | GND |
| SDI (DIN) | D11 | D51 |
| SCLK (CLK) | D13 | D52 |
| CS | D10 | D10 |
| DC | D9 | D9 |
| RST | D8 | D8 |
| BUSY | D7 | D7 |
2. Arduino E-Paper Display Library
For this tutorial, we’ll test two different libraries for E-Paper display with Arduino which are listed below:
- GxEPD2
- WaveShare
We’ll install and use each library for a couple of example projects to test their functionalities. However, after many test cases we’ve conducted, the WaveShare library is much better in many aspects so you can skip over the GxEPD2 library examples if you’re not curious about it.
Arduino ePaper Library (GxEPD2)
You can download and install the Arduino GxEPD2 library manually from GitHub, or alternatively, install it within the Arduino IDE itself. Just open the library manager. Tools > Manage Libraries > Search for GxEPD2. Then, click Install and let it finish the installation.
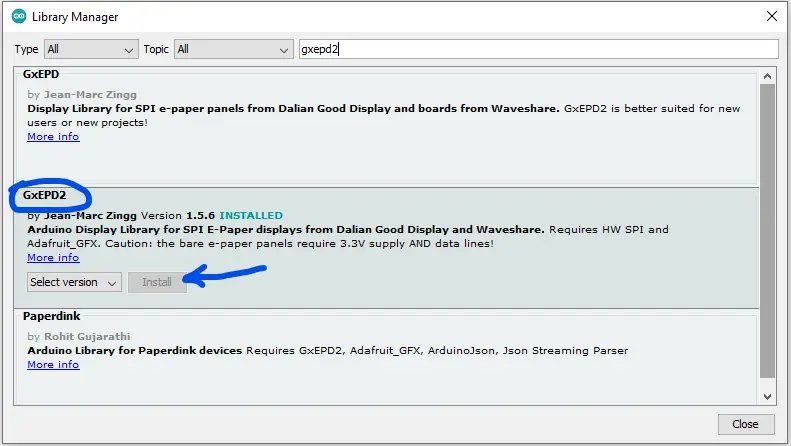
Now, you can easily use the Arduino GxEPD2 library and check the built-in examples for the library to help you get started.
Next up, we’ll move to the practical code examples to test this Arduino E-Paper display library for displaying text & bitmap images on the E-Paper display module.
Arduino E-Paper Display Examples (GxEPD2)
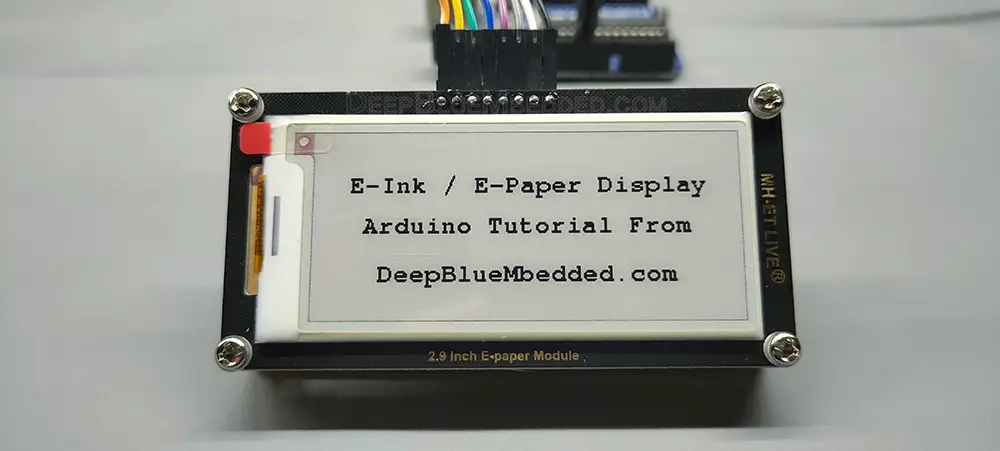
Here are two project code examples for the Arduino E-Paper display interfacing using the GxEPD2 library. In the first example, we’ll display 3 lines of text messages on the E-Paper display (each line is center-aligned on the screen). In the second example, we’ll display a small bitmap image on the E-Paper display.
E-Paper Display Text Code Example
Here is the full code listing for this example.
|
1 2 3 4 5 6 7 8 9 10 11 12 13 14 15 16 17 18 19 20 21 22 23 24 25 26 27 28 29 30 31 32 33 34 35 36 37 38 39 40 41 42 43 44 45 46 47 48 49 50 51 52 53 54 55 56 57 58 59 60 61 62 63 64 65 66 67 68 69 |
/* * LAB Name: Arduino 2.9" E-Paper Display (GxEPD2 Library) - Text Example * Author: Khaled Magdy * For More Info Visit: www.DeepBlueMbedded.com */ #include <GxEPD2_3C.h> #include <Fonts/FreeMonoBold9pt7b.h> #define EPD_SS 10 #define EPD_DC 9 #define EPD_RST 8 #define EPD_BUSY 7 #define MAX_DISPLAY_BUFFER_SIZE 800 #define MAX_HEIGHT(EPD) (EPD::HEIGHT <= (MAX_DISPLAY_BUFFER_SIZE / 2) / (EPD::WIDTH / 8) ? EPD::HEIGHT : (MAX_DISPLAY_BUFFER_SIZE / 2) /(EPD::WIDTH / 8)) #define TEXT_LINES 3 GxEPD2_3C<GxEPD2_290_C90c, MAX_HEIGHT(GxEPD2_290_C90c)> display(GxEPD2_290_C90c(EPD_SS, EPD_DC, EPD_RST, EPD_BUSY)); uint16_t TextCursors[2][TEXT_LINES]; const char* MSG[TEXT_LINES] = { "E-Ink / E-Paper Display", "Arduino Tutorial From", "DeepBlueMbedded.com" }; void setup() { Serial.begin(115200); Serial.println("Initializing The E-Paper..."); display.init(); Serial.println("Initialization Done!"); Serial.println("Printing Messages, Please Wait..."); PrintMessages(); Serial.println("Printing Done! E-Paper Is Hibernating!"); display.hibernate(); } void loop() { // Nothing To Do Here! } void PrintMessages() { int16_t tbx, tby; uint16_t tbw, tbh; display.setRotation(3); display.setFont(&FreeMonoBold9pt7b); display.setTextColor(GxEPD_BLACK); for(int i=0; i<TEXT_LINES; i++) { display.getTextBounds(MSG[i], 0, 0, &tbx, &tby, &tbw, &tbh); TextCursors[0][i] = (display.width() - tbw) / 2; TextCursors[1][i] = ((display.height()*(i+1)) /(TEXT_LINES+1)) + (tbh/2); } display.setFullWindow(); display.firstPage(); do { display.fillScreen(GxEPD_WHITE); display.setCursor(TextCursors[0][0], TextCursors[1][0]); display.print(MSG[0]); display.setCursor(TextCursors[0][1], TextCursors[1][1]); display.print(MSG[1]); display.setCursor(TextCursors[0][2], TextCursors[1][2]); display.print(MSG[2]); } while(display.nextPage()); } |
Testing Result
Here is the testing result for the example code listed above.
Code Customization
You can easily change the font family/size of the displayed text but you need to #include the font header file and use the setFont function to change the font. In the PrintMessages() function:
|
1 |
display.setFont(&FreeMonoBold9pt7b); |
The text color can be set to black or red as our 2.9″ E-Paper display supports (White, Black, and Red) colors. This can be done as follows:
|
1 |
display.setTextColor(GxEPD_RED); |
To change the number of text messages (lines of text), you just need to modify this: #define TEXT_LINES 3
Then, you can edit the text strings to be displayed by modifying the variable below. Just make sure that the number of strings in the array matches the number of text lines you’d like to display and there is no “,” after the last item in the array.
|
1 2 3 4 5 |
const char* MSG[TEXT_LINES] = { "E-Ink / E-Paper Display", "Arduino Tutorial From", "DeepBlueMbedded.com" }; |
E-Paper Display BitMap Code Example
Here is the full code listing for this example. Which displays a 45×45 bitmap image stored in the flash (program memory). You can use this online tool to get the bitmap array of any image you want to display on the E-Paper. But make sure it’s a small image because of the memory limitation associated with this E-Paper display library.
|
1 2 3 4 5 6 7 8 9 10 11 12 13 14 15 16 17 18 19 20 21 22 23 24 25 26 27 28 29 30 31 32 33 34 35 36 37 38 39 40 41 42 43 44 45 46 47 48 49 50 51 |
/* * LAB Name: Arduino 2.9" E-Paper Display (GxEPD2 Library) - BitMap Example * Author: Khaled Magdy * For More Info Visit: www.DeepBlueMbedded.com */ #include <GxEPD2_3C.h> #define EPD_SS 10 #define EPD_DC 9 #define EPD_RST 8 #define EPD_BUSY 7 #define MAX_DISPLAY_BUFFER_SIZE 1350 #define MAX_HEIGHT(EPD) (EPD::HEIGHT <= (MAX_DISPLAY_BUFFER_SIZE / 2) / (EPD::WIDTH / 8) ? EPD::HEIGHT : (MAX_DISPLAY_BUFFER_SIZE / 2) /(EPD::WIDTH / 8)) GxEPD2_3C<GxEPD2_290_C90c, MAX_HEIGHT(GxEPD2_290_C90c)> display(GxEPD2_290_C90c(EPD_SS, EPD_DC, EPD_RST, EPD_BUSY)); const uint8_t bitmap[] PROGMEM = { // Format: 1 bit per pixel (black and white) 0xff, 0xff, 0xff, 0xff, 0xff, 0xf8, 0xff, 0xff, 0xff, 0xff, 0xff, 0xf8, 0xff, 0xff, 0xff, 0xff, 0xff, 0xf8, 0x00, 0x00, 0x00, 0x0f, 0xff, 0xf8, 0x00, 0x00, 0x00, 0x07, 0xff, 0xf8, 0x03, 0xff, 0xff, 0x80, 0xff, 0xf8, 0x06, 0x00, 0x07, 0xe0, 0x7f, 0xf8, 0x0c, 0x00, 0x00, 0x38, 0x3f, 0xf8, 0x18, 0x00, 0x00, 0x0c, 0x1f, 0xf8, 0x30, 0x00, 0x00, 0x0c, 0x0f, 0xf8, 0x30, 0x00, 0x00, 0x08, 0x07, 0xf8, 0x30, 0xe1, 0xfc, 0x18, 0x43, 0xf8, 0x30, 0xe1, 0xfc, 0x30, 0xe3, 0xf8, 0x30, 0xe1, 0xf8, 0x20, 0xf1, 0xf8, 0x30, 0xe1, 0xf0, 0x61, 0xd0, 0xf8, 0x30, 0xe1, 0xf0, 0x43, 0xb0, 0xf8, 0x30, 0xe1, 0xe0, 0xc3, 0x74, 0x78, 0x30, 0xe1, 0xe1, 0x87, 0xec, 0x38, 0x30, 0x00, 0x01, 0x86, 0xdc, 0x38, 0x30, 0x00, 0x03, 0x0e, 0xfb, 0x18, 0x30, 0x00, 0x02, 0x0a, 0xbb, 0x88, 0x30, 0x00, 0x06, 0x1f, 0xff, 0x80, 0x3f, 0xff, 0xfc, 0x1f, 0xff, 0xc0, 0x30, 0x00, 0x06, 0x1f, 0xff, 0x80, 0x30, 0x00, 0x02, 0x0d, 0x93, 0x88, 0x30, 0x00, 0x03, 0x08, 0x93, 0x18, 0x30, 0x00, 0x01, 0x86, 0xde, 0x38, 0x30, 0xff, 0xe1, 0x87, 0xcc, 0x38, 0x30, 0xff, 0xe0, 0xc3, 0x6c, 0x78, 0x30, 0xff, 0xf0, 0x43, 0xb0, 0xf8, 0x30, 0xff, 0xf0, 0x61, 0xf0, 0xf8, 0x30, 0xff, 0xf8, 0x20, 0xd1, 0xf8, 0x30, 0xff, 0xfc, 0x30, 0xc3, 0xf8, 0x30, 0xff, 0xfc, 0x18, 0x43, 0xf8, 0x30, 0xff, 0xf8, 0x08, 0x07, 0xf8, 0x30, 0x00, 0x00, 0x0c, 0x0f, 0xf8, 0x18, 0x00, 0x00, 0x0c, 0x1f, 0xf8, 0x0c, 0x00, 0x00, 0x1c, 0x3f, 0xf8, 0x06, 0x00, 0x03, 0xe0, 0x7f, 0xf8, 0x03, 0xff, 0xff, 0x80, 0xff, 0xf8, 0x00, 0x00, 0x00, 0x03, 0xff, 0xf8, 0x00, 0x00, 0x00, 0x0f, 0xff, 0xf8, 0xff, 0xff, 0xff, 0xff, 0xff, 0xf8, 0xff, 0xff, 0xff, 0xff, 0xff, 0xf8, 0xff, 0xff, 0xff, 0xff, 0xff, 0xf8 }; void setup() { display.init(); display.fillScreen(GxEPD_WHITE); // Fill the screen with white background display.setRotation(0); display.setFullWindow(); // Draw the bitmap image at position (0, 0) display.drawInvertedBitmap(0, 0, bitmap, 45, 45, GxEPD_BLACK); display.display(); // Update the display } void loop() { // Your code here } |
Testing Result
Here is the testing result for the example code listed above.
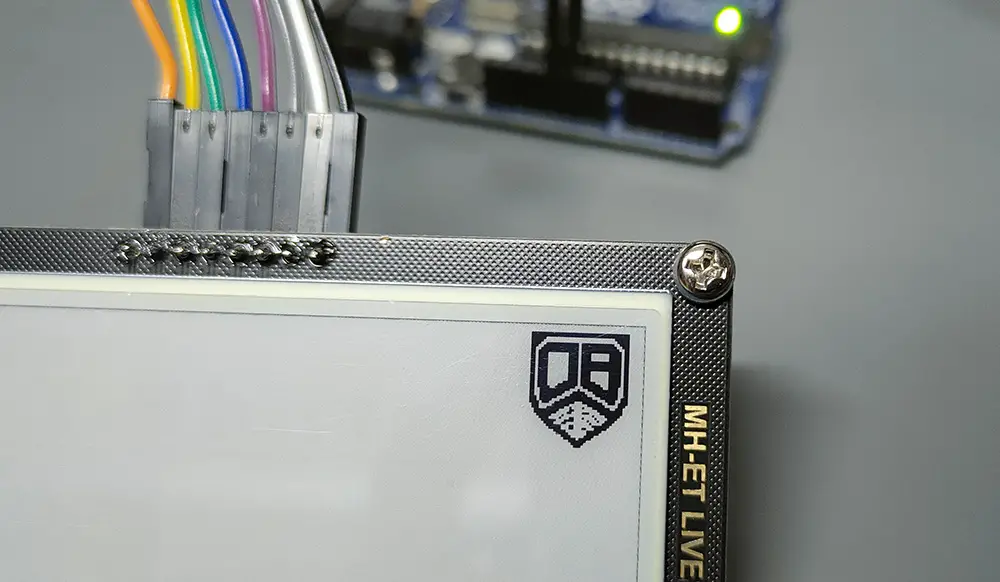
The GxEPD2 library is really good for displaying text on the E-Paper display with little to no effort. However, it’s lacking behind the WaveShare library when it comes to graphical bitmap display and requires a lot of memory to handle graphics beyond the capabilities of the Arduino UNO board. However, the WaveShare library can easily handle E-Paper display graphics with minimal memory utilization.
Arduino ePaper Library (WaveShare)
The WaveShare E-Paper display library is not listed in the Arduino library manager so you can’t add it within the Arduino IDE itself. However, you can download the latest version of it from GitHub or WaveShare’s website.
Here is how it looks inside after downloading and unzipping the master directory.

You can then try the provided examples that correspond to the E-Paper display module you’ve got. For me, the examples starting with epd2in9xxx are what I should be using because the E-Paper display unit that I’ve got is a 2.9″ display.
In the next section, we’ll create a couple of example projects to test the WaveShare E-Paper Arduino library’s functionalities.
Arduino E-Paper Display Examples (WaveShare)
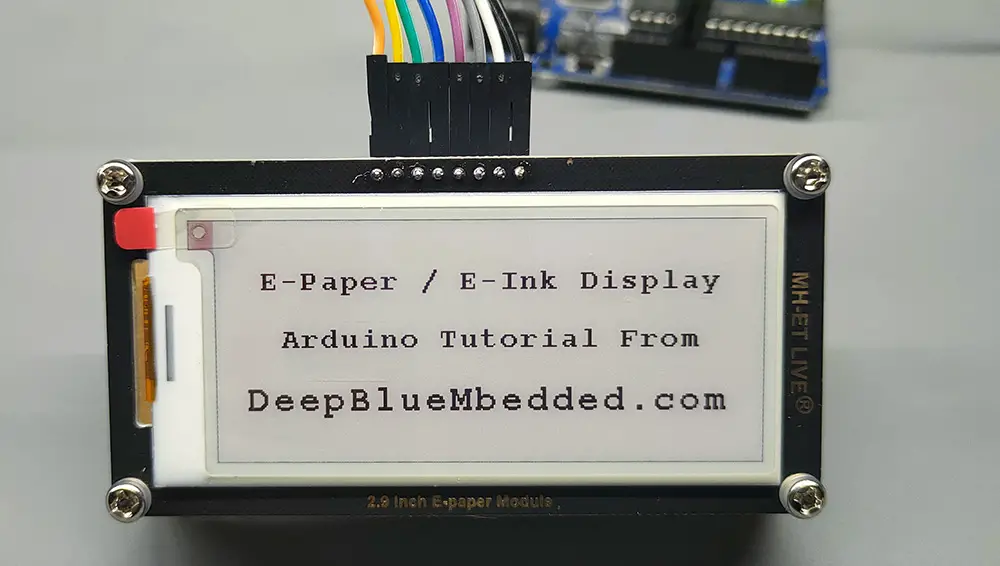
Here are 3 project code examples for the Arduino E-Paper display interfacing using the WaveShare library. In the first example, we’ll display 3 lines of text messages on the E-Paper display. In the second example, we’ll display a full-size 2.9″ bitmap image (296×128) on the E-Paper display.
In the third last example, we’ll display a full-size 2.9″ bitmap image (296×128) on the E-Paper display with separate bitmaps for black & red color pixels.
E-Paper Display Text Code Example (1)
Here is the full code listing for this example.
|
1 2 3 4 5 6 7 8 9 10 11 12 13 14 15 16 17 18 19 20 21 22 23 24 25 26 27 28 29 30 31 32 33 34 35 36 37 38 39 40 41 42 43 44 45 46 47 48 |
/* * LAB Name: Arduino 2.9" E-Paper Display (WaveShare Library) - Text Example * Author: Khaled Magdy * For More Info Visit: www.DeepBlueMbedded.com */ #include <SPI.h> #include "epd2in9.h" #include "epdpaint.h" #define COLORED 0 #define UNCOLORED 1 unsigned char image[1024]; Paint paint(image, 0, 0); Epd epd; void setup() { Serial.begin(9600); if (epd.Init(lut_full_update) != 0) { Serial.print("e-Paper init failed"); return; } // Memory Frame Must Be Cleared Twice epd.ClearFrameMemory(0xFF); // bit set = white, bit reset = black epd.DisplayFrame(); epd.ClearFrameMemory(0xFF); // bit set = white, bit reset = black epd.DisplayFrame(); // Set Display Settings paint.SetRotate(ROTATE_270); paint.SetWidth(24); paint.SetHeight(296); // Write The Text Messages To The Display paint.Clear(UNCOLORED); paint.DrawStringAt(0, 0, " E-Paper / E-Ink Display", &Font16, COLORED); epd.SetFrameMemory(paint.GetImage(), 30, 0, paint.GetWidth(), paint.GetHeight()); paint.Clear(UNCOLORED); paint.DrawStringAt(0, 0, " Arduino Tutorial From", &Font16, COLORED); epd.SetFrameMemory(paint.GetImage(), 60, 0, paint.GetWidth(), paint.GetHeight()); paint.Clear(UNCOLORED); paint.DrawStringAt(0, 0, " DeepBlueMbedded.com", &Font20, COLORED); epd.SetFrameMemory(paint.GetImage(), 90, 0, paint.GetWidth(), paint.GetHeight()); epd.DisplayFrame(); } void loop() { // Nothing To Do Here! } |
Testing Result
Here is the testing result for the example code listed above.
E-Paper Display BitMap Code Example (2)
Here is the full code listing for this example. Which displays a 296×128 bitmap image stored in the flash (program memory). The bitmap image data array is found in the imagedata.cpp file. You can use this online tool to get the bitmap array of any image you want to display on the E-Paper.
|
1 2 3 4 5 6 7 8 9 10 11 12 13 14 15 16 17 18 19 20 21 22 23 24 25 26 27 28 29 30 31 32 33 34 35 36 37 38 |
/* * LAB Name: Arduino 2.9" E-Paper Display (WaveShare Library) - BitMap Image Example * Author: Khaled Magdy * For More Info Visit: www.DeepBlueMbedded.com */ #include <SPI.h> #include "epd2in9.h" #include "epdpaint.h" #include "imagedata.h" #define COLORED 0 #define UNCOLORED 1 unsigned char image[1024]; Paint paint(image, 0, 0); Epd epd; void setup() { Serial.begin(9600); if (epd.Init(lut_full_update) != 0) { Serial.print("e-Paper init failed"); return; } // Memory Frame Must Be Cleared Twice epd.ClearFrameMemory(0xFF); epd.DisplayFrame(); epd.ClearFrameMemory(0xFF); epd.DisplayFrame(); // Set Display Settings paint.SetRotate(ROTATE_270); epd.SetFrameMemory(IMAGE_DATA); epd.DisplayFrame(); } void loop() { // Nothing To Do Here! } |
Testing Result
Here is the testing result for the example code listed above.

E-Paper Display BitMap (Black/Red) Code Example (3)
This third example project code displays two 296×128 bitmap images stored in the flash (program memory). The 2x bitmap image data arrays ( R_IMAGE_DATA red pixels image bitmap & B_IMAGE_DATA black pixels image bitmap) are found in the imagedata.cpp file. You can use this online tool to get the bitmap array of any image you want to display on the E-Paper.
You can design any custom image with black and red colors but make sure that the red image doesn’t overlap the black image pixels. Export each image bitmap array independently and replace the contents of the arrays found in the imagedata.cpp file with yours.
|
1 2 3 4 5 6 7 8 9 10 11 12 13 14 15 16 17 18 19 20 21 22 23 24 25 26 27 28 29 30 31 |
/* * LAB Name: Arduino 2.9" E-Paper Display (WaveShare Library) - BitMap Black/Red Image Example * Author: Khaled Magdy * For More Info Visit: www.DeepBlueMbedded.com */ #include <SPI.h> #include "epd2in9b_V4.h" #include "imagedata.h" Epd epd; void setup() { Serial.begin(115200); Serial.println("E-Paper Display Initializing..."); if (epd.Init() != 0) { Serial.println("E-Paper Display Initialization Failed!"); return; } Serial.println("Clearing Display..."); epd.Clear(); epd.Init_Fast(); Serial.println("Drawing Image..."); epd.Display_Fast(B_IMAGE_DATA, R_IMAGE_DATA); Serial.print("E-Paper Display Hibernating..."); epd.Sleep(); } void loop() { // Nothing To Do Here! } |
The WaveShare Arduino E-Paper display library is much more versatile and easy to use overall compared to the GxEPD2 library and we highly recommend using it instead for almost any situation (text display, graphics, fast display, partial refresh, etc).
Partial Refresh is a technique used in e-paper displays to update only a portion of the screen, rather than the entire display. This method significantly reduces the time and power required to change the content, making it useful for applications where only small sections of the display need to be updated frequently.
Required Parts List
Here is the full components list for all the parts you’d need to perform the practical LABs mentioned in this tutorial and the whole Arduino Programming series of tutorials found here on our website.
* Please, note that those are affiliate links and we’ll receive a small commission on your purchase at no additional cost to you, and it’d definitely support our work.
| QTY. | Component Name | Amazon.com | AliExpress | eBay |
| 1 | E-Paper Display Module | Amazon | AliExpress | eBay |
| 1 | Arduino UNO Kit | Amazon | AliExpress | eBay |
| 1 | Complete Arduino Sensors/Modules Kit | Amazon | AliExpress | eBay |
| 1 | DC Power Supply | Amazon | AliExpress | eBay |
| 1 | BreadBoard | Amazon | AliExpress | eBay |
| 1 | LEDs Kit | Amazon & Amazon | AliExpress | eBay |
| 1 | Resistors Kit | Amazon & Amazon | AliExpress | eBay |
| 1 | Capacitors Kit | Amazon & Amazon | AliExpress & AliExpress | eBay & eBay |
| 1 | Jumper Wires Pack | Amazon & Amazon | AliExpress & AliExpress | eBay & eBay |
| 1 | Push Buttons | Amazon & Amazon | AliExpress | eBay |
| 1 | Potentiometers | Amazon | AliExpress | eBay |
★ Check The Links Below For The Full Course Kit List & LAB Test Equipment Required For Debugging ★
Download Tutorial’s Attachments
You can download all attachment files for this Article/Tutorial (project files, schematics, code, etc..) using the link below. Please consider supporting our work through the various support options listed in the link down below. Every small donation helps to keep this website up and running and ultimately supports the whole community.
Wrap Up
To conclude this tutorial, we can say that you can easily interface an e-paper (e-ink) display with Arduino using the WaveShare library. Try the provided code examples on your hardware setup to maximize the information gained from this tutorial. Make sure to wait a good few seconds after uploading each example code because refreshing an e-paper display takes some time to complete.
If you’re just getting started with Arduino, you need to check out the Arduino Getting Started [Ultimate Guide] here.
And follow this Arduino Series of Tutorials to learn more about Arduino Programming.
![Arduino E-Paper Display (E-Ink) Library Examples [Tutorial]](https://deepbluembedded.com/wp-content/uploads/2024/06/Arduino-E-Paper-Display-E-Ink-Library-Examples-Tutorial.jpg)
