In this tutorial, we’ll discuss Arduino UART Serial Communication from the very basic concepts all the way to implementing Arduino UART-based serial communication. We’ll create a couple of projects in this tutorial, the first of which will be Arduino with PC serial communication over UART. In the second project, we’ll do a Serial Communication Between Two Arduino Boards (UART).
Without further ado, let’s get right into it!
Table of Contents
- Arduino UART Serial Communication
- Arduino UART Serial Library
- Arduino UART Example (Arduino – PC)
- Serial Communication Between Two Arduino Boards (UART)
- Remarks on UART Communication
- Wrap Up
Arduino UART Serial Communication
In Embedded Systems, Telecommunication, and Data Transmission applications, Serial Communication is known to be the process of sending data one bit at a time (bit-by-bit) sequentially, over the serial bus. It takes a complete clock cycle in order to transfer each bit from one end to the other.
Serial Communication Fundamentals
There are so many different serial communication protocols, each of which is working in a unique way. However, they all do share one thing in common. Which is having Shift Registers somehow/somewhere in their hardware implementation as the working horse (core).
Shift Registers are used to shift out the data to be transmitted bit-by-bit each clock cycle. Shift registers are basically some D-Flip-Flops serially connected while sharing the same clock line. Here is a graphical animation that demonstrates how a shift register works.

Generally speaking, serial communication at the end of the day comes down to connecting a couple of shift registers together! We just connect the data output of a shift register to the data input of the other shift register enables us of sending digital data serially from one end to another.
In the following animation, I’m connecting a couple of 4-Bit shift registers. One at the transmitter device and the other at the receiver device. The serial bus consists of a couple of wires (data line, and clock line). Each clock, a bit is sent from the transmitter’s TX pin and received by the receiver’s RX pin.

As you might have noticed, it takes 4 clocks to send the 4-Bit data from the transmitter to the receiver. This is simply the short answer to the “How does Serial Communication Work?”. This is the basic idea behind serial communication that you need to know first to start building up your understanding of the topic.
In fact, there are so many options and configurations for each serial communication protocol that sets it apart from the others. This includes various data transmission rates, operating modes, error detection & correction mechanisms, data flow control, and much more that adds to the overall complexity associated with each protocol.
This is more than enough for the scope of this tutorial, but if you want to learn more about serial communication fundamentals, and its underlying hardware, and to go deeper into the topic, then the tutorial linked below is a very good starting point for you.

This article will give more in-depth information about serial communication fundamentals and UART serial communication ports hardware & software.
Arduino UART Serial Communication
UART (Universal Asynchronous Receiver-Transmitter) is the most popular serial communication protocol in embedded microcontrollers. In Arduino, we typically use the UART module for serial communication with the PC via a USB-TTL converter to print serial messages on the serial monitor.
There are actually two forms of UART Hardware as follows:
- UART – Universal Asynchronous Receiver/Transmitter
- USART – Universal Synchronous/Asynchronous Receiver/Transmitter
The Synchronous type of transmitter generates the data clock and sends it to the receiver which works accordingly in a synchronized manner. On the other hand, the Asynchronous type of transmitter generates the data clock internally. There is no incoming serial clock signal, so in order to achieve proper communication between the two ends, both of them must be using the same baud rate. The baud rate is the rate at which bits are being sent bps (bits per second).
Arduino UART Pins
The Arduino UNO has only one UART module which has two pins (RX for receiving serial data and TX for transmitting serial data). The UART pins’ mapping is as follows: RX is Arduino pin 0, and TX is Arduino pin 1 respectively.

Arduino UART Logic Level
Serial communication on pins TX/RX uses TTL logic levels (5V or 3.3V depending on the board). Don’t connect these pins directly to an RS232 serial port which operates at +/- 12V and can damage your Arduino board.
Arduino UART Parameters
When using UART (Universal Asynchronous Receiver Transmitter) communication on Arduino, several parameters can be configured to control the data transmission. These parameters determine aspects such as baud rate, data format, parity, and stop bits. Let’s explore each of these parameters.
Baud Rate
The baud rate specifies the speed at which data is transmitted over the UART interface. It represents the number of bits per second. Common baud rate options for Arduino include 9600, 115200, 57600, and 38400. Both the transmitting and receiving devices must be set to the same baud rate for successful communication.
Data Bits
Data bits determine the number of bits used to represent the data being transmitted. The most common configuration is 8 data bits, which allows the transmission of 8-bit data. However, Arduino also supports other options such as 5, 6, 7, or 9 data bits.
Parity Bit
Parity is an error-checking mechanism used to detect transmission errors. It adds an additional bit to each transmitted byte for error detection. The parity bit can be configured as even, odd, or none.
- Even – the parity bit is “1” if there is an odd number of 1’s in the data frame
- Odd – the parity bit is “0” if there is an even number of 1’s in the data frame.
Stop Bits
Stop bits indicate the end of a data frame. After transmitting the data bits, one or more stop bits are added to signal the completion of the transmission. The most common option is 1 stop bit, but 1.5 or 2-stop bits can also be used for specific applications.
Flow Control
Flow control manages the data flow between the transmitting and receiving devices to prevent data loss or buffer overflow. Two common flow control mechanisms are hardware flow control (using RTS/CTS signals) and software flow control (using XON/XOFF special characters).
It is important to configure the UART parameters correctly on both the transmitting and receiving devices to ensure proper communication. The Serial library in Arduino provides functions to set and read these parameters. By selecting the appropriate baud rate, data format, parity, and stop bits, you can establish reliable UART communication between Arduino boards and other devices.
If you need an extra UART module in your application, you can use the SoftwareSerial library which is a software-emulated UART module. It’ll bit-bang the UART serial pattern on any 2 pins of your choice. But note that it’ll cost you a lot of CPU load and it’s not going to be reliable at high speeds. Because at the end of the day, it’s not a real UART hardware module.

This article will give more in-depth information about Arduino serial communication fundamentals and a general overview of Arduino’s UART, SPI, and I2C serial communication ports (protocol).
Arduino UART Serial Library
To use Arduino’s UART module, we’ll be using the built-in Serial library. This library handles all initialization and operations that you’d even need to perform with the UART serial port.
Serial.begin()
First of all, you need to initialize the serial UART module using the Serial.begin() function. Which takes only one argument (baud rate).
Serial.begin(9600);
Standard Baud Rates: (1200, 2400, 4800, 19200, 38400, 57600, and 115200). It can go up to 2Mbps in more powerful MCUs.
Serial.available()
The available() function returns the number of bytes available to read from the serial input buffer. It is often used in conjunction with the read() function to check if there is any incoming data before reading.
if (Serial.available() > 0) {
    // You Can Read The Received Data Here...
}
This function helps prevent blocking when no data is available, ensuring efficient serial communication.
Serial.read()
The read() function reads a single byte of incoming serial data from the UART input buffer. It returns the first byte available for reading as an integer value. This function is commonly used when receiving data byte by byte or when dealing with binary data. The read() function can be used within a loop to continuously read incoming data.
int incomingByte = 0; // for incoming serial data

void setup() {
  Serial.begin(9600); // opens serial port, sets data rate to 9600 bps
}

void loop() {
  // reply only when you receive data:
  if (Serial.available() > 0) {
    // read the incoming byte:
    incomingByte = Serial.read();

    // say what you got:
    Serial.print("I received: ");
    Serial.println(incomingByte, DEC);
  }
}
Serial.readBytes()
The readBytes() function reads a specified number of bytes from the serial input buffer into an array. It allows you to retrieve a chunk of data at once, making it suitable for scenarios where you need to process a fixed-length message or packet. This function takes two arguments: the buffer array and the number of bytes to read.
Serial.readBytes(buffer, length);
Parameters
buffer: the buffer to store the bytes in. Allowed data types: array of char or byte.
length: the number of bytes to read. Allowed data types: int.
Returns
The number of bytes placed in the buffer. Data type: size_t.
Serial.readBytesUntil()
The readBytesUntil() function reads serial data into an array until it encounters a specific terminating character. It is useful when you want to extract data until a certain delimiter is reached, such as a newline character ( \n ) or a custom character. The function takes three arguments: the buffer array, the maximum number of bytes to read, and the terminating character.
Serial.readBytesUntil(character, buffer, length);
Parameters
character: the character to search for. Allowed data types: char.
buffer: the buffer to store the bytes in. Allowed data types: array of char or byte.
length: the number of bytes to read. Allowed data types: int.
Returns
Returns the number of characters read into the buffer. A 0 means that the length parameter <= 0, a time-out occurred before any other input, or a termination character was found before any other input. Data type: size_t.
Serial.print()
The print() function is used to send data as human-readable text over the UART interface. It accepts various data types such as integers, floating-point numbers, strings, and characters. It allows you to display information, debug messages, or sensor readings in a readable format. The print() function does not append a newline character at the end.
Serial.print(val);
This function can also take another optional argument that specifies the format.
Serial.print(val, format);
Parameters
val: the value to print. Allowed data types: any data type.
format: format options are BIN(binary, or base 2), OCT(octal, or base 8), DEC(decimal, or base 10), HEX(hexadecimal, or base 16). For floating point numbers, this parameter specifies the number of decimal places to use. For example:
- Serial.print(78, BIN) gives “1001110”
- Serial.print(78, OCT) gives “116”
- Serial.print(78, DEC) gives “78”
- Serial.print(78, HEX) gives “4E”
- Serial.print(1.23456, 0) gives “1”
- Serial.print(1.23456, 2) gives “1.23”
- Serial.print(1.23456, 4) gives “1.2346”
Returns
print() returns the number of bytes written, though reading that number is optional. Data type: size_t.
Serial.println()
Similar to the print() function, the println() function sends data as text. However, it appends a newline character ( \n ) at the end of the transmitted data. This is useful for printing each message on a new line, providing a clearer output when reading from the serial monitor.
Serial.write()
Writes binary data to the serial port. This data is sent as a byte or series of bytes. To send the characters representing the digits of a number, use the print() function instead.
Serial.write(val);
Serial.write(str);
Serial.write(buf, len);
Parameters
val: a value to send as a single byte.
str: a string to send as a series of bytes.
buf: an array to send as a series of bytes.
len: the number of bytes to be sent from the array.
Returns
write() will return the number of bytes written, though reading that number is optional. Data type: size_t.
Example
void loop() {
  Serial.write(45); // send a byte with the value 45
  int bytesSent = Serial.write("hello");  //send the string "hello" and return the length of the string.
}
Other Useful Functions in Arduino Serial Library
| Function | Description |
|---|---|
if(Serial) | Checks if the Serial communication is active and available. |
Serial.available() | Returns the number of bytes available to read from the serial input buffer. |
Serial.availableForWrite() | Returns the number of bytes available for writing to the serial output buffer. |
Serial.begin() | Sets the data rate (baud rate) for serial communication. |
Serial.end() | Ends the serial communication and releases the associated resources. |
Serial.find() | Searches for a specific character or sequence of characters in the incoming serial data. |
Serial.findUntil() | Searches for a character or sequence of characters until a specified terminator is found. |
Serial.flush() | Waits for the transmission of outgoing serial data to complete. |
Serial.parseFloat() | Reads a floating-point number from the serial input. |
Serial.parseInt() | Reads an integer number from the serial input. |
Serial.peek() | Returns the next byte of incoming serial data without removing it from the buffer. |
Serial.print() | Sends data as human-readable text over the serial communication. |
Serial.println() | Sends data as text with a newline character (‘\n’) over the serial communication. |
Serial.read() | Reads a single byte of incoming serial data. |
Serial.readBytes() | Reads a specified number of bytes from the serial input into an array. |
Serial.readBytesUntil() | Reads serial data into an array until a specified terminator is encountered. |
Serial.readString() | Reads characters from the serial input into a string until a timeout or terminator is reached. |
Serial.readStringUntil() | Reads characters from the serial input into a string until a specified terminator is found. |
Serial.setTimeout() | Sets the maximum time to wait for serial data during read operations. |
Serial.write() | Sends a byte of data over the serial communication. |
Serial.serialEvent() | Called automatically when serial data is available, allowing custom handling of incoming data. |
Refer to Arduino’s official Serial Library documentation for more information.
Arduino UART Example (Arduino – PC)
In this example project, we’ll establish serial communication between Arduino & PC using the UART serial port. The Arduino UNO board has a main microcontroller Atmega328p and another Atmega16U microcontroller acting as a USB-To-TTL (USB-UART) converter which enables us to send serial data using UART to the PC’s USB port.
This project will establish 2-way serial communication over UART between the Arduino <-> PC. The Arduino will send the status of an LED, and the PC will send commands to the Arduino for controlling the LED output. Both Arduino & PC will exchange data over UART to achieve the requirement of this project.
Wiring
Here is the wiring diagram for this example showing how to connect the output LED.

Example Code
Here is the full code listing for this example.
/*
 * LAB Name: Arduino <-> PC (UART Communication)
 * Author: Khaled Magdy
 * For More Info Visit: www.DeepBlueMbedded.com
*/
uint8_t incomingByte = 0;

void setup()
{
  pinMode(LED_BUILTIN, OUTPUT);
  Serial.begin(9600);
}

void loop()
{
  if(Serial.available())
  {
    incomingByte = Serial.read();
    if(incomingByte == '1')
    {
      digitalWrite(LED_BUILTIN, 1);
    }
    if(incomingByte == '0')
    {
      digitalWrite(LED_BUILTIN, 0);
    }
  }
  if(digitalRead(LED_BUILTIN))
  {
    Serial.println("LED is ON");
  }
  else
  {
    Serial.println("LED is OFF");
  }
  delay(100);
}
Code Explanation
We’ll first define a variable to hold the incoming byte of data via UART receive.
uint8_t incomingByte = 0;
setup()
in the setup() function, we’ll set the LED pinMode to be output. And we’ll initialize the UART serial port using the Serial.begin() function and set the baud rate to the default value (9600 bps).
pinMode(LED_BUILTIN, OUTPUT);
Serial.begin(9600);
loop()
in the loop() function, we’ll check if there is any serial data has been received using the Serial.available() function. If data has been received, we’ll save it into the incomingByte variable and use it to control the LED output status. If the received byte of data is equal to the ‘1’ character, we’ll turn ON the LED. And if it’s equal to the ‘0’ character, we’ll turn OFF the LED.
if(Serial.available())
{
    incomingByte = Serial.read();
    if(incomingByte == '1')
    {
      digitalWrite(LED_BUILTIN, 1);
    }
    if(incomingByte == '0')
    {
      digitalWrite(LED_BUILTIN, 0);
    }
}
Then, we send the LED status to the PC over the UART serial port. We just check the LED output pin status using the digitlaRead() function, and then we send the status message over the UART using the Serial.println() function.
if(digitalRead(LED_BUILTIN))
{
    Serial.println("LED is ON");
}
else
{
    Serial.println("LED is OFF");
}
Simulation
Here is the simulation result for this project on the TinkerCAD simulator.
You can check this simulation project on TinkerCAD using this link.
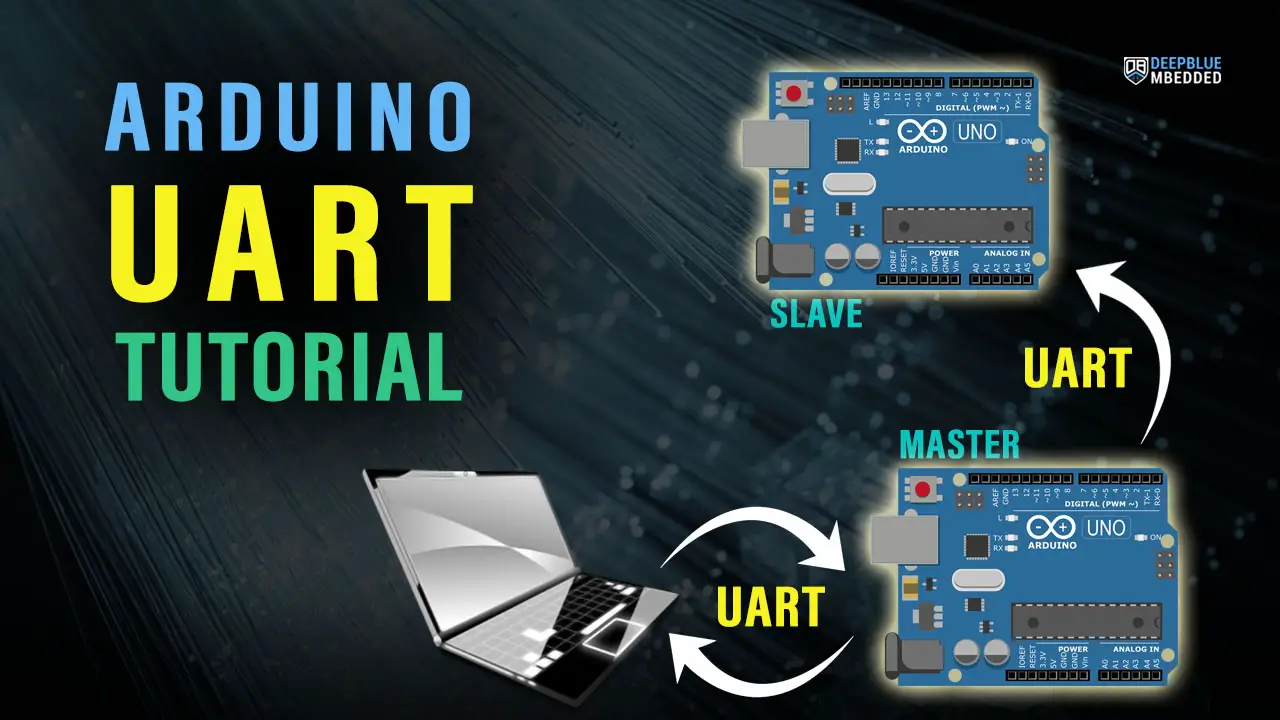
Serial Communication Between Two Arduino Boards (UART)
In this example project, we’ll establish serial communication between two Arduino Boards using UART serial communication. One Arduino board will act as a UART master that will read a potentiometer analog input and send it to the Slave Arduino UART device which is going to read the incoming data and use it to control a PWM output (LED).
This is a one-way communication between (Arduino UART Master) -> (Arduino UART Slave).
Wiring
Here is the wiring diagram for this example showing how to connect the LED output, and the potentiometer analog input on both Arduino boards (Master & Slave).

UART Master Code
Here is the full code listing for the Arduino UART Master Board.
/*
 * LAB Name: Arduino -> Arduino (UART Master)
 * Author: Khaled Magdy
 * For More Info Visit: www.DeepBlueMbedded.com
*/

void setup()
{
  Serial.begin(9600);
}

void loop()
{
  Serial.write(analogRead(A0)>>2);
  delay(100);
}
UART Slave Code
Here is the full code listing for the Arduino UART Slave Board.
/*
 * LAB Name: Arduino -> Arduino (UART Slave)
 * Author: Khaled Magdy
 * For More Info Visit: www.DeepBlueMbedded.com
*/
#define LED_PIN  9

uint8_t incomingByte = 0;

void setup()
{
  pinMode(LED_PIN, OUTPUT);
  Serial.begin(9600);
}

void loop()
{
  if(Serial.available())
  {
    incomingByte = Serial.read();
    analogWrite(LED_PIN, incomingByte);
  }
  delay(100);
}
Master Code Explanation
setup()
in the setup() function, we’ll initialize the UART serial port using the Serial.begin() function and set the baud rate to the default value (9600 bps).
Serial.begin(9600);
loop()
in the loop() function, we’ll read the analog input pin of the potentiometer (which is 10-Bit resolution 0- 1023) and convert it to 8-Bit resolution by dividing by 4 (or right-shifting twice “ >>2”). This is necessary because the UART serial communication sends the data byte-by-byte and the byte can have a value (0 up to 255).
And then we’ll send it over UART to the Arduino UART Slave board to control its PWM output duty cycle.
Serial.write(analogRead(A0)>>2);
Slave Code Explanation
We’ll first define a variable to hold the incoming byte of data via UART receive.
uint8_t incomingByte = 0;
setup()
in the setup() function, we’ll set the LED pinMode to be output. And we’ll initialize the UART serial port using the Serial.begin() function and set the baud rate to the default value (9600 bps).
pinMode(LED_PIN, OUTPUT);
Serial.begin(9600);
loop()
in the loop() function, we’ll check if there is any serial data has been received using the Serial.available() function. If data has been received, we’ll save it into the incomingByte variable and use it to control the LED PWM duty cycle using the analogWrite() function.
if(Serial.available())
{
    incomingByte = Serial.read();
    analogWrite(LED_PIN, incomingByte);
}
We can test this project’s code example using any available Arduino simulator environment. Here I’ll show you the simulation results for this project on both TinkerCAD and Proteus (ISIS).
TinkerCAD Simulation
You can check this simulation project on TinkerCAD using this link.
Proteus (ISIS) Simulation
Another extremely powerful simulation environment for Arduino is the Proteus (ISIS) with Arduino add-on library. It can definitely run our test projects for this tutorial. But you won’t feel its power until you need some virtual test equipment like an oscilloscope, function generator, power supply, and advanced SPICE simulation for auxiliary electronic circuitry that you may build around an Arduino microcontroller.
Here is the Arduino project simulation result from the Proteus environment.
Testing Results
Check out the tutorial below to help you get started with simulating your Arduino projects in the Proteus simulation environment.

This article will provide you with more in-depth information about using proteus ISIS for Arduino projects simulation.
Remarks on UART Communication
Before concluding this tutorial, here are some good remarks for Arduino UART communication that you need to keep in mind.
UART RX – TX
Always check the RX-TX connections if you’re facing issues getting the UART communication to work. This is the first and most common thing that people get wrong while working with UART. Double-check the wiring and make sure you’re connecting the RX of the first device to the TX of the second device and vice versa.
Common Ground Line
You also need to have a common ground connecting both devices that you’d like to establish UART communication between. They do need to have a common ground connection, otherwise, the data will get corrupted if it was sent & received at all.
UART Serial Monitor
Using the Arduino IDE’s built-in serial monitor tool is extremely useful for debugging your Arduino projects. You can use it to print various messages, variables, flags, or anything to make sure that your code is doing what it should be doing (in real time).
UART Serial Plotter
Using the Arduino IDE’s built-in serial plotter tool is also extremely useful for debugging your Arduino projects and plotting data in a graphical way. This can help you catch a lot of runtime bugs, fluctuations, and non-static errors that vary with time. It’s a very powerful and useful tool to keep in your kit.
Parts List
Here is the full components list for all parts that you’d need in order to perform the practical LABs mentioned here in this article and for the whole Arduino Programming series of tutorials found here on DeepBlueMbedded. Please, note that those are affiliate links and we’ll receive a small commission on your purchase at no additional cost to you, and it’d definitely support our work.
Download Attachments
You can download all attachment files for this Article/Tutorial (project files, schematics, code, etc..) using the link below. Please consider supporting my work through the various support options listed in the link down below. Every small donation helps to keep this website up and running and ultimately supports our community.
Wrap Up
To conclude this tutorial, we’d like to highlight the fact that the Arduino microcontroller is equipped with all 3 major serial communication ports that we’ll be heavily using for interfacing various sensors & modules in future tutorials. Each serial communication port (protocol) has its own set of features and specs that makes it more suitable for certain applications than others.
This tutorial is a fundamental part of our Arduino Series of Tutorials because we’ll build on top of it to interface various UART sensors and modules with Arduino in other tutorials & projects.
If you’re just getting started with Arduino, you need to check out the Arduino Getting Started [Ultimate Guide] here.

This is the ultimate guide for getting started with Arduino for beginners. It’ll help you learn the Arduino fundamentals for Hardware & Software and understand the basics required to accelerate your learning journey with Arduino Programming.