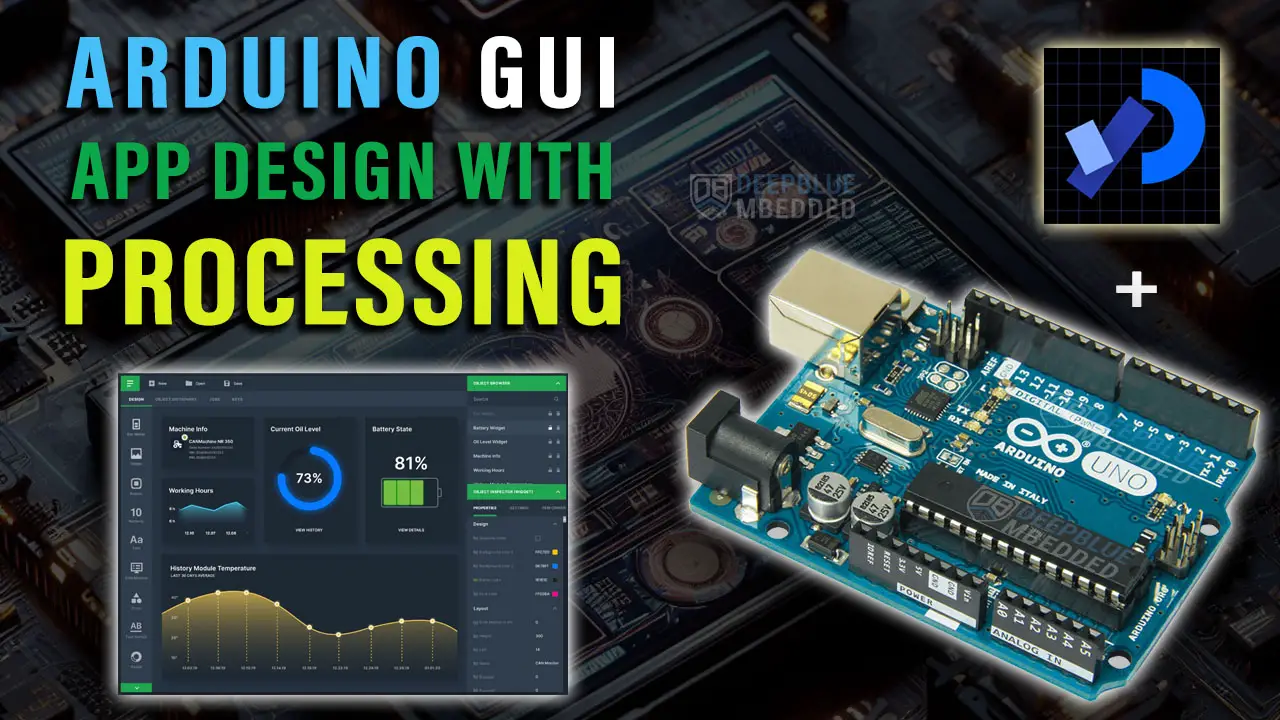
In this tutorial, you’ll learn how to set up and use Processing IDE as a GUI builder for your Arduino Projects. We’ll discuss how to connect Arduino with Processing IDE over the serial port communication. We’ll create a complete Arduino GUI application with Processing IDE and export it as a standalone GUI application so you can share your own GUI app with the world.
This tutorial is a fundamental part of the Arduino Tutorials series on DeepBlueMbedded as we’ll be using the Processing IDE in various examples and projects to build GUI applications and data visualizations for Arduino and other microcontrollers as well. So let’s get right into it!
Table of Contents
- Arduino Processing IDE Overview
- Arduino Processing IDE Installation
- Connecting Arduino With Processing
- Installing Arduino GUI Processing Libraries
- Arduino Processing Project Example
- Exporting Arduino Processing GUI Application (Standalone)
- Conclusion
Arduino Processing IDE Overview
Processing IDE was initially developed for artists and graphics research, then it gained a lot of traction in the makers’ space, especially Arduino, due to the ease of using it to create GUI applications compared to other options that require C# .net programming or native java programming.
The Processing programming language is based on Java, but it simplifies the syntax and graphic programming model, making it more accessible for beginners. It allows users to create graphical and interactive applications without the steep learning curve typically associated with Java.
In this tutorial, we’ll be using the Processing IDE to develop an Arduino GUI application that’s shown in the image below. We’ll connect our Arduino board with Processing IDE and use the GUI app to send data to the Arduino board and receive the data coming from it.

Arduino Processing IDE Installation
To install the Processing IDE on your PC, you need to go to the Processing.org website to download the latest version of the IDE.
After downloading the software zip file, unzip it anywhere and copy the output folder. Go to your program files directory (in Windows) and paste it there. Create a desktop shortcut to easily access it afterward.
It’s that simple, no installation wizard is involved in the process, just copy and paste, and you’re good to go.

Does it look familiar to you? Sure, it does! It’s almost the same layout as the Arduino IDE with two buttons at the top to Run and Stop the execution of the current program. You can also debug your applications inside the Processing IDE and use the console window to print various messages.
Similar to Arduino, you’ll have a huge sketchbook and examples in the same menu File option. We highly recommend that you open up some pre-made examples and skim through the code before and after running it to get an intuition of what’s really going on there.
Connecting Arduino With Processing
Given that the GUI application we’ll be building in the Processing IDE environment will run on our PC, there should be some way for it to communicate with the Arduino hardware board (or any other microcontroller e.g. STM32, ESP32, Pi Pico, etc). The answer is Serial Communication, it’s the easiest way to establish communication between your GUI app on your PC and the Arduino board (microcontroller).
There do exist some built-in and user-contributed libraries in the Processing IDE to help you add WiFi communication, Bluetooth, etc. But we’ll get to that later on in the ESP32 Tutorials series to be specific.
Arduino With Processing IDE Connection Example
In this simple example, we’ll establish a 2-way communication between our Arduino board and a simple GUI application on Processing IDE. The functionality of both the Arduino code and the Processing code will be as follows:
- Arduino: will set up the serial communication port to operate @ 9600bps. Read the incoming data from the Processing GUI app over the serial port and toggle the onboard LED each time a character is received. The Arduino will increment the received character by 1 and send back the new character to the processing GUI application over the serial port.
- Processing: the GUI processing application will set up a serial port communication on the exact same port of our Arduino board (“COM8” in my case). It’ll continuously check the incoming data from Arduino over the serial port, and print it on the GUI window when something is received. It’ll also listen to the mouse click event inside the whole GUI window, any click will trigger the last function which will send back the same character that was last received from the Arduino as is.
Arduino Code
/*
 * LAB Name: Arduino-Processing Communication Test Example
 * Author: Khaled Magdy
 * For More Info Visit: www.DeepBlueMbedded.com
*/
void setup() {
  pinMode(LED_BUILTIN, OUTPUT); // Set the built-in LED pin as an output
  Serial.begin(9600);          // Start serial communication at 9600 baud rate
}

void loop() {
  if (Serial.available() > 0) {
    char received = Serial.read(); // Read the incoming data
    digitalWrite(LED_BUILTIN, !digitalRead(LED_BUILTIN)); // Toggle the built-in LED
    Serial.println(++received); // Send back the next character
  }
}
Processing Code
/*
 * LAB Name: Arduino-Processing Communication Test Example
 * Author: Khaled Magdy
 * For More Info Visit: www.DeepBlueMbedded.com
*/
import processing.serial.*;

Serial myPort;
char Msg = '0';

void setup() {
  size(200, 150);
  smooth();
  // Initialize serial communication
  println("Available ports: " + join(Serial.list(), ", "));
  myPort = new Serial(this, "COM8", 9600); // Set Port Name + Adjust baud rate as needed
}

void draw() {
  background(0);
  if (myPort.available() > 0) {
    String val = myPort.readStringUntil('\n');
    if (val != null) {
      Msg = val.trim().charAt(0);
    }
  }
  textSize(20);
  text("Arduino says: " + Msg, 35, 75);
}

void mousePressed() {
  myPort.write(Msg); // Echo back the received character from Arduino
}
To test this example, you need to flash the Arduino code to your Arduino board. Copy the processing code into a new sketch in Processing IDE, and run the GUI app after making sure that your Arduino board is connected to your PC via a USB cable and it’s not busy (don’t open the Arduino’s serial monitor during this tet).

If your Arduino’s serial port is busy (like for example, you’re using the Arduino serial monitor) it won’t be accessible to the Processing GUI application that will try to connect to it upon startup. This will cause a potential crash issue in your GUI application. We’ll see how to prevent this later in this tutorial but keep it in mind that the Arduino’s serial port must be available and not busy.
Installing Arduino GUI Processing Libraries
The Processing IDE comes already with a lot of example sketches and libraries pre-installed. You may need to play with a couple of them to get yourself familiar with the ecosystem. However, in most tutorials on DeepBlueMbedded that use Processing IDE to create GUI applications, we’ll be using a couple of libraries that you need to install.
- controlP5 Library
- meter Library
The first library has a lot of interactive GUI elements that look awesome and provide us with buttons, toggle switches, sliders, etc. The second library includes a lot of gauges, meters, and other graphing assets that will also help us create nice visualizations for Arduino sensors and applications.
To install a new library in Processing IDE, go to the Tools > Manage Tools option.
In the Libraries tab, search for controlP5 library and click the install button.

And do the same for the meter library as well.

And now we’re ready to create our first Arduino GUI application with Processing IDE.
Arduino Processing Project Example
Now, let’s create our first Arduino GUI application with Processing IDE. This GUI application will have the following features and functionalities:
- Toggle Switch: to control an LED on the Arduino board
- Text Label: to indicate the current switch (LED) state
- Virtual LED: just a circle that we’ll change its color (White <-> Gray) that will be controlled from the Arduino board (push button)
The target embedded application that will run on our Arduino board will have the following functionality:
- Output LED: will be controlled according to the received serial data coming from the processing GUI app.
- Input Push Button: we’ll read its state and send it over to the processing GUI to control the virtual LED (colored circle)
And that’s all about it. Let’s now move to the full code listing of this example project for both the Arduino board and the Processing GUI application.
Arduino Code
This is the Arduino code that we’ll flash to the microcontroller (Arduino Board)
/*
 * LAB Name: Arduino <-> Processing GUI App
 * Author: Khaled Magdy
 * For More Info Visit: www.DeepBlueMbedded.com
*/
#define LED_PIN 13
#define BTN_PIN 2

void setup() {
  Serial.begin(9600);
  pinMode(LED_PIN, OUTPUT);
  pinMode(BTN_PIN, INPUT_PULLUP);
}

void loop() {
  if (Serial.available())
  {
    char receivedChar = Serial.read();
    if (receivedChar == '1') {
      digitalWrite(LED_PIN, HIGH);
    } else if (receivedChar == '0') {
      digitalWrite(LED_PIN, LOW);
    }
  }
  if(digitalRead(BTN_PIN)){
    Serial.println("0");
  }
  else{
    Serial.println("1");
  }
}
How The Arduino Code Works
The Arduino code simply defines an output LED pin and an input push Button pin. It opens a serial port @ 9600bps. It reads incoming data to control the LED status accordingly, and it reads the push button pin state to send it over the serial port to control the “virtual LED” which is a colored circle on the GUI app.
Processing Code
This is the processing code that you need to copy into your Processing IDE sketch and run it on the PC.
/*
 * LAB Name: Processing Arduino GUI App
 * Author: Khaled Magdy
 * For More Info Visit: www.DeepBlueMbedded.com
*/
import controlP5.*;
import processing.serial.*;

ControlP5 cp5;
Serial myPort;
int col = color(100);
boolean toggleValue = false;
Textlabel LED_State;
Toggle ToggleSW;

void setup() {
  size(270, 150);
  smooth();
  cp5 = new ControlP5(this);
  // Create a toggle switch
  ToggleSW =cp5.addToggle("toggle")
     .setPosition(40, 50)
     .setSize(50, 20)
     .setValue(false)
     .setLabel("1                     0")
     .setMode(ControlP5.SWITCH);
  // Create a text label to show LED status
  LED_State = cp5.addTextlabel("label")
     .setText("LED OFF")
     .setFont(createFont("Arial", 12))
     .setPosition(35, 110);
  ToggleSW.setLock(true);
  // Initialize serial communication
  println("Available ports: " + join(Serial.list(), ", "));
  try
  {
    myPort = new Serial(this, "COM8", 9600); // Set Port Name + Adjust baud rate as needed
  } catch (Exception e) {
    println("Error opening serial port: " + e.getMessage());
  }
  ToggleSW.setLock(false);
}

void draw() {
  background(0);
  // Draw Circle (LED)
  pushMatrix();
  translate(200, 60);
  fill(col);
  ellipse(0, 0, 40, 40);
  popMatrix();
}

void toggle(boolean theFlag) {
  if (theFlag == true) {
    col = color(255);
    myPort.write('1'); // Send '1' when toggle is ON
    LED_State.setText("LED ON");
  } else {
    col = color(100);
    myPort.write('0'); // Send '0' when toggle is OFF
    LED_State.setText("LED OFF");
  }
  println("a toggle event.");
}

void serialEvent(Serial myPort) {
  while (myPort.available() > 0) {
    char received = myPort.readChar();
    if (received == '1') {
      col = color(255);  // Set Color 'White' when '1' is received
    } else if (received == '0') {
      col = color(100);  // Set Color 'Gray' when '0' is received
    }
  }
}
How The Processing Code Works
The processing code above may look intimidating at first glance, but we’ll break it down section by section to see how simple it is to create GUI apps in the Processing IDE environment.
The setup() Function
The setup() function in Processing is very similar to that of Arduino in terms of execution behavior. It also gets executed first and once in the program’s lifetime. Here, in this GUI application example, we’re doing a bunch of tasks inside the setup() function which are as follows:
First of all, we create the GUI window and set its size (in pixels) with the following function call.
size(270, 150);
The next function call is to make the graphics on the GUI app smoother. This function improves the drawing quality by smoothing out the edges of shapes.
smooth();
Next up we’re creating a new ControlP5 object from the library that we’ve previously installed. It has a lot of interactive GUI elements ready for us to use (buttons, toggle switches, sliders, etc).
cp5 = new ControlP5(this);
Then we’re adding the first element which is the toggle switch that we’ll use to control the Arduino’s LED. This block of code adds a toggle switch to your window. It’s positioned at (40, 50) pixels from the top-left corner, has a size of 50×20 pixels, initially set to false (off), labeled with “1 0”, and styled as a switch.
ToggleSW = cp5.addToggle("toggle")
              .setPosition(40, 50)
              .setSize(50, 20)
              .setValue(false)
              .setLabel("1                     0")
              .setMode(ControlP5.SWITCH);
Then we’re adding a text label to show the current LED status according to the toggle switch position.
LED_State = cp5.addTextlabel("label")
               .setText("LED OFF")
               .setFont(createFont("Arial", 12))
               .setPosition(35, 110);
Then we’re locking the toggle switch to make it non-interactive until we successfully establish the serial communication (to prevent crashing if the user clicks the switch before the serial port is properly initialized).
ToggleSW.setLock(true);
Next up, we’ll set up the serial communication (safely). We first print out all available serial ports so we can see the port names in the console.

Here, I’m using the “ try-catch” feature in the Java language to handle this task which has a potential risk of crashing the whole application if the serial port is not non-existent or not available at the moment of starting the GUI app.
println("Available ports: " + join(Serial.list(), ", "));
try {
  myPort = new Serial(this, "COM8", 9600);
} catch (Exception e) {
  println("Error opening serial port: " + e.getMessage());
}
Note That I’ve hard-coded the port name of my Arduino UNO board which is “COM8” into the GUI app. You can, however, prompt the user to enter a port name, show a drop-down selection menu, or just change the port name to match your board’s port just like what I’ve done in this example project.
At this point, we’ve already succeeded in establishing the serial port connection. Otherwise, a catch exception would have been triggered. So, we’ll release the toggle switch’s lock to make it interactive again.
ToggleSW.setLock(false);
The draw() Function
The draw() function in Processing is very similar to Arduino’s loop() function in the sense that it’s executed repeatedly forever to draw and handle all GUI elements and graphics on the screen. We’ll draw the virtual LED circle and position it next to the toggle switch.
void draw() {
  background(0);
  // Draw Circle (LED)
  pushMatrix();
  translate(200, 60);
  fill(col);
  ellipse(0, 0, 40, 40);
  popMatrix();
}
The toggle() Function
The toggle() function is executed whenever the user clicks the toggle switch element on the GUI application. In this function, we’ll toggle the state of the switch and send it over the serial port to the Arduino board (to control the Arduino’s LED output pin state). And we’re also setting the text label on the GUI to reflect the current state (ON or OFF).
void toggle(boolean theFlag) {
  if (theFlag == true) {
    col = color(255);
    myPort.write('1'); // Send '1' when toggle is ON
    LED_State.setText("LED ON");
  } else {
    col = color(100);
    myPort.write('0'); // Send '0' when toggle is OFF
    LED_State.setText("LED OFF");
  }
  println("a toggle event.");
}
The serialEvent() Function
The serialEvent() function is executed whenever something is received at the serial COMx port. In this function, we’ll read the incoming data from the Arduino board and check the value. If ‘1‘ is received, we’ll set the “virtual LED” circle’s color to White and set it to Gray if a ‘0‘ is received.
void serialEvent(Serial myPort) {
  while (myPort.available() > 0) {
    char received = myPort.readChar();
    if (received == '1') {
      col = color(255);  // Set Color 'White' when '1' is received
    } else if (received == '0') {
      col = color(100);  // Set Color 'Gray' when '0' is received
    }
  }
}
Testing Demo
Here is a demo video for testing the final GUI application with my Arduino UNO board.
Exporting Arduino Processing GUI Application (Standalone)
The last step after creating the Arduino Processing GUI application is to export it to share it with the world so others can try using it. Shall we?! This is not a mandatory step of course but it’s really good to know. So in this section, I’ll show you how to export your GUI application from Processing IDE and run it as a standalone software that you can share with friends or other team members.
First of all, open the sketch of the Processing GUI application that you want to export and go to File > Export Application option.

Then, a new window will show up asking you to select the export options before starting the export process. The major option that we need to decide on is the “Embedding of Java” whether to turn it ON or OFF.

The final GUI application after export completion will require the Java Runtime Environment (JDK) to be installed on any PC machine that you’d like to have your app running on. For portability reasons, you might want to enable the “Embed Java” option to guarantee that your App will run on any PC in case you’re willing to share your GUI app with friends and such. But keep in mind that the app size will be large.
To give you more context on the exported Processing GUI app size matter, I’ve exported the example GUI application that we’ve developed in this tutorial twice. Once with Java Embedding enabled, and another time with this option disabled, here are the results:
- Embed Java Enabled: GUI App Size = 258MB
- Embed Java Disabled: GUI App Size = 6.5MB
It’s a significant difference indeed, but for the sake of portability and being able to run it on another colleague’s PC who doesn’t have JDK installed on their PC machine, it’d be worthy of course.
And there you have it! Your own Arduino GUI App is ready to go out to the world.

Parts List
Here is the full components list for all parts that you’d need in order to perform the practical LABs mentioned here in this article and for the whole Arduino Programming series of tutorials found here on DeepBlueMbedded. Please, note that those are affiliate links and we’ll receive a small commission on your purchase at no additional cost to you, and it’d definitely support our work.
Download Attachments
You can download all attachment files for this Article/Tutorial (project files, schematics, code, etc..) using the link below. Please consider supporting my work through the various support options listed in the link down below. Every small donation helps to keep this website up and running and ultimately supports our community.
Conclusion
To conclude this tutorial, we can say that the Processing IDE is an amazing environment that’s not much different from the Arduino IDE in terms of layout, ease of use, and supporting packages. Actually, it’ll complement your Arduino programming skill to develop and share your own GUI applications and data visualizations not only for Arduino but also STM32, ESP32, Raspberry Pi Pico, and any other embedded target.
If you’re just getting started with Arduino, you need to check out the Arduino Getting Started [Ultimate Guide] here. And follow this Arduino series of tutorials to learn more about Arduino Programming.

This is the ultimate guide for getting started with Arduino for beginners. It’ll help you learn the Arduino fundamentals for Hardware & Software and understand the basics required to accelerate your learning journey with Arduino Programming.