This is a comprehensive guide for Arduino Digital Potentiometer X9C103s Module Interfacing. You’ll learn how to use X9C103s With Arduino To Create Some Digital Potentiometer Applications to practice what we’ll be learning in this tutorial.
We’ll start by explaining how the X9C103s digital potentiometer module works, its pinout, and how to connect it With Arduino. Then, we’ll install the Arduino X9C10x Library, and create a couple of Arduino digital potentiometer example projects with the X9C103s module. Without further ado, let’s get right into it!
Table of Contents
- Arduino Digital Potentiometer (X9C103s)
- Arduino X9C103s Digital Pot Interfacing
- Arduino Digital Pot X9C10x Library Installation
- Arduino Digital Potentiometer X9C103s Example
- Arduino X9C103s TTL Oscillator Example
- Arduino Digital Potentiometer X9C10x Projects' Tips
- Wrap Up
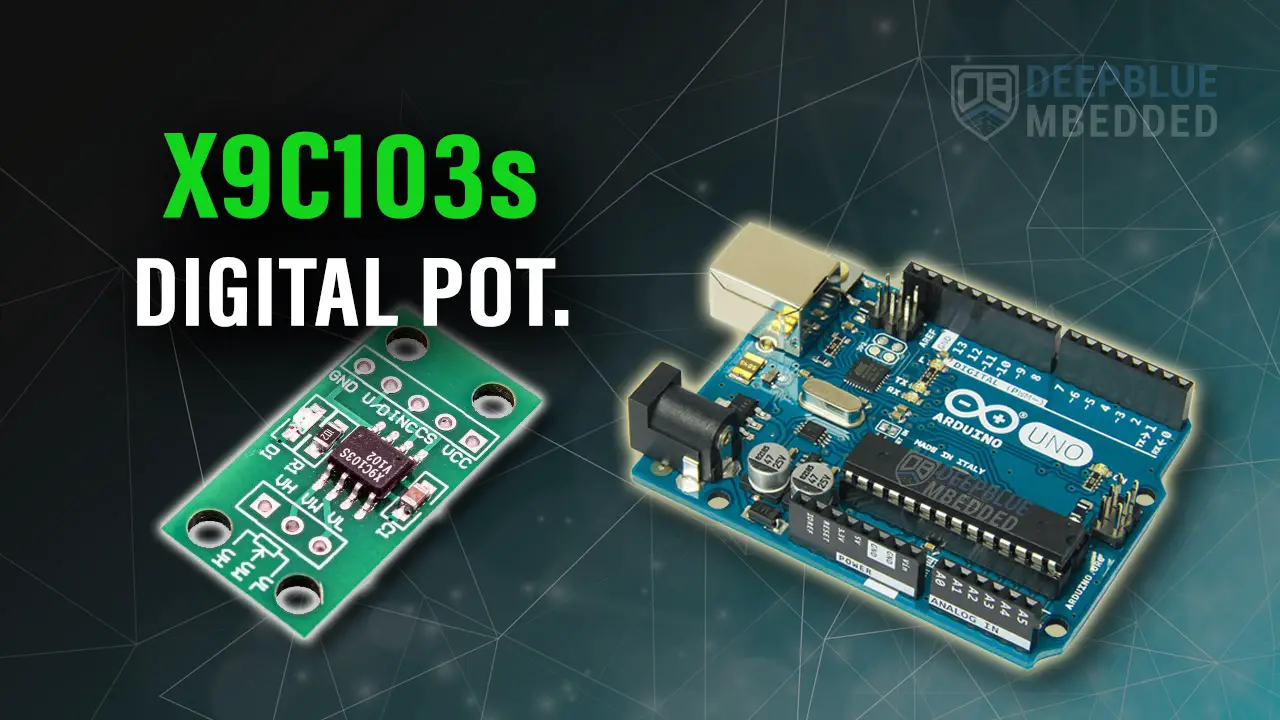
Arduino Digital Potentiometer (X9C103s)
The X9C103s is a digital potentiometer IC that consists of an array of resistors, wiper switches, control logic, and NVM memory to store the wiper position. By enabling and disabling the internal fixed resistors, it can act as a variable resistor with 100 steps. The X9C103s potentiometer is a 10kΩ resistor with a step size of 100Ω per wiper position tick.

For this tutorial, we’ll use the X9C103s module with Arduino to change the potentiometer’s wiper position programmatically and use that to generate a variable voltage divider network and also to replace a resistor in an RC oscillator circuit to obtain a programmable variable frequency oscillator circuit.

Buy an X9C103s Module: you can find it here on Amazon.com
X9C103s Tech Specs
| Operating Voltage | 5v |
| Total Resistance | 10kΩ (±20% tolerance) |
| Wiper Positions | 100 |
| Minimum Resistance | 40Ω |
| Maximum Wiper Current | 4.5mA |
Arduino Digital Potentiometer Applications
Digital Potentiometers are required in various types of sensing, actuation, tunable filters, and oscillator applications. Here are some applications where you might consider using a digital potentiometer like the X9C103s:
- Volume Control
- Light Control
- Auto-Tunable Filters
- Auto-Contrast Adjustment
- Programmable Oscillators
You can find more information about the X9C10x digital potentiometer IC family in its Datasheet from Renesas.
Arduino X9C103s Digital Pot Interfacing
Now, let’s move to interfacing the X9C103s digital potentiometer with Arduino. Let’s check the pinout, pin functions, and the wiring diagram.
X9C103s Pinout

VCC is the module’s power supply input pin (connects to +5v).
CS is the chip select (Enable) pin.
INC is the increment signal input pin.
U/D is the Up/Down wiper increment direction control pin.
GND is the ground pin.
H is the High end terminal of the digital potentiometer.
W is the wiper middle pin of the potentiometer.
L is the Low end terminal of the digital potentiometer.
Wiring X9C103s With Arduino
Here is the wiring diagram for the X9C103s digital potentiometer with Arduino that we’ll be using in the example projects hereafter in this tutorial.

Arduino Digital Pot X9C10x Library Installation
You can download and install the Arduino X9C10x digital potentiometer library manually from GitHub, or alternatively, install it within the Arduino IDE itself. Just open the library manager. Tools > Manage Libraries > Search for X9C. Then, click Install and let it finish the installation.

Now, you can easily use the Arduino Digital Potentiometer X9C10x library and check the built-in examples for the library to help you get started.
We’ll move now to the practical code example to test the Arduino Digital Potentiometer X9C103s Module interfacing.
Arduino Digital Potentiometer X9C103s Example
Now, we’re ready to create our first Arduino X9C103s Digital Potentiometer demo application. In which, we’ll hook up the digital potentiometer to Vdd and GND to create a voltage divider network. The output of the wiper pin voltage will be measured by the Arduino’s A0 analog input pin. The core logic of this application, will gradually increment the wiper position up to the maximum and gradually decrease it down to the minimum and keep repeating that forever.
To visualize the output signal, we’ll feed it back to our Arduino’s A0 analog input channel and send the readings over the serial port to the PC where we’ll view the signal on the serial plotter.
Wiring
The wiring diagram for this example project is shown in the previous section, scroll up and check it out. Below is an image of how the whole setup looks like at the end, ready for the test.

Example Code
Here is the full code listing for this example.
/*
 * LAB Name: Arduino X9C103S Digital Potentiometer Demo Example
 * Author: Khaled Magdy
 * For More Info Visit: www.DeepBlueMbedded.com
*/
#include <DigiPotX9Cxxx.h>

DigiPot MyPot(2,3,4); // Pins:(INC, U/D, CS)

void setup() {
  Serial.begin(9600);
}

void loop() {
  for(int i=0; i<100; i++)
  {
    MyPot.increase(1);
    Serial.println(analogRead(A0));
    delay(10);
  }
  for(int i=0; i<100; i++)
  {
    MyPot.decrease(1);
    Serial.println(analogRead(A0));
    delay(10);
  }
}
Code Explanation
First of all, we need to include the Arduino DigiPotX9Cxxx.h library to use the digital potentiometer X9C103s module.
#include <DigiPotX9Cxxx.h>
Then, we’ll create an instance of the DigiPot class for our digital potentiometer module and assign the control signal pins to it.
DigiPot MyPot(2,3,4); // Pins:(INC, U/D, CS)
setup()
in the setup() function, we’ll initialize the serial port to send the measured signal back to the PC for display on the serial plotter.
Serial.begin(9600);
loop()
In the loop() function, we’ll create two for loops. In the first loop, we’ll increment the potentiometer wiper position all the way up to the maximum position. In the second loop, we’ll decrease the wiper position all the way down to the minimum value. In each of them, we’ll print the voltage output that we fed back to the A0 analog input channel over the serial port, and keep repeating.
void loop() {
  for(int i=0; i<100; i++)
  {
    MyPot.increase(1);
    Serial.println(analogRead(A0));
    delay(10);
  }
  for(int i=0; i<100; i++)
  {
    MyPot.decrease(1);
    Serial.println(analogRead(A0));
    delay(10);
  }
}
Testing Result

The output is exactly what we expect it to be. The output voltage is gradually going up from 0v to 5v and down to 0v again which means we’re successfully controlling the digital potentiometer’s wiper position.
Arduino X9C103s TTL Oscillator Example
In this second example project, we’ll use the X9C103s digital potentiometer with Arduino and a CD40106 Schmitt-Trigger Hex-Inverter chip to create a TTL RC oscillator with controllable output clock frequency. We’ll replace the resistor in the TTL RC oscillator circuit with the digital potentiometer to act as a variable resistance to change the output frequency according to the current value of the digitally controlled resistor.
The Arduino board will read two input push buttons to increase/decrease the resistor’s value and consequently change the output frequency of the TTL inverter RC oscillator.
TTL Schmitt-Trigger Inverter Oscillator Circuit & Equations
Below is a figure showing a typical application circuit for the CD40106 Schmitt-Trigger Inverter Oscillator as found in its Datasheet. It only requires one resistor and one capacitor to operate. The output Frequency = 1 / tA

Note that: VDD = 5v, VP = 3v (in the datasheet), and VN = 2v (in the datasheet).
In this example project, I’ll use a 100nF capacitor and the X9C103s as a variable (10kΩ) resistor. Therefore, the output signal’s frequency for this oscillator circuit will fall in the following range. (by substituting all known values in the tA equation and calculating F = 1/tA)
X9C103s Min Resistance value = 40Ω. At which the output frequency FOUT(Max) = 1/(40 x 100 x 10-9 x ln[(1.5)(1.5)]) = 300kHz
X9C103s Max Resistance value = 10kΩ. At which the output frequency FOUT(Min) = 1/(10,000 x 100 x 10-9 x ln[(1.5)(1.5)]) = 1.2kHz
FOUT range is (1.2kHz – 300kHz).
Wiring
The wiring diagram for this example project is shown below.

Example Code
Here is the full code listing for this example.
/*
 * LAB Name: Arduino X9C103S Digital Potentiometer Oscillator Example
 * Author: Khaled Magdy
 * For More Info Visit: www.DeepBlueMbedded.com
*/
#include <DigiPotX9Cxxx.h>
#include <Pushbutton.h>

DigiPot MyPot(2,3,4); // Pins:(INC, U/D, CS)
Pushbutton IncButton(7);
Pushbutton DecButton(8);

void setup() {
  // Nothing
}

void loop() {
  if (IncButton.getSingleDebouncedPress()){
    MyPot.increase(1);
  }
  if (DecButton.getSingleDebouncedPress()){
    MyPot.decrease(1);
  }
}
Code Explanation
First of all, we need to include the Arduino DigiPotX9Cxxx.h & Pushbutton.h libraries to use the digital potentiometer X9C103s module and the push button debouncing library.
#include <DigiPotX9Cxxx.h>
#include <Pushbutton.h>
Then, we’ll create an instance of the DigiPot class for our digital potentiometer module and assign the control signal pins to it. And we’ll also create 2x instances of the Pushbutton class for the input buttons (increase button, decrease button).
DigiPot MyPot(2,3,4); // Pins:(INC, U/D, CS)
Pushbutton IncButton(7);
Pushbutton DecButton(8);
loop()
In the loop() function, we’ll read the debounced state of each input button and send a control signal to the X9C103s digital potentiometer to move the wiper up or down according to the input state.
void loop() {
  if (IncButton.getSingleDebouncedPress()){
    MyPot.increase(1);
  }
  if (DecButton.getSingleDebouncedPress()){
    MyPot.decrease(1);
  }
}
Testing Result
As you might have noticed, the usable range for the output clock frequency is only 1.5kHz up to 30kHz. But we can still push it further by reducing the capacitor value and improving the IC’s power supply decoupling to help it switch the output pin fast enough without distorting the waveform. The clock distortion near the end is mainly because of the capacitor value we’re using, try reducing it to get higher output frequencies but keep in mind that the minimum output frequency will also increase.
To learn more about the push button debouncing techniques and the library we’ve used in this example project, check the tutorial below.

This article will provide you with more in-depth information about Arduino button debouncing techniques both hardware & software methods. With a lot of code examples & circuit diagrams.
Arduino Digital Potentiometer X9C10x Projects’ Tips
Before concluding this tutorial, let’s address some of the shortcomings of the X9C10x digital potentiometer module that you’ll encounter in your Arduino projects and how to go about overcoming such challenges.
X9C10x Max INC/DEC Values
The X9C10x digital potentiometers have a ±20% tolerance for the total resistance value. Hence, the X9C103s (10kΩ) true full resistance value is going to fall within the range (8kΩ – 12kΩ).
Increment pulses will have no effect after the wiper reaches the maximum position giving you the full resistance value. Any further increment commands will have no effect at all.
Similarly, decrement pulses will have no effect when the wiper reaches the minimum position. The resistance will not be zero, though, it’s going to be around 40Ω as stated in the datasheet.
X9C10x Max Current & Buffering
The X9C10x digital potentiometer is intended to be used as a reference voltage source not to be used as a power resistor. You can’t use it as a current source to drive LEDs, transistors, or whatever load you might have. The maximum current you can source or sink through this digital potentiometer is 4.5mA only.
A buffer opAmp can be used in conjunction with the X9C10x digital potentiometer to provide the drive current that your application might need given that the input current into the opAmp is really small and it’s got a low impedance output, therefore it’d be an ideal solution for a lot of applications.
X9C10x NVM
The X9C10x digital potentiometer has an internal non-volatile memory (NVM) to store the current wiper position so it can “remember” the last wiper position even after a power OFF/ON cycle. But you need to send a store signal to the module to command it to store the current wiper position when it’s powered up after a hard reset.
Required Parts List
Here is the full components list for all the parts that you’d need to perform the practical LABs mentioned here in this article and for the whole Arduino Programming series of tutorials found here on DeepBlueMbedded. Please, note that those are affiliate links and we’ll receive a small commission on your purchase at no additional cost to you, and it’d definitely support our work.
Download Attachments
You can download all attachment files for this Article/Tutorial (project files, schematics, code, etc..) using the link below. Please consider supporting my work through the various support options listed in the link down below. Every small donation helps to keep this website up and running and ultimately supports our community.
Wrap Up
To conclude this tutorial, we can say that the X9C103s digital potentiometer module is a very powerful option to use with Arduino for a lot of applications where you need a variable resistor that can be programmatically changed without user intervention. Using the Arduino X9C10x digital potentiometer library makes it easier to interface with digital potentiometers of this IC family as we’ve seen in the practice example projects.
If you’re just starting with Arduino, check out the Arduino Getting Started [Ultimate Guide] here.
And follow this Arduino Series of Tutorials to learn more about Arduino Programming.