In this tutorial, we’ll discuss STM32 Arduino IDE Programming (STM32DUINO) as a way to get started with STM32 microcontrollers using Arduino IDE. This is a very beginner-friendly way to get yourself introduced to STM32 microcontrollers programming using the well-known Arduino IDE and its STM32DUINO core that allows you to program STM32 microcontrollers with Arduino C++ and take advantage of its wide variety of libraries and sketch examples everywhere online.
This is the only guide you’d ever need to program your STM32 dev board with Arduino. We’ll use The STM32F103C8T6 Blue Pill with Arduino in this tutorial but the information given here does also apply to any other STM32 dev board that’s “supported” by the STM32DUINO Arduino Core as we’ll discuss hereafter. Without further ado, let’s get right into it!
Table of Contents
- STM32 Arduino Core (STM32DUINO)
- STM32 Programming With Arduino IDE
- What's Needed To Program STM32 µC With Arduino IDE?
- STM32 Arduino USB HID Bootloader Flashing
- STM32 Arduino Example (LED Blinking)
- Flashing STM32 Arduino Bootloader & Code
- Wrap Up
STM32 Arduino Core (STM32DUINO)
Can I program an STM32 microcontroller using Arduino IDE? Yes, you can use Arduino IDE for STM32 microcontroller programming. The STM32DUINO core provides the needed firmware device drivers that make it possible for us to use STM32-based development boards as if they were Arduino boards.
In this tutorial, we’ll discuss how to set up your Arduino ecosystem and prepare your STM32 dev board (like stm32f103c8t6 blue pill) to be able to program it using Arduino IDE and flash some Arduino sketches to rapidly prototype any project idea you want to implement using the high computational power of STM32 microcontrollers.
STM32 Arduino Core (STM32DUINO) Features
The STM32 Arduino Core (STM32DUINO) provides software support for various STM32 microcontroller hardware product lines. You can check the natively supported STM32 microcontrollers & development boards as well as the rest of the features provided by the STM32DUINO Core.
For this tutorial, we’ll be programming STM32F103C8T6 (Blue Pill) with Arduino. However, any other supported STM32 dev board will also work just as fine but you’ll need to flash the corresponding Arduino bootloader that matches your STM32 part family number. We’ll discuss this in more detail hereafter.
The GPIO pins in STM32 microcontrollers are by default 3.3v while some pins are 5v tolerant, the rest are not. So you need to be careful when working with STM32 microcontrollers so as not to damage the IO pins by applying 5v to a 3.3v pin that’s not 5v tolerant. Don’t also use pull-ups or pull-downs when working with 5v. Check this STM32 GPIO tutorial for more information.
STM32 Programming With Arduino IDE
STM32 programming with Arduino C++ is a less conservative way of programming STM32 microcontrollers. Coming from a low-level embedded-C programming perspective, you may feel your application a bit more bloated than usual but it’s way better compared to something like MicroPython for instance.
On the other hand, you’ll like and enjoy the ease of use and wide library support for almost every sensor and module which is a huge positive point when it comes to programming your STM32 using Arduino.
Pros of STM32 Programming With Arduino IDE
- Ease of programming your STM32 board in Arduino C++ like any Arduino board.
- You can familiarize yourself with the STM32 hardware using the Arduino C++ built-in libraries to create some easy test demo projects.
- Even more complex projects can be implemented using the Arduino multi-file build system to organize your source code files, use timers and interrupts to achieve a specific timing behavior, and much more.
Cons of STM32 Programming With Arduino IDE
- Less control over the hardware peripherals and their configurations.
- Not all STM32 hardware peripherals are supported yet in the STM32DUINO core.
- You won’t be able to establish thorough real-time debugging sessions compared to STM32Cube IDE.
My Take on STM32 With Arduino IDE
Using Arduino C++ to program your STM32 dev board can be a really good decision if you’re just getting started with STM32 microcontrollers and would like to familiarize yourself with the STM32 hardware and computational power compared to 8-bit microcontrollers that are found in most Arduino boards.
After a week or so, you should have created a handful of projects using STM32 & Arduino sketches. It should be the time to move on and start diving deeper into the real STM32 hardware peripherals mechanics and learn how to configure & program it in C using STM32 CubeMX & Cube IDE.
You can follow this STM32 series of tutorials. It’s been a great resource for a lot of universities’ embedded systems courses across the globe since I published them many years ago. You can also check this STM32 Projects page for ideas and inspiration.
You can also check this great Arduino Programming Tutorials Series to help you get started with Arduino programming with so many example projects and demonstrations for Arduino built-in functions and user-contributed libraries as well.
What’s Needed To Program STM32 µC With Arduino IDE?
Here’s what you need to prepare so you can program your STM32 dev board using Arduino IDE and upload Arduino sketches to it just like any Arduino board you’ve worked with before.
- Arduino IDE Installed
- STM32CubeProgrammer Installed
- Arduino STM32 Package (Board Manager)
- Flash The Arduino Bootloader To Your STM32 Board
To get started with Arduino programming on your STM32 development board, you’ll need an STM32 dev board supported by the STM32DUINO core. Then, you need to have installed the Arduino IDE on your PC. Install the STM32 Package support (Board Manager) within Arduino IDE.
Finally, you need to flash the Arduino code to your STM32 microcontroller, so you can upload Arduino sketches and use your STM32 board as if it’s an Arduino board.
1. Install Arduino IDE
First of all, you need to download and install the Arduino IDE version that matches your OS (Windows, Linux, Mac). You can get it here on the Arduino Website and the installation process is straightforward.
2. Install STM32CubeProgrammer
The next tool we’ll need is the STM32 Cube Programmer. Which we’ll use to flash the Arduino bootloader to the STM32 microcontroller. After flashing the Arduino bootloader for the first time, we can use Arduino IDE only for flashing Arduino sketches to the STM32 board afterward.
We’ll need the STM32CubeProgrammer at least once if you’ve decided to use the Arduino bootloader (which will take up some memory space but is highly recommended to use).
Download the STM32CubeProgrammer here from the STMicroelectronics website which will require you to create an account if it’s your first time registering on their website. Then, your download process will start and the tool is very straightforward to install on your machine. Here is how it looks after launch.

3. Arduino STM32 Package (Board Manager)
Now, the next step is to install the Arduino STM32 hardware package using the Arduino IDE board manager.
Open your Arduino IDE, click on File, then choose Preferences, and you’ll have the following window opened. In the “Additional Boards Manager URLs” textbox area, you’ll need to add the following URL. If you’ve other boards support package URLs, you’ll just need to add a comma for separating URLs.
STM32DUINO Hardware Support Package URL:
https://github.com/stm32duino/BoardManagerFiles/raw/main/package_stmicroelectronics_index.json

Now, the URL pointing to the STM32 Arduino hardware support package is placed but it’s not yet downloaded or installed. So we need to install it next.
In your Arduino IDE, click on Tools, then move to the Boards drop list, and choose the Board Manager option.
Search for the following “STM32 MCU Based Boards”, and you’ll easily find it. Click install and let it download and install the files as shown below.

To check that you’ve set up the Arduino STM32 hardware support, open the Tools menu, and check the Boards tab. It should have an option for STM32 boards grouped by series & board type.
Here is what it should look like.

For me, I’m using the STM32F103C8T6 Blue Pill development board. Therefore, I would choose the “BluePill F103C8” option. If you, however, are using any other STM32 development board, you should choose the corresponding board type or “Generic xxx Series” if you’re using a custom STM32 board design.
For the well-known STM32-Nucleo development boards, you can choose one of the 3 Nucleo board form factors shown below. You can easily identify the STM32-Nucleo board form factor by the looks of it.
| Nucleo-32 | Nucleo-64 | Nucleo-144 |
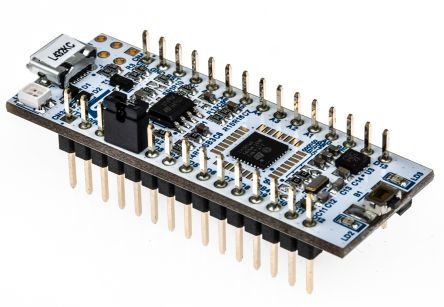 |  | 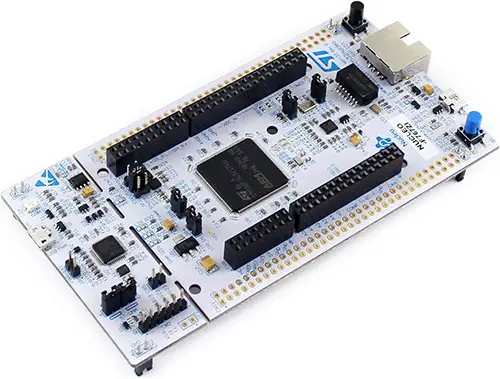 |
4. Flash The Arduino Code To Your STM32 Board
This last step can be done in three different ways as we’ll see in the next section, and it’s up to you to choose whatever seems convenient to you. I’ll first demonstrate my preferred method in a step-by-step manner. then, I’ll summarize the other possible methods that you could also you instead.
STM32 Arduino USB HID Bootloader Flashing
Here is a step-by-step guide for how to flash the Arduino Bootloader on STM32 Blue Pill over USB HID. Completing this step successfully will enable you to use your STM32 dev board as any other Arduino board and you’ll only need Arduino IDE to flash your Arduino sketches onto your STM32 with 1 button click. So, let’s get started!
Step #1
Download the STM32 USB HID Arduino Bootloader binary file using this link below.
Download STM32 USB HID Arduino Bootloader

Unzip the bootloader binaries folder. This is the binary file that we need to flash to our STM32 microcontroller (this is for STM32F103C8T6 Blue Pill). Different boards have different IO pins used for the onboard LED. My STM32F103C8T6 BluePill board has the onboard LED connected to the PC13 pin. That’s why I’ll be using the “hid_generic_pc13.bin” binary file.

Step #2
Connect your STM32 board to the ST-Link v2 debugger SWD header as shown below.

Step #3
Open the STM32CubeProgrammer software and choose (ST-Link) from the dropdown menu (Alternative options are USB or Serial). But we’re using the ST-Link debugger for this task, so it’s what we’ll choose. Then, click the “Connect” button and wait for it to connect. When it’s done, it’ll look as shown below.

Step #4
Open the “Download Tab“, point to the location of the bootloader binary file that we’ve downloaded in Step#1, and choose the following options as shown below. Click the “Start Programming” button and wait a couple of seconds till completion. Then close the completion notification box, close the STM32CubeProgrammer, and move to the next step.

Step #5
Disconnect the ST-Link debugger from your STM32 Blue Pill board and connect your board to the PC over the USB cable. It should be detected as a HID USB device. We’ll check for that using the “Device Manager” to also get the “COM” port associated with our board which we’ll need later.

Step #6
Let’s write the following LED blinking code example. Copy the following code into your Arduino IDE editor:
void setup() {
  Serial.begin(9600);
  pinMode(PC13, OUTPUT);
}
void loop() {
  Serial.println("Hello World From STM32 Over USB CDC");
  digitalWrite(PC12, HIGH);
  delay(100);
  digitalWrite(PC12, LOW);
  delay(100);
}
Don’t compile or upload the code now.
Step #7
In your Arduino IDE, open the Tools menu and select the following settings as shown below. Just make sure to choose the correct COM port for your STM32 board USB as seen in your Device Manager earlier.

Click the upload button and wait till compilation completion. It’ll attempt flashing the code automatically afterward, so I didn’t have to move the BOOT0 jumper back and forth during the flashing process.
However, on your STM32 board, you may need to move the BOOT0 jumper to “1” position and then press the RESET button before attempting the upload process. Then move it back to “0” position after flashing completion, then press the RESET button again so the STM32 starts executing your Arduino sketch.
After flashing completion, the onboard LED (pin PC13) started to blink every 100ms and the USB port is also doing CDC communication so I could easily receive the serial data from the STM32 and show it on the Arduino serial monitor.

And we’re done. Now you can write any Arduino code and flash it to your STM32 board just like the LED blinking example we’ve already done. You’ll only need the USB cable and no further use for the ST-Link debugger or the STM32CubeProgrammer anymore, unless we need to upgrade the Arduino bootloader should it become deprecated.
STM32 Arduino Example (LED Blinking)
This is another STM32 Arduino LED Blinking Example In which we’ll blink an LED attached to the pin (PB12). And here is the wiring diagram for this example demo project.

STM32 Arduino LED Blinking Example Code
void setup() {
  pinMode(PB12, OUTPUT);
}
void loop() {
  digitalWrite(PB12, HIGH);
  delay(100);
  digitalWrite(PB12, LOW);
  delay(100);
}
Flashing The Code
Connect your STM32 board to your PC with the USB cable, It should be detected as a USB HID device, and make sure you’re selecting the correct COM port in Arduino IDE as well as the configurations shown below. Then you just click on the upload button and wait for it to complete the process.
If you’re following along using a similar STM32 BluePill board, you shouldn’t need to do the BOOT0 toggle step. However, if you’re experiencing difficulties uploading any code to your board whether through Arduino IDE itself or via STM32CubeProgrammer, then follow the steps below:
- Before attempting any upload (flash) process, move the BOOT0 jumper to the “1” position
- Press the RESET button once
- Start the firmware upload (flashing)
- After flashing completion, Move the BOOT0 jumper back to the “0” position
- Press the RESET button once, and your STM32 should start executing the firmware you’ve just uploaded
Testing Results
Here is the result of running this example project on my STM32 BluePill board.
Flashing STM32 Arduino Bootloader & Code
This is a summarized list of possible options for flashing the STM32 Arduino bootloader or code sketches that you could use as well. The method #1 is what we’ve implemented and demonstrated already in this tutorial. I tend to favor it over the other two options but let’s check them out in a bit more detail.
- STM32 Arduino USB HID Bootloader Flashing
- STM32 Arduino ST-Link v2 Flashing
- STM32 Arduino USB-TTL Flashing
1. Using The Arduino USB HID Bootloader
This is my favorite way of flashing Arduino sketches to any STM32 dev board with a USB port. You’ll still be able to use the USB port as a virtual COM port to send/receive serial data between STM32 and the PC. And the same USB port will be used for flashing Arduino code just like an Arduino UNO board.
The only downside of this method is that it takes up a bit of the STM32 internal flash memory and it requires a couple of preparation steps before being able to use it as we’ve already done in this tutorial.
2. STM32 Arduino ST-Link v2 Flashing
(Note: This method will erase the Arduino Bootloader if it’s been already flashed earlier)
Using the ST-Link v2 debugger alongside the STM32CubeProgrammer can be a viable option to flash your Arduino compiled sketches’ binary file. It requires a bit more steps every time you need to manually flash the board. But it’s not that hard and it ends up using a bit less memory space compared to the bootloader method.
But as I’ve stated earlier it’s much more convenient to use the ST-Link v2 debugger to flash the Arduino USB HID Bootloader to your STM32 board only once, then you can flash Arduino sketches over USB just like any Arduino board.
3. STM32 Arduino USB-TTL Flashing
(Note: This method will erase the Arduino Bootloader if it’s been already flashed earlier)
The last but not least option for flashing Arduino code to your SM32 is by using the USB-TTL converter with Arduino IDE to flash your code over the serial port. Alternatively, you can use the USB-TTL serial converter to flash the Arduino USB HID bootloader to your STM32 board using STM32CubeProgrammer.
But let’s say you’d like to use the USB-TTL converter (in case you don’t have the ST-Link v2 debugger). Here is how to connect the USB-TTL to the STM32 Blue Pill dev board.

Make sure to select the 3.3v logic level on the USB-TTL converter module.
| USB-TTL | STM32 BluePill |
| RX | A10 |
| TX | A9 |
| Vcc | 3.3v |
| GND | GND |
Don’t connect the USB cable to the STM32 BluePill board. The USB cable should only be connected to the USB-TTL module.
Once everything is connected, plug the USB cable into your PC and open Arduino IDE. In the Tools menu, you need to set the code upload method to “STM32CubeProgrammer (Serial)” and follow the rest of the configurations shown below. And make sure to select the correct COM port of your USB-TTL converter device.

Write the following LED blinking code or any other test demo you’d like to use.
void setup() {
  pinMode(PC13, OUTPUT);
}
void loop() {
  digitalWrite(PC13, HIGH);
  delay(100);
  digitalWrite(PC13, LOW);
  delay(100);
}
Before uploading the code, you need to set the STM32 BluePill BOOT0 pin to “1” position, then press the RESET button.
Now, you can click the upload button in Arduino IDE, and wait till completion.
Once the flashing is successfully completed, move the BOOT0 jumper back to “0” position, then press the RESET button one last time.
Now, you should see the onboard LED (connected to pin PC13) blinking every 100ms. You’ll need to follow the same process every time you want to upload an Arduino sketch to your STM32 dev board.
Required Parts For Example LABs
All the example code/LABs/projects in the series of tutorials are done using the dev boards below:
- Nucleo32-L432KC (ARM Cortex-M4 @ 80MHz) or (eBay)
- Blue Pill STM32-F103 (ARM Cortex-M3 @ 72MHz) or (eBay)
- ST-Link v2 Debugger or (eBay)
| QTY# | Component Name | ???? Amazon.com | ???? eBay.com |
| 2 | BreadBoard | Amazon | eBay |
| 1 | LEDs Kit | Amazon Amazon | eBay |
| 1 | Resistors Kit | Amazon Amazon | eBay |
| 1 | Capacitors Kit | Amazon Amazon | eBay & eBay |
| 2 | Jumper Wires Pack | Amazon Amazon | eBay & eBay |
| 1 | 9v Battery or DC Power Supply | Amazon Amazon Amazon | eBay |
| 1 | Micro USB Cable | Amazon | eBay |
| 1 | Push Buttons | Amazon Amazon | eBay |
★ Check The Full Course Complete Kit List & LAB Test Equipment Required For Debugging
Download Attachments
You can download all attachment files for this Article/Tutorial (project files, schematics, code, etc..) using the link below. Please consider supporting my work through the various support options listed in the link below. Every small donation helps to keep this website up and running and ultimately supports our community.
Wrap Up
To conclude this tutorial, I’d like to highlight the fact that most STM32 microcontroller dev boards are supported by the STM32DUINO core and you can easily set your STM32 board to be programmed with Arduino IDE just like any Arduino board. By following the steps illustrated earlier in this tutorial, you’ll be able to set up everything and develop your Arduino projects using the powerful STM32 hardware.
If you’re just getting started with STM32, you need to check out the STM32 Getting Started Tutorial here.
Follow this STM32 Series of Tutorials to learn more about STM32 Microcontrollers Programming.
You can also check this great Arduino Programming Tutorials Series to help you get started with Arduino programming
FAQ & Answers
Yes, STM32 can use Arduino programming language (C++) and the Arduino IDE for developing projects just like any AVR-based Arduino board. There are a few steps that you need to follow however in order to prepare your STM32 development board to be programmed with Arduino.
To install the STM32DUINO core, you need to add its URL to the paths in Arduino IDE first. Then, search for the STM32 Arduino hardware support package in Arduino Board Manager and click install. After completion, you’ll be able to configure and flash Arduino sketches to your STM32 development board.
STM32 is better than Arduino in terms of performance and hardware capabilities. AVR-based Arduino boards lack computational power compared to STM32 microcontrollers that can run at much higher clock rates with built-in FPU (floating-point unit) and other hardware-accelerated math operations.
Moreover, the STM32 microcontrollers are generally equipped with a much wider and stronger set of peripherals compared to Avr-based Arduino boards.
Yes, you can program STM32 with Arduino IDE. There are a few steps that you need to follow however in order to prepare your STM32 development board to be programmed with Arduino. Preferably, you need to install the Arduino USB CDC bootloader onto your STM32 development board. This will enable you to program your STM32 using a USB cable just like any Arduino board hassle-free.
Yes, STM32 is compatible with Arduino. The STM32DUINO core has hardware support for most STM32 microcontroller product lines & development boards. Especially, the 3 STM32-Nucleo form factor dev boards are all supported as well as generic custom STM32-based boards from different families.
First, you need to install the STM32DUINO hardware package support into your Arduino IDE which will enable you to program your STM32 dev board just like any Arduino board seamlessly. Programming STM32 with Arduino is a less conservative way compared to embedded-C using STM32CubeIDE, but it can be a very good beginner-friendly starting point for anyone just getting started with STM32 hardware and willing to get familiar with it.