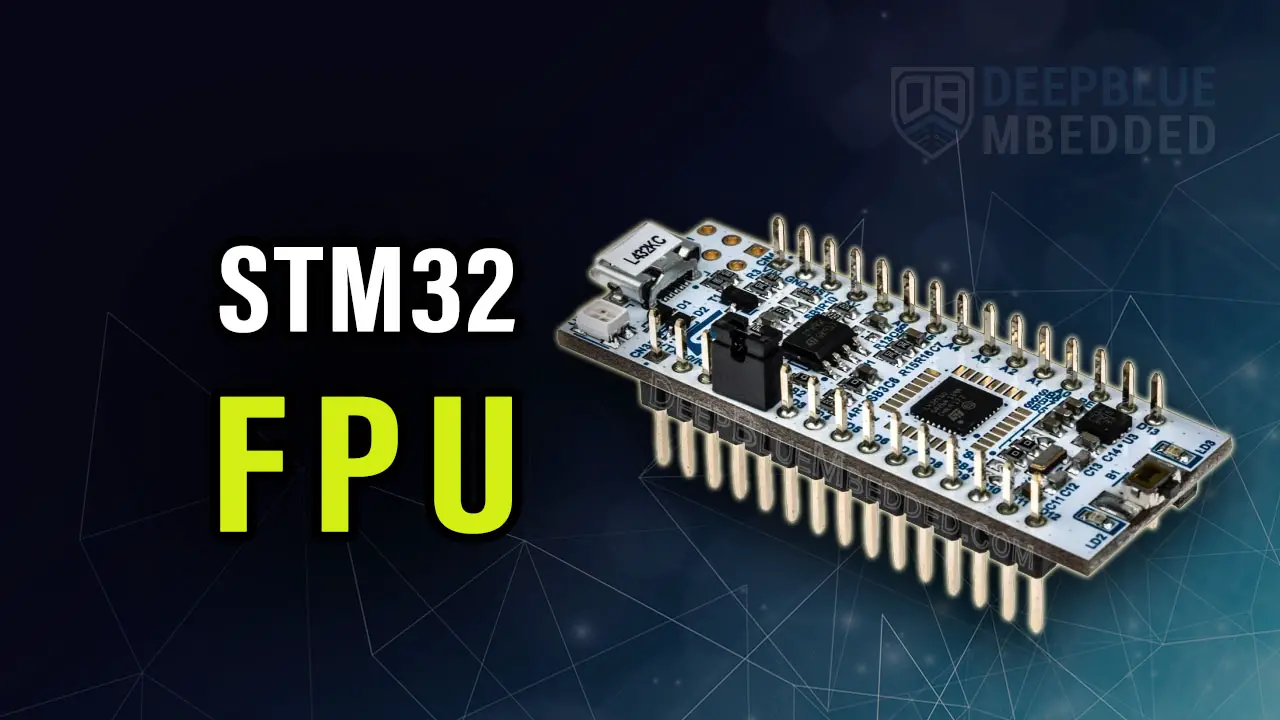
In this short article, we’ll explore How To Enable The STM32 FPU (Floating-Point Unit) and how much it affects the speed of executing floating-point arithmetic operations. We’ll also conduct a simple experiment to test the execution time reduction that we can get by using the STM32 FPU for floating-point operations.
Table of Contents
- STM32 FPU
- STM32 FPU Enable Floating-Point Unit (Steps)
- STM32 FPU Performance Test (Enable / Disable)
- Wrap Up
STM32 FPU
Some STM32 microcontrollers have an internal FPU (Floating-Point Unit) that can accelerate floating-point arithmetic operations by executing them in hardware instead of software emulation for these operations which takes a bit longer time compared to the hardware FPU performance.
Below is a table that summarizes which ARM Cortex-M cores support a hardware FPU with only single-precision (SP), double-precision (DP), or no FPU at all. By checking your STM32 microcontroller’s datasheet you can easily figure out which ARM Cortex-M core it has.
| No FPU | FPU (SP) | FPU (SP + DP) | |
| M0, M0+, M1, M3, M23 | * | ||
| M4, M33, M35P, M55 | * | ||
| M7 | * |
STM32 FPU Enable Floating-Point Unit (Steps)
There are only two steps required to enable the STM32 FPU given that your target STM32 microcontroller does actually have an internal hardware FPU unit. Those steps are as follows:
Step #1
Set The Compiler Flags To Use The Hardware FPU
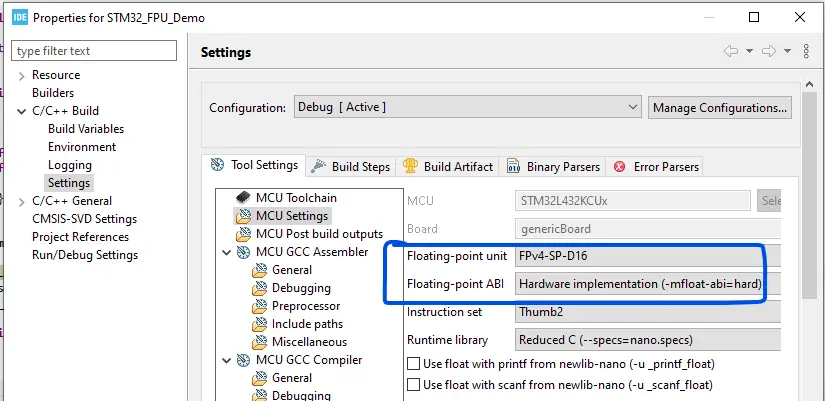
We need to set the compiler flags so it uses the hardware FPU unit for floating-point arithmetic operations instead of software-emulating them. This is done by default if you’re using the STM32CubeMX for generating your project, it’ll automatically detect if your selected STM32 microcontroller has an internal FPU unit and it’ll set it for you.
To double-check this, we can right-click the project name in the project navigator > select Properties > C/C++ Build > Settings > MCU Settings
And there you’ll find the following options enabled by default.
Step #2
Set The FPU Enable Bit in The CPACR Register
Next up, we need to enable the FPU by writing to the CPACR register (Coprocessor Access Control Register) which has a control bit to enable/disable the hardware FPU unit. This is also done by default if you’re using the STM32CubeMX to generate your project initialization code, you’ll find that it calls the HAL_Init() function at the beginning of the main() function.
By tracking the initialization sequence, you’ll find out that it also calls the SystemInit() function that looks like the one shown below.
|
1 2 3 4 5 6 7 8 9 |
void SystemInit(void) { ... /* FPU settings ------------------------------------------------------------*/ #if (__FPU_PRESENT == 1) && (__FPU_USED == 1) SCB->CPACR |= ((3UL << 20U)|(3UL << 22U)); /* set CP10 and CP11 Full Access */ #endif ... } |
And that’s all about it, now the FPU is enabled and any floating-point operations in your source code will be executed with the help of the FPU to accelerate the CPU’s performance in such calculations.
If you’re using the STM32CubeMX to generate your project initialization code files, you’ll probably be good to go and the FPU will be used by default in your floating-point operations without worrying about manually enabling the FPU.
STM32 FPU Performance Test (Enable / Disable)
To test the FPU performance and compare between having it enabled or disabled, I’ve created the following simple test setup. We’ll just create a new project for our STM32 hardware board (I’ve used Nucleo-L432KC) and enable a GPIO output pin.
The Application Code For This Test Example
|
1 2 3 4 5 6 7 8 9 10 11 12 13 14 15 16 17 18 19 20 21 22 23 24 25 26 27 28 29 30 31 32 33 34 |
/* * LAB Name: STM32L4 FPU Demo * Author: Khaled Magdy * For More Info Visit: www.DeepBlueMbedded.com */ #include "main.h" float Pi = 3.141592; void SystemClock_Config(void); static void MX_GPIO_Init(void); void PowerFunction(float val, int n) { float result = val; for(int i=0; i<n; i++){ result *= val; } } int main(void) { HAL_Init(); SystemClock_Config(); MX_GPIO_Init(); while (1) { HAL_GPIO_WritePin(GPIOB, GPIO_PIN_0, GPIO_PIN_SET); PowerFunction(Pi, 10); HAL_GPIO_WritePin(GPIOB, GPIO_PIN_0, GPIO_PIN_RESET); HAL_Delay(1); } } |
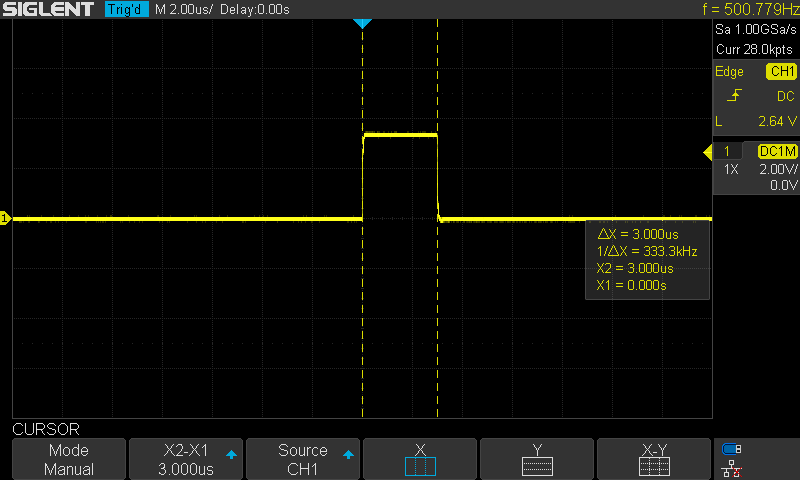
As stated earlier, the CubeMX HAL initializes the necessary hardware and enables the FPU by default. And the default compiler flags are also pointing to the hardware FPU instead of software emulation, so we’re good to go. Here is the measured execution time for the function above that does 10x floating-point multiplications.
Let’s now disable the FPU using the compiler flags as shown below.
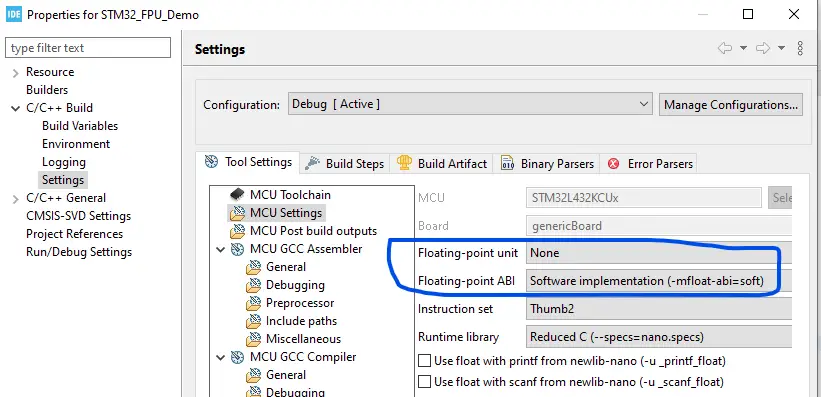
Here is what the execution time measured looks like.
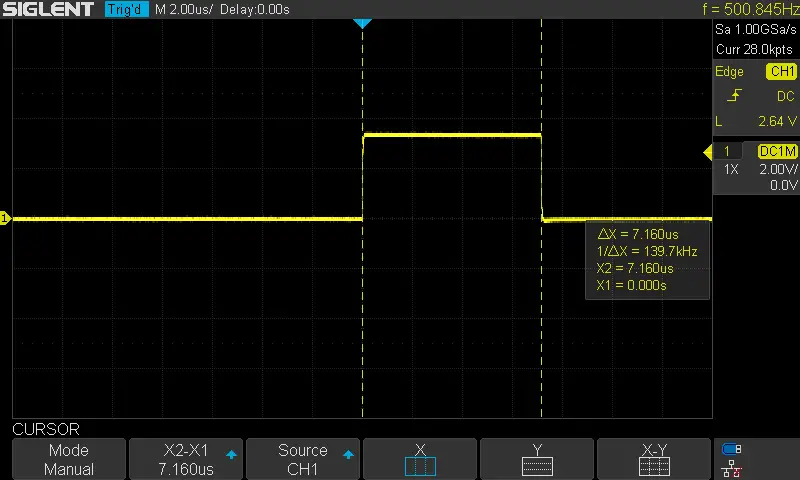
| FPU Enabled | FPU Disabled | |
| Execution Time Measured | 3µs | 7.16µs |
There is definitely a noticeable acceleration in the floating-point computations when having the STM32 FPU enabled.
Required Parts For STM32 Examples
All the example Code/LABs/Projects in this STM32 Series of Tutorials are done using the Dev boards & Electronic Parts Below:
| QTY. | Component Name | Amazon.com | AliExpress | eBay |
| 1 | STM32-F103 BluePill Board (ARM Cortex-M3 @ 72MHz) | Amazon | AliExpress | eBay |
| 1 | Nucleo-L432KC (ARM Cortex-M4 @ 80MHz) | Amazon | AliExpress | eBay |
| 1 | ST-Link V2 Debugger | Amazon | AliExpress | eBay |
| 2 | BreadBoard | Amazon | AliExpress | eBay |
| 1 | LEDs Kit | Amazon & Amazon | AliExpress | eBay |
| 1 | Resistors Kit | Amazon & Amazon | AliExpress | eBay |
| 1 | Capacitors Kit | Amazon & Amazon | AliExpress & AliExpress | eBay & eBay |
| 1 | Jumper Wires Pack | Amazon & Amazon | AliExpress & AliExpress | eBay & eBay |
| 1 | Push Buttons | Amazon & Amazon | AliExpress | eBay |
| 1 | Potentiometers | Amazon | AliExpress | eBay |
| 1 | Micro USB Cable | Amazon | AliExpress | eBay |
★ Check The Links Below For The Full Course Kit List & LAB Test Equipment Required For Debugging ★
Download Attachments
You can download all attachment files for this Article/Tutorial (project files, schematics, code, etc..) using the link below. Please consider supporting our work through the various support options listed in the link down below. Every small donation helps to keep this website up and running and ultimately supports the whole community.
Wrap Up
In conclusion, we’ve discussed how the STM32 FPU can be enabled & disabled and how it can accelerate the performance of the CPU by doing the floating-point arithmetic operations in hardware instead of being software-emulated. You should choose an STM32 microcontroller that has an internal hardware FPU if you’re planning to create a project that’s computationally intensive and requires a lot of floating-point operations.
If you’re just getting started with STM32, you need to check out the STM32 Getting Started Tutorial here.
Follow this STM32 Series of Tutorials to learn more about STM32 Microcontrollers Programming.
