| Previous Tutorial | Tutorial 2 | Next Tutorial | |||||
| Creating New Project With MPLAB | |||||||
| PIC Microcontrollers Course Home Page ???? | |||||||
The IDE which we’ll be using for embedded systems development with PIC MCUs is called MPLAB X IDE also a product from Microchip which is so powerful and versatile. However, it’s completely free to use and you can download a suitable version for your operating system from the link below.
In this tutorial, we’ll learn how to create a new project in MPLAB and how to add the basic code files. Just stick with me through the following steps.
1.
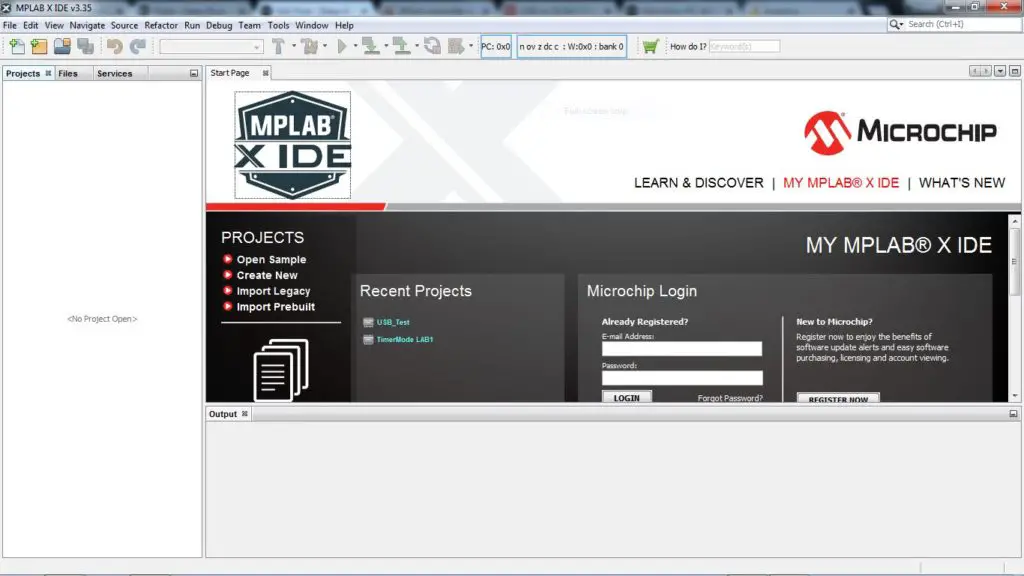
The first step is to run the MPLAB IDE.exe file on your desktop or whatever the installation path is.
2.
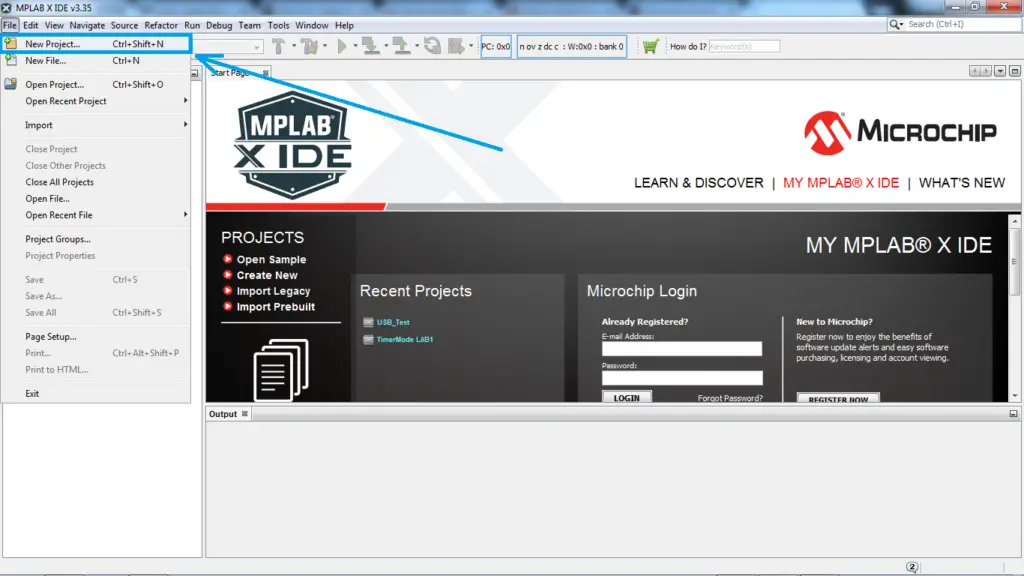
Head over to the File option in the menu bar at the top of the screen. And choose to create a new project.
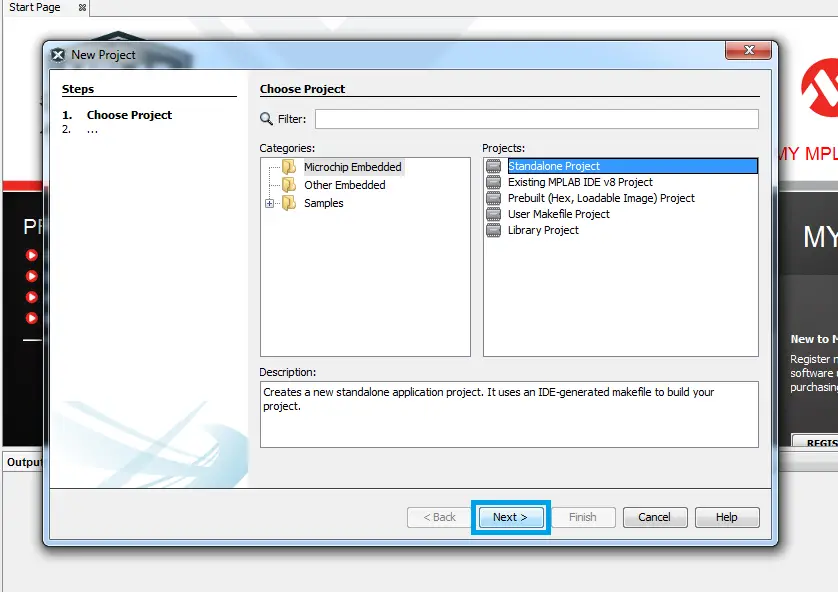
3.
Choose Embedded Standalone Project. Then Next.
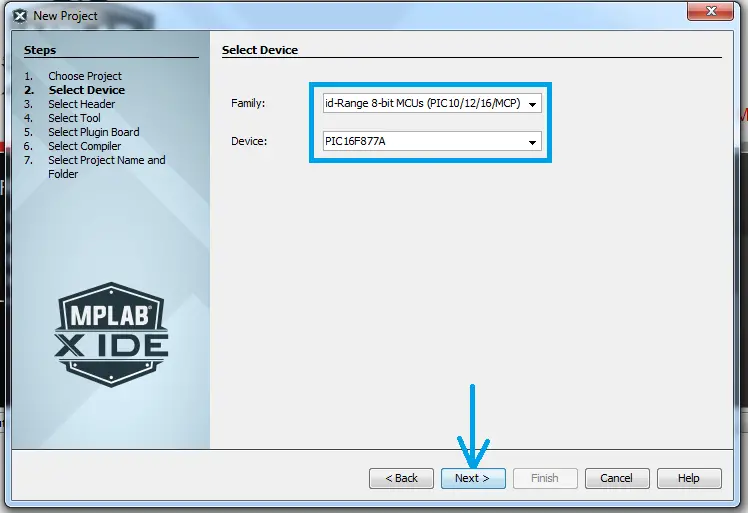
4.
Choose the family of the MCU which is 8-bit Mid-range. Then write the name of the chip in the box below which will be PIC16F877A. Then Next.
| Note | |||
|
Just remember this step in which you’ve chosen the specific chip which you’ll be working within your project. I’ll give a justification for doing that so try to remember it as possible. |
|||
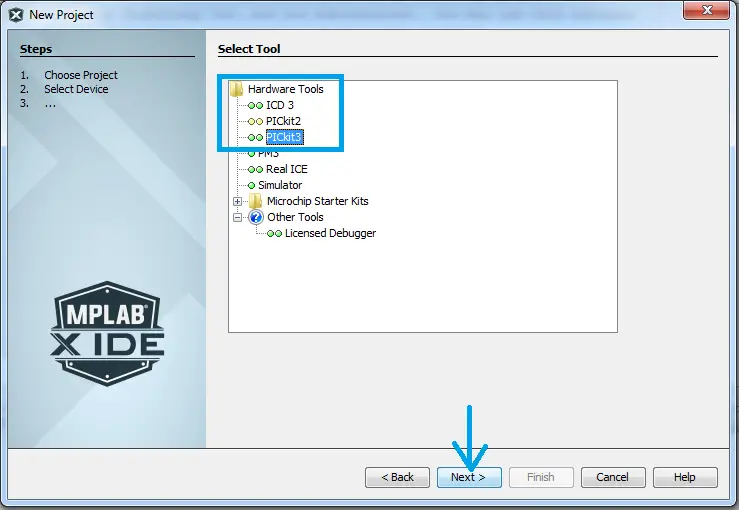
5.
Here you’ll choose the debugging hardware tool for your project. I’m using PICkit3 so I’ll choose that one. However, you can choose whatever you want as we’ll not use a hardware debugging tool in these tutorials. Pick any one then click Next.
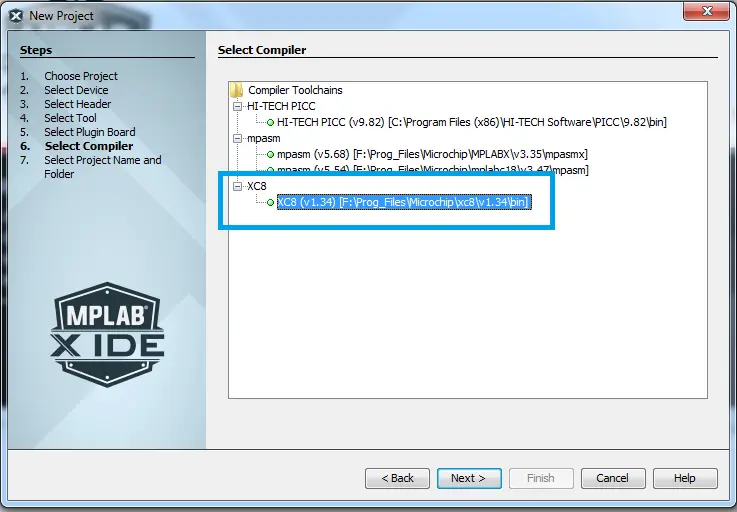
6.
Choose the compiler for your project. We’ll be using XC8 compiler for our projects. Then Next.
| Note | |||
|
At this step, some of you might not find compilers in the options window. Those guys have a specific problem which is installing XC8 before MPLAB IDE. The solution to this issue is to uninstall MPLAB & XC8 and reinstall them again in the right order. MPLAB first, then XC8 |
|||
7.
Choose the path to save your project into. And give your project a relevant name. In the future, you’ll need to reuse some of the code listings which you’ll be righting nowadays so do yourself a favor and give them relevant names.
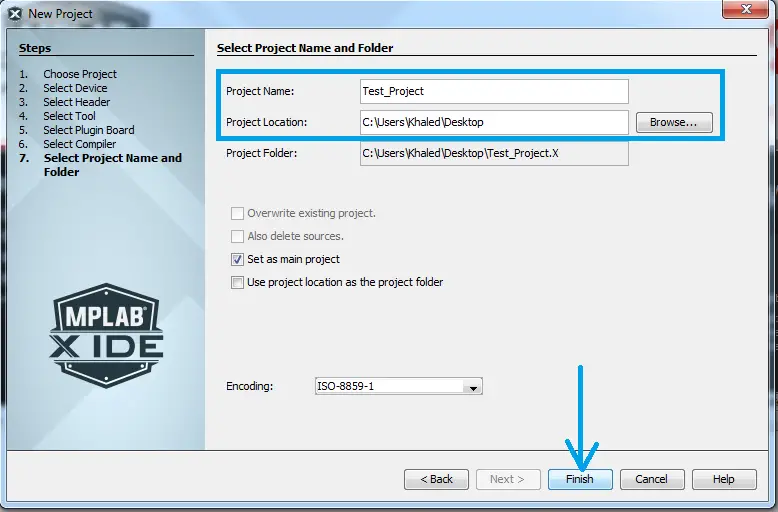
8.
Click Finish and you should see something like this screen down below.

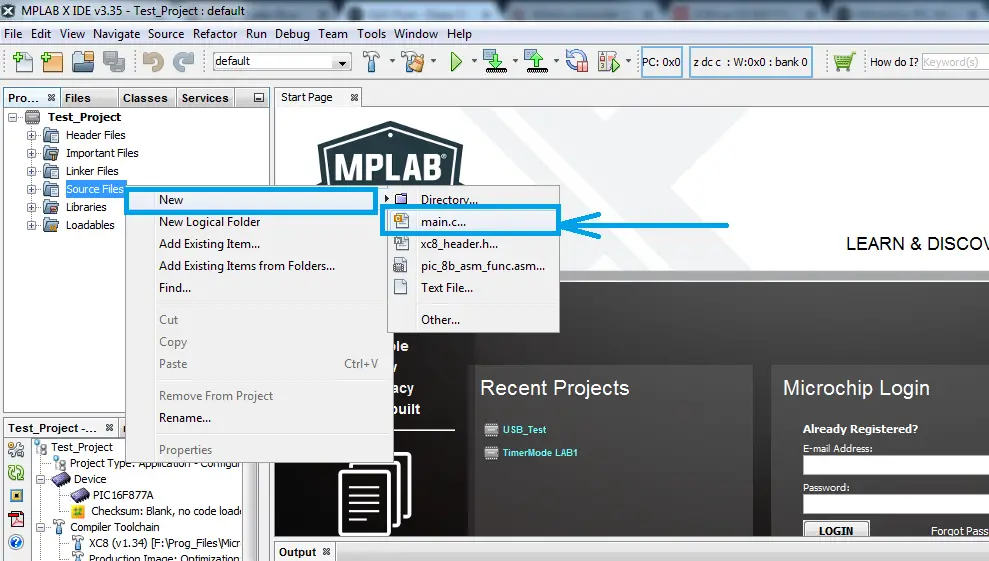
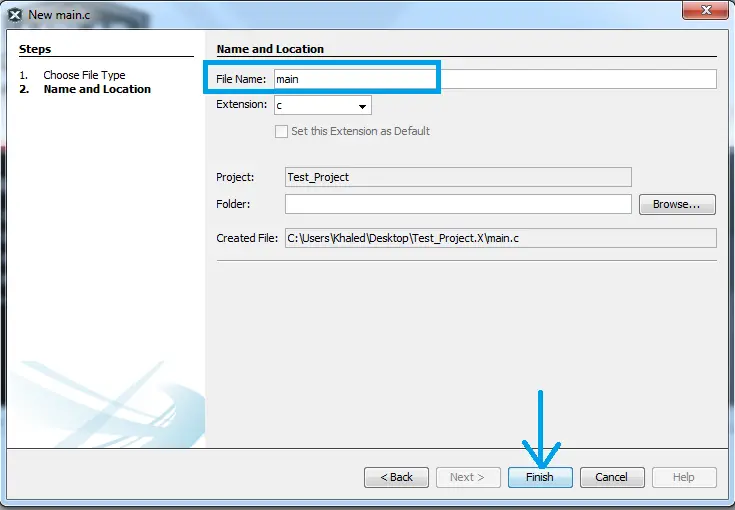
9.
Now, let’s create the file in which we’ll write our source C-Code. Right-Click on the source files and choose to create a new main.c file. And give it a relevant name. It’s usually named as main.c
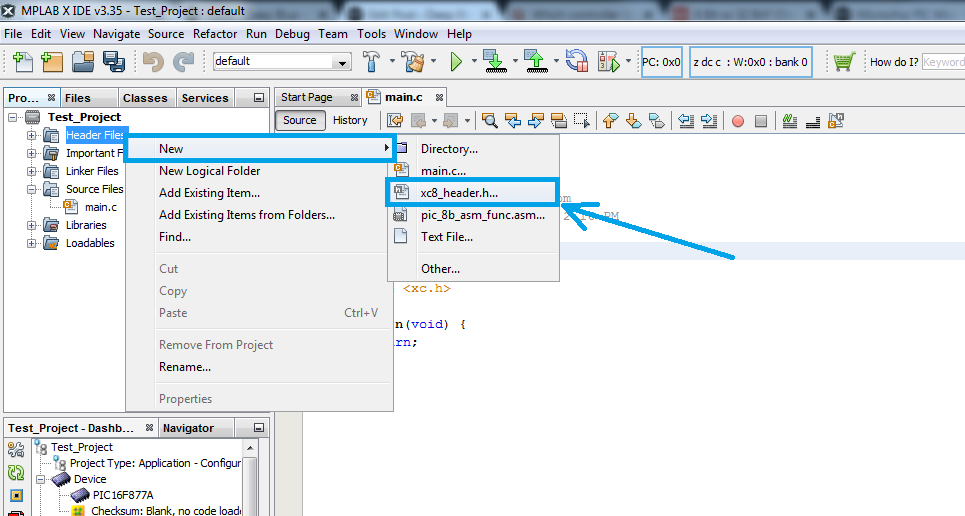
10.
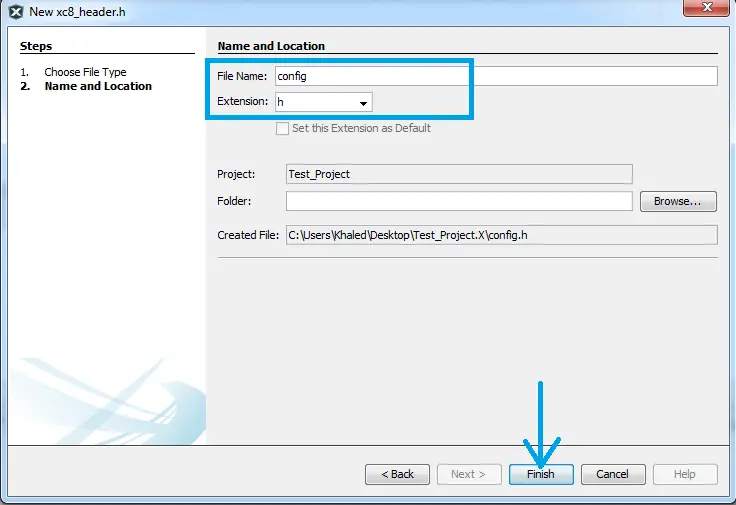
The last step is to create a header file that will contain our project’s configurations for the target PIC chip. The next tutorial will show you in detail what exactly the configuration bits are and how to properly set every single bit of them.
For now, we’ll just create the header file in preparation for the next tutorial in which we’ll learn what are and how to set the configuration bits.
Right-Click the header files and choose to create a header file for XC8. And also give it a relevant name. I usually name it as config.h which stands for the configurations file.
In the next tutorial, we’ll learn more about the configuration bits (Fuses), how they work? how important are they? how to properly set these bits? and how to use the GUI provided by MPLAB to programmatically set these bits!
| PIC Microcontrollers Course Home Page ???? |
|||||||
| Previous Tutorial | Tutorial 2 | Next Tutorial | |||||
xc file include