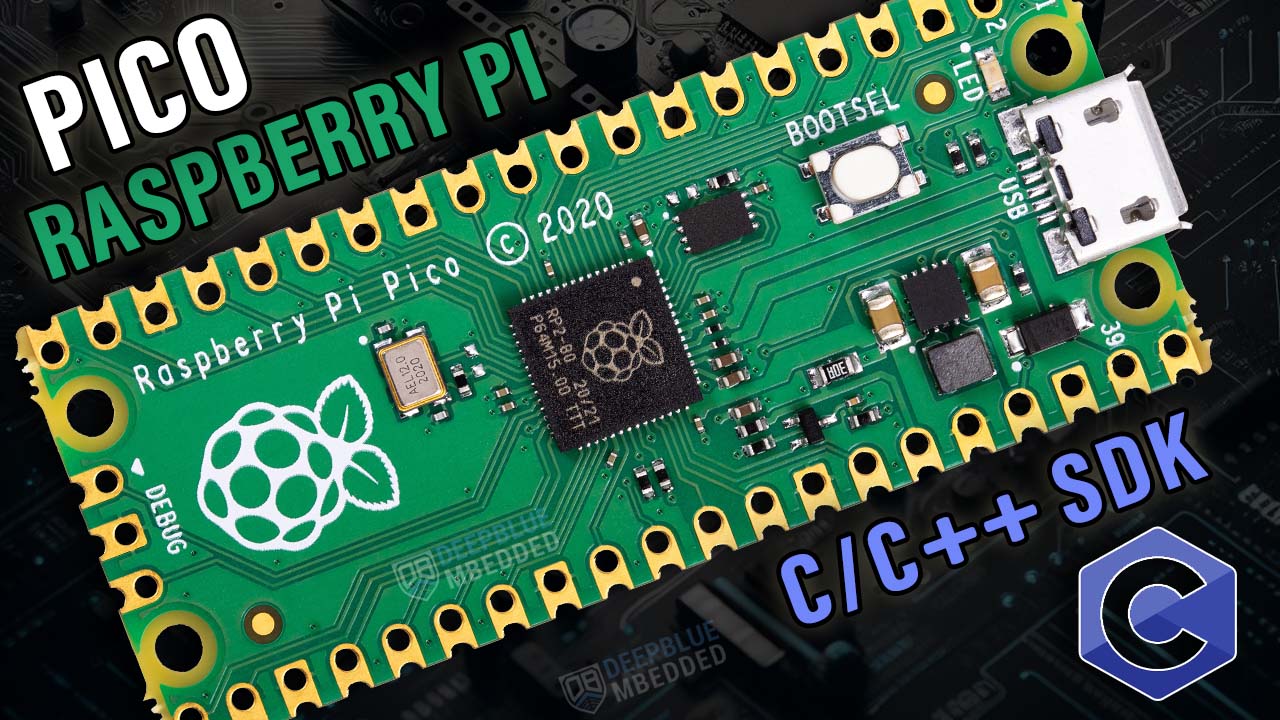
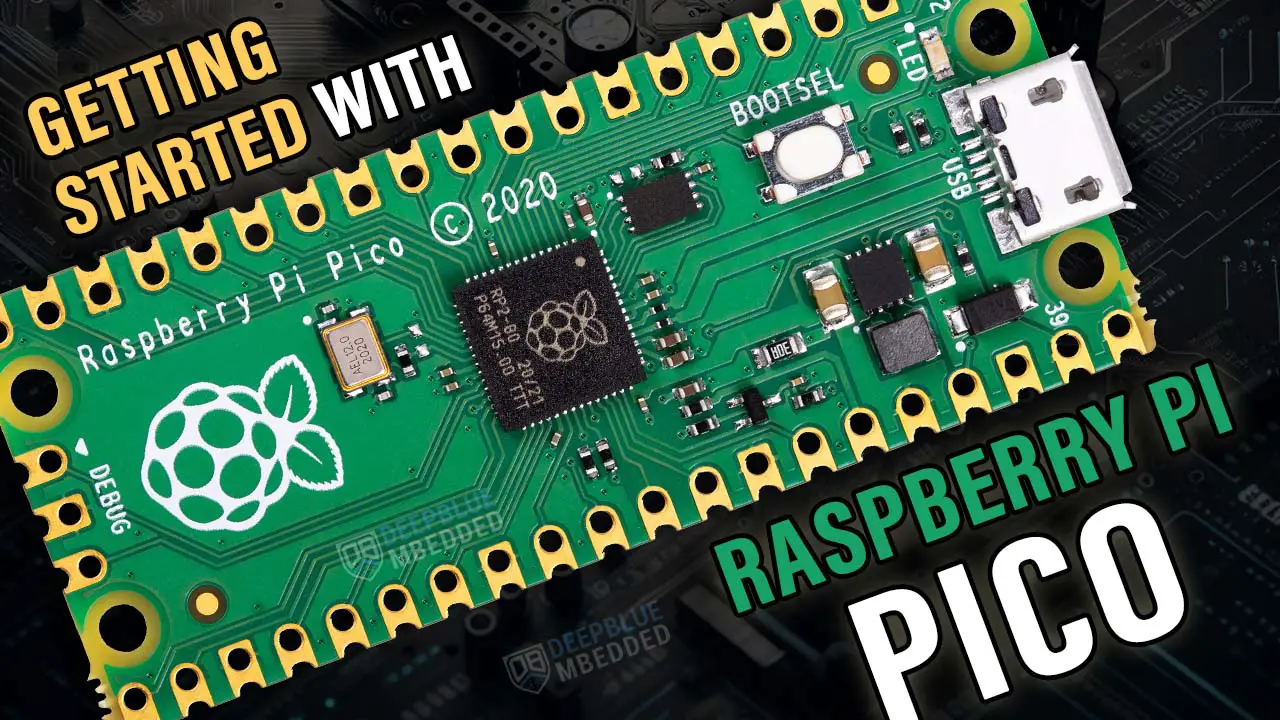
This tutorial is a Getting-Started Guide For The Raspberry Pi Pico C/C++ SDK Programming (And Pico W). The RP2040-based Raspberry Pi Pico boards can also be programmed using (Arduino C++, MicroPython, CircuitPython, and Rust). You can find navigation buttons on the left sidebar to go to the Raspberry Pi Pico tutorials series using the programming language you prefer.
In this tutorial, we’ll set up the Raspberry Pi Pico C/C++ SDK Toolchain to use VS Code as an IDE for the development of embedded projects with RP2040-based Pi Pico boards. Without further ado, let’s get right into it!
Table of Contents
- Raspberry Pi Pico C/C++ SDK Programming
- Installing Pi Pico C/C++ SDK Toolchain
- Flashing Firmware To Raspberry Pi Pico (C SDK)
- Standalone Raspberry Pi Pico C/C++ Project
- Raspberry Pi Pico C/C++ SDK LED Blinking Example
- Raspberry Pi Pico W C/C++ SDK LED Blinking Example
- Raspberry Pi Pico C/C++ SDK Project Simulation (Wokwi)
- Concluding Remarks
Raspberry Pi Pico C/C++ SDK Programming
As stated in the previous Getting Started With Raspberry Pi Pico (MicroPython) tutorial, the Pi Pico C/C++ SDK programming is the most conservative way of programming the RP2040-based microcontrollers. Embedded-C programming gives you the highest level of control over your embedded software behavior and performance.
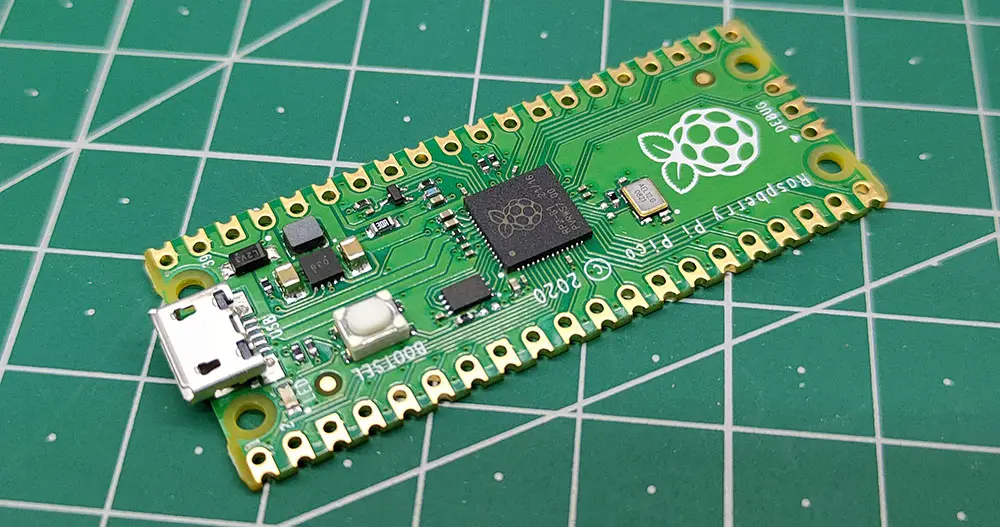
We can deterministically build reliable embedded systems using the C programming language as we’ve always been doing over the past decades. It’s still the standard way of developing such systems across multiple industries. Therefore, in this tutorial, we’ll prepare the required setup to develop and build C projects for the Raspberry Pi Pico RP2040 microcontroller.
RP2040 Hardware Architecture
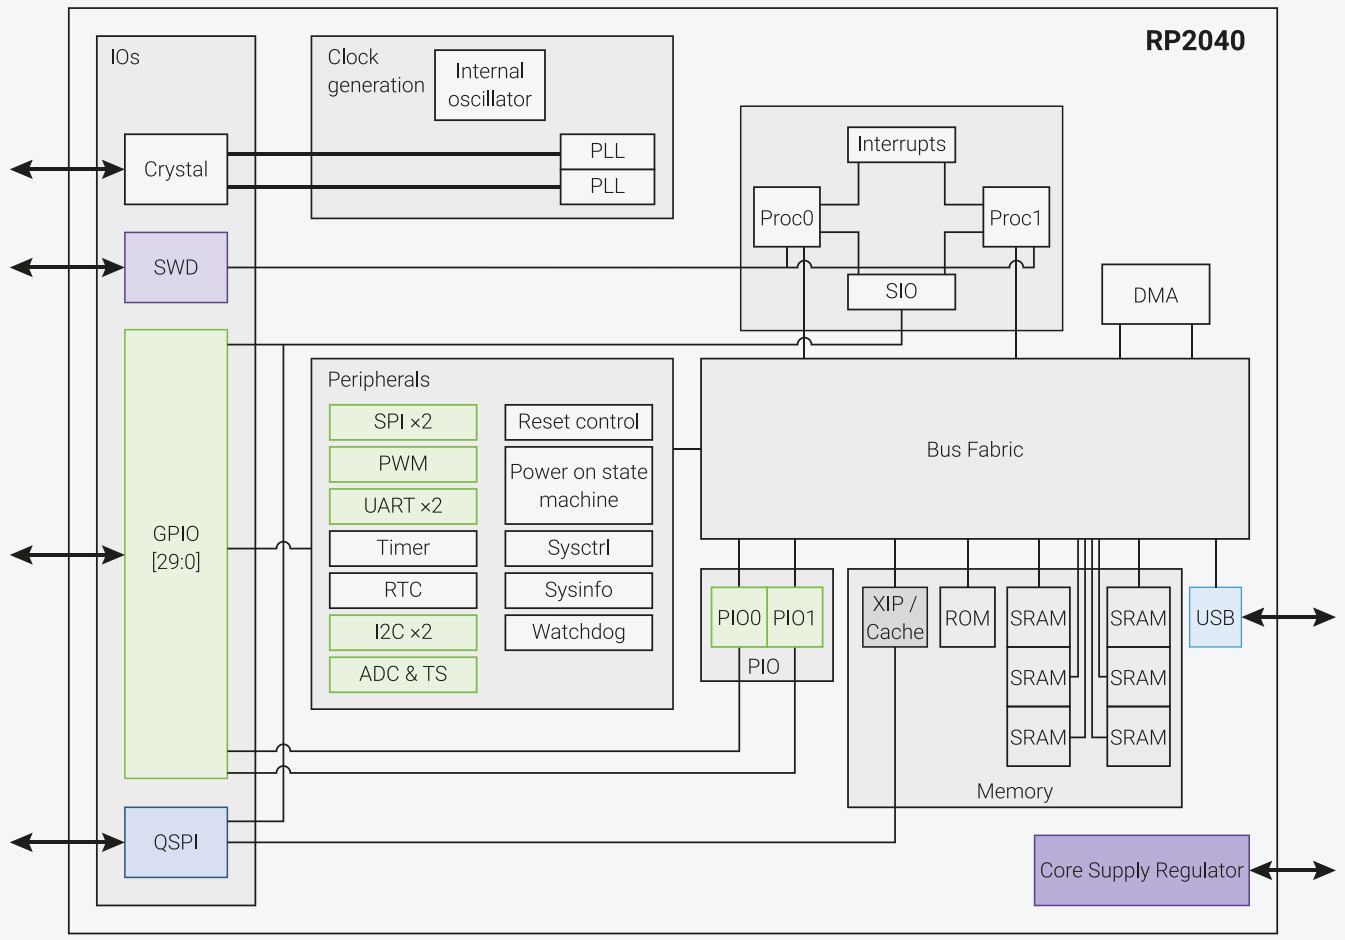
The RP2040 microcontroller, like most microcontrollers, has: internal RAM, ROM, GPIOs, Peripherals, and DMA. Additionally, it’s got dual-core ARM Cortex-M0+ processors and a PIO which is a very interesting feature that we’ll address in future tutorials. The diagram below shows you the internal architecture and interconnection of the RP2040 hardware.
What is an SDK? Why To Use Pico C/C++ SDK?
All the peripherals and hardware features that you’ve seen in the RP2040’s architecture diagram above are configured and controlled with special function registers (SFRs) in the microcontroller’s memory. You can refer to the RP2040’s datasheet for details of how each peripheral operates and which registers are responsible for which configuration or operation.
To build embedded applications using the RP2040, or any other microcontroller, we need to build a memory map for the hardware registers that define the address of each SFR register in the memory and give it a name that we can refer to in the code. This is, of course, a tedious process that we have to do unless the manufacturer provides their own SDK (Software Development Kit) that has, at least, memory-mapped low-level register definitions.
The Raspberry Pi Pico C/C++ SDK not only will give us low-level memory-mapped register definitions, but also all the necessary low-level drivers for most of the hardware peripherals in the microcontroller. It’s got also some other features as we’ll see in the next section.
Raspberry Pi Pico C/C++ SDK Overview
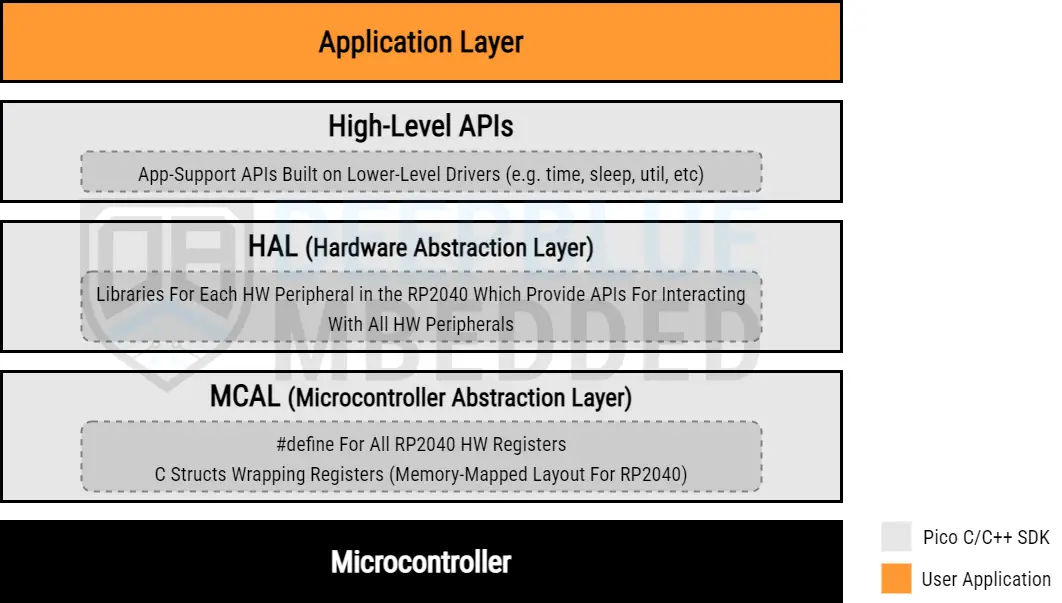
The Raspberry Pi Pico C/C++ SDK consists of multiple low-level device drivers and hardware abstraction drivers that are built on top of the low-level drivers. There are also a handful of high-level APIs that provide some services to support your target application (things like time, sleep, utilities, etc).
The Raspberry Pi Pico C/C++ SDK software architecture can be viewed as shown in the figure below. The Pico SDK will abstract the interfacing between the applications we’ll be developing in this series of tutorials and the target RP2040 microcontroller’s low-level hardware.
CMake & Pico C/C++ SDK Build Process
As of writing this tutorial, there is no “proper” IDE for developing embedded-C projects based on the RP2040 microcontroller. This means that we’ll have to install individual tools to create a convenient development environment and we’ll have to deal with compilers at a lower level and use things like CMake, compiler flags, build tools, etc.
The maker space has always been dominated by Arduino, AVR, PIC, STM32, and other mainstream microcontrollers. Each of which has an excellent development environment where IDEs handle all low-level stuff and no one has to deal with compiler flags, CMake, and such. Just don’t get frustrated by this matter and look at it as a chance to learn new things and get closer to the compiler and the C build process.
The Raspberry Pi Pico SDK uses CMake to manage project builds. Each project should have a file called CMakeLists.txt, which specifies the header files to which the project should link, any source files that it should include, and other configurations for the build process.
For each project we’ll create, we’ll use a CMakeLists.txt file template that will be modified to suit each project’s needs. We’ll demonstrate this more later on in this tutorial as we’ll create and build a project from scratch after installing the required toolchain.
CMake is an open-source cross-platform build system that provides a unified, platform-independent way to manage the build process for software projects. It allows developers to describe the build process using a simple scripting language (CMake language) and it generates native build files for various platforms and build environments.
Installing Pi Pico C/C++ SDK Toolchain
Now, we need to install the Raspberry Pi Pico C/C++ SDK toolchain to start developing our first embedded project for the RP2040 microcontroller. Here is a list of the software tools that we need to install:
- Arm GNU Toolchain
- CMake
- Ninja
- Python 3.9
- Git for Windows
- Visual Studio Code
- OpenOCD
These software tools include the ARM C compiler, CMake, build manager, VS code editor (we’ll use it as an IDE), and on-chip debugger (OpenOCD). Luckily, instead of downloading and setting up each tool independently, there is a community-contributed Windows installer that packs up all of the toolchain software tools into one file that you can download and it’ll automatically set up and configure everything for us.
A lot of users have so many complaints about the setup and configuration process for the Raspberry Pi Pico C/C++ SDK toolchain which can actually go wrong in many ways. So, please stick to the following setup step-by-step guide and let me know if you’re experiencing any issues.
Here is a step-by-step guide for downloading and installing everything you need to establish a Raspberry Pi Pico C/C++ SDK development environment on your PC (windows):
Step #1
First of all, we need to download the “Raspberry Pi Pico Windows Setup” file that includes all the Pico C SDK toolchain software tools. It’ll take a bit of time, so let it finish downloading and start installation once it’s complete.
You may need to completely disable your Windows Defender settings to be able to run the Pico Windows Setup installer exe file. It may also require you to disable the smart screen option on the security settings page.
The installation process is standard and it won’t require any input from your side it’ll also take some time, so let it finish. At the end, a CMD window will pop up prompting you to accept building all pi pico SDK example projects, say yes, and let it also complete building the examples.
Now, you’ve successfully installed the Raspberry Pi Pico C/C++ SDK toolchain. Open the start menu and look for the recently added software tools, you should find the following 3 shortcuts:
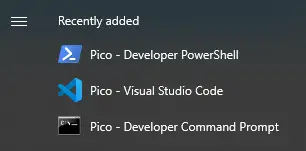
Make a shortcut/copy of the “Pico – Visual Studio Code” launcher as we’ll be using it for all projects thereafter. This launcher shortcut starts the VS code IDE with default settings for the Raspberry Pi Pico C/C++ SDK and configures the paths for CMake, GCC Compiler, etc. It’s important to have a copy of it on your desktop or wherever it seems convenient to you.
Step #2
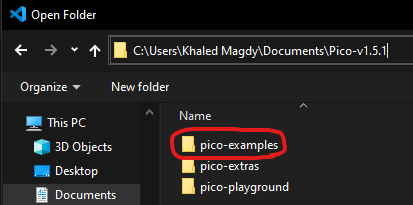
Open the “Pico – Visual Studio Code” shortcut launcher. Select File > Open Folder, and navigate to where you’ve installed the pico SDK examples.
Make sure you’ve selected the “Pico ARM GCC” compiler. You may need to click on the build button or it may automatically attempt building all the pico SDK example projects on its own. For me, selecting the compiler or just opening the “pico-examples” folder initiates the build process and it shows you the results in the OUTPUT window at the bottom of the VS Code IDE.
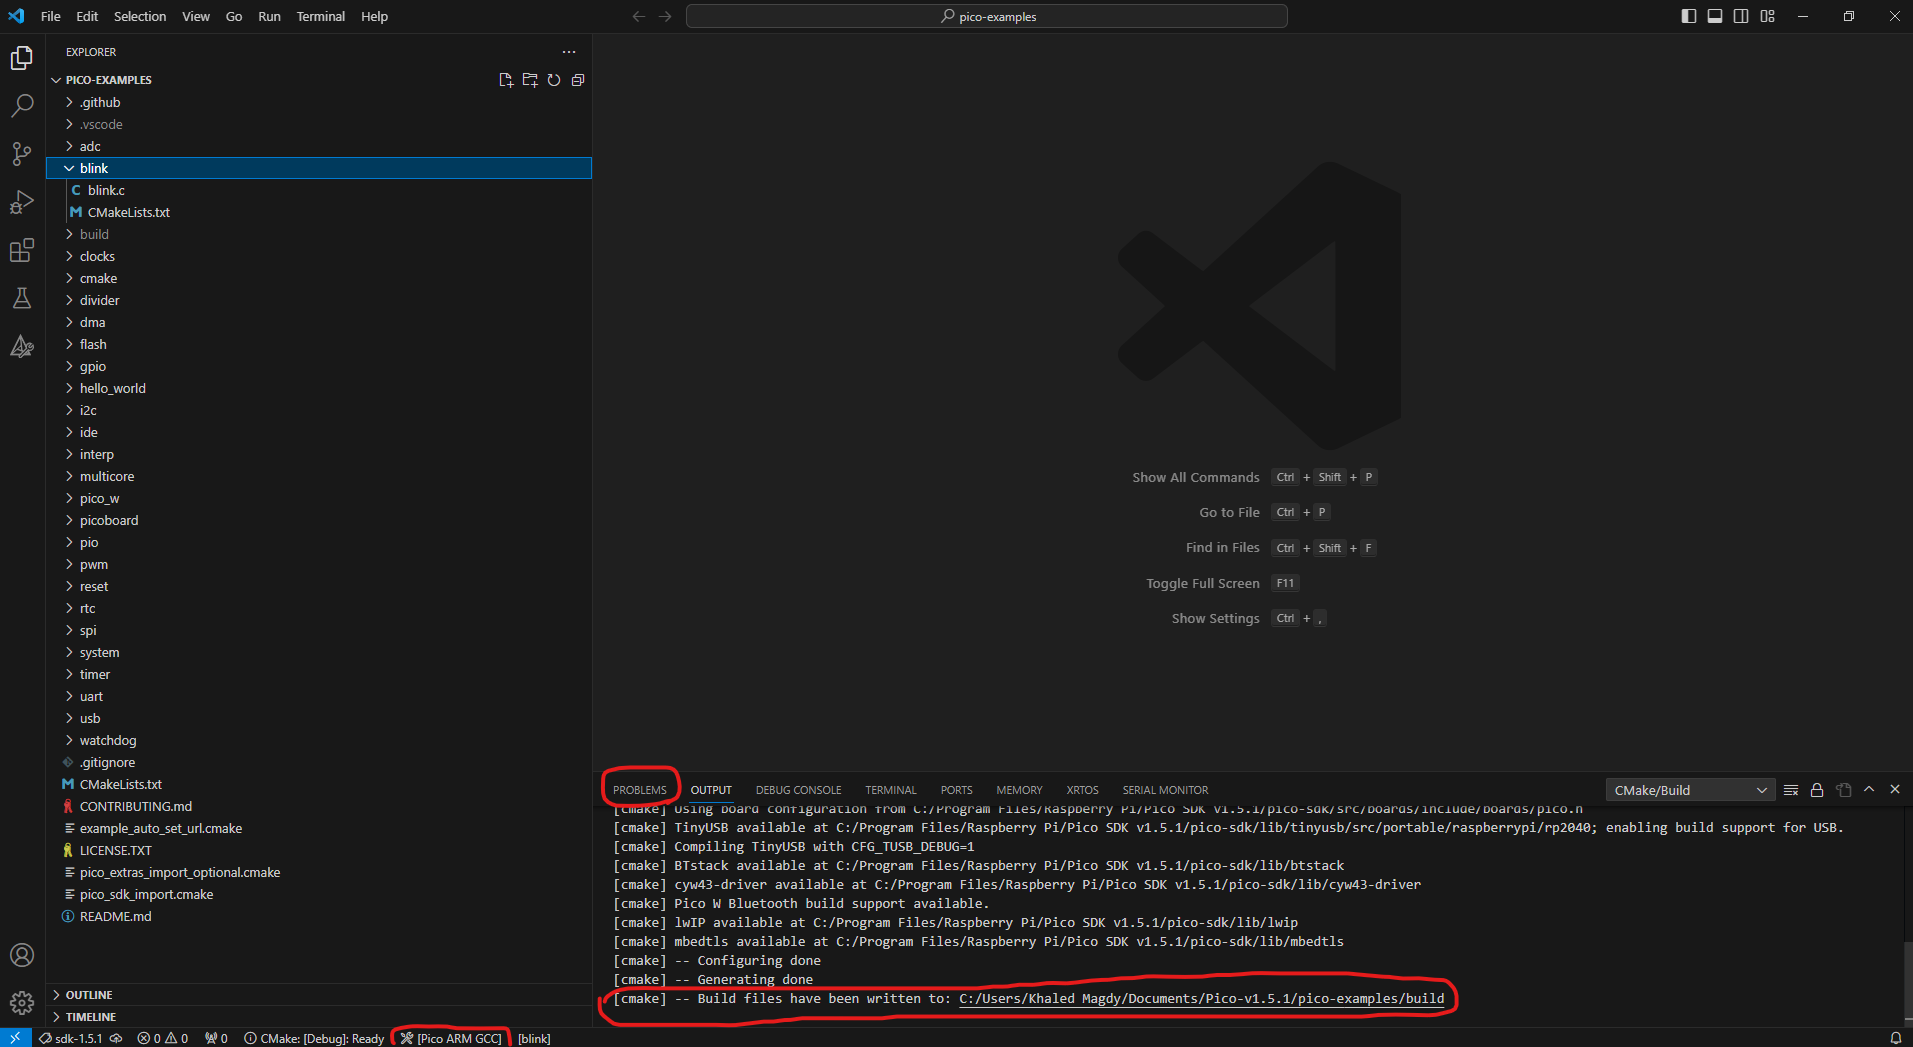
In the output window, it shows you where the build output files are stored. So you can navigate to that path and check the output files.
Step #3
Finally, we should verify that everything is working as expected by flashing the blink example UF2 file to the Raspberry Pi Pico board and make sure it works as expected. The next section illustrates the required steps to flash any firmware project output file to the Raspberry Pi Pico board.
Flashing Firmware To Raspberry Pi Pico (C SDK)
Here is a step-by-step guide for how to flash a new firmware project output binary file to the Raspberry Pi Pico (or Pico W) board.
Step #1
Hold the BOOTSEL button of the Raspberry Pi Pico board before connecting it to the USB port of your PC. While holding the BOOTSEL button, connect the Raspberry Pi Pico to your PC’s USB port.
It’ll boot in the bootloader mode and your PC will detect it as a USB storage device, so you’re now free to release the BOOTSEL button.
Step #2
It’s a matter of dragging and dropping the UF2 output file to the Raspberry Pi Pico USB drive. It’ll take a couple of seconds to load, then it’ll automatically reboot and start running the new firmware that we’ve flashed to the RP2040 microcontroller.
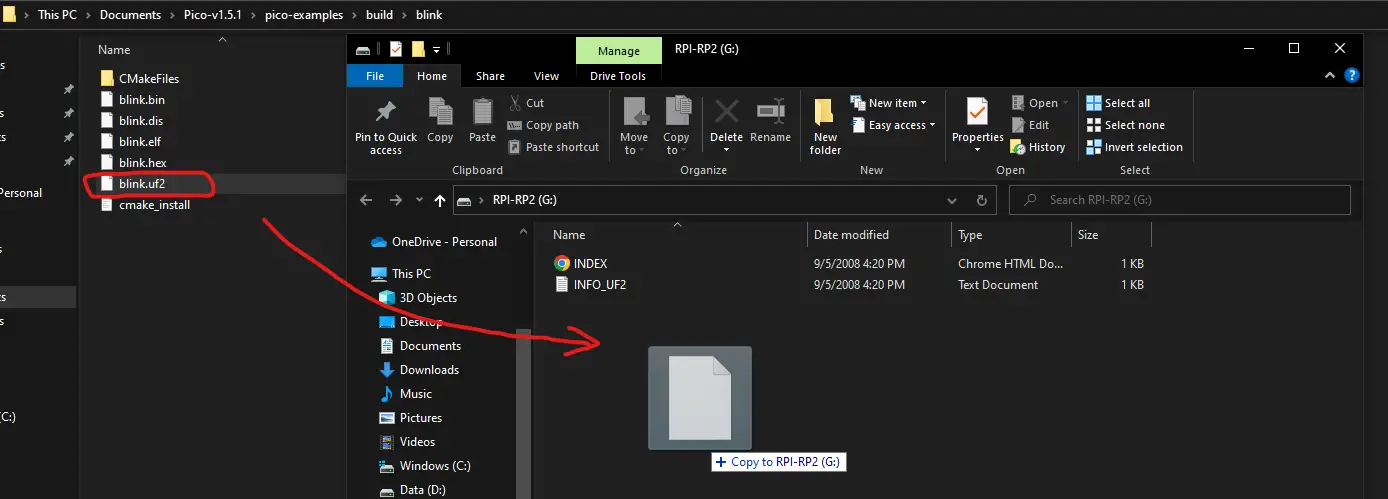
You should notice the onboard LED blinking with a 250ms of delay between every toggle event. This is the built-in Pico SDK blink example project.
Next, we’ll learn how to create a standalone Raspberry Pi Pico C/C++ SDK project from scratch, add the CMakeList file, build the project, and flash the output binary file to validate the whole process.
Standalone Raspberry Pi Pico C/C++ Project
Let’s now create our first standalone Raspberry Pi Pico C/C++ SDK project which will also be an LED blinking example with a 100ms delay between LED state toggle events. We’ll create the project from scratch in a manual way, however, there does exist a Raspberry Pi Pico SDK project generator software tool that automates this process. Which we’ll discuss and use in a future tutorial as well.
Step #1
Create the project folder LED_BLINK and a main.c source code file. This is the source code to paste into the main.c file.
|
1 2 3 4 5 6 7 8 9 10 11 12 13 14 15 16 |
#include "pico/stdlib.h" #define BUILTIN_LED PICO_DEFAULT_LED_PIN int main() { gpio_init(BUILTIN_LED); gpio_set_dir(BUILTIN_LED, GPIO_OUT); while (1) { gpio_put(BUILTIN_LED, 1); sleep_ms(100); gpio_put(BUILTIN_LED, 0); sleep_ms(100); } } |
Step #2
Create and add the CMakeLists.txt file to the project’s folder. This is the CMake code to paste into the CMakeLists.txt file.
|
1 2 3 4 5 6 7 |
cmake_minimum_required(VERSION 3.13) include(pico_sdk_import.cmake) project(LED_BLINK C CXX ASM) pico_sdk_init() add_executable(main main.c) pico_add_extra_outputs(main) target_link_libraries(main pico_stdlib) |
Step #3
Copy the file named ( pico_sdk_import.cmake ) CMake source file from the pico-sdk/external folder into your new project’s folder. The new project’s folder should now look like the one shown below.

Step #4
Open the “Pico – Visual Studio Code” shortcut launcher from the desktop of the start menu (recently added software). Select File > Open Folder. Navigate to where your new project’s folder is located and choose that folder.
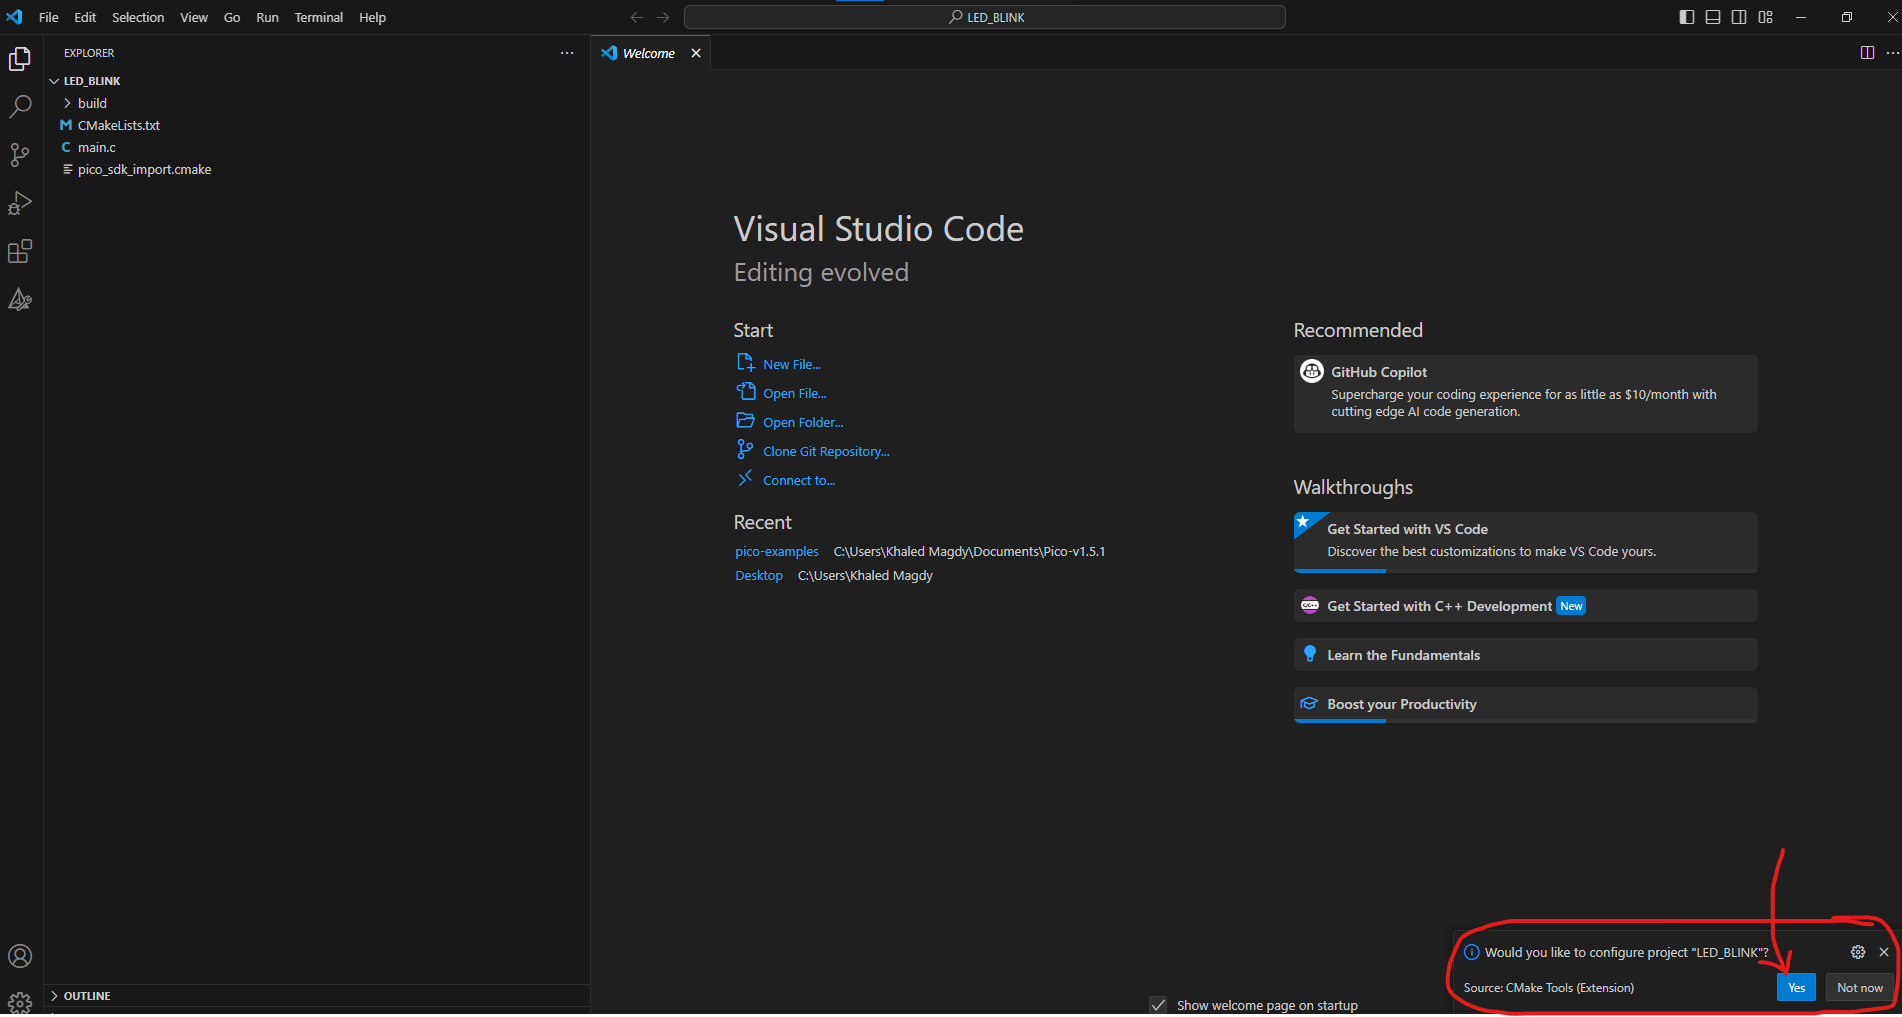
VS Code will prompt you at the bottom of the IDE’s window to configure the project’s folder for you, select ‘yes’, and let it do that for you.
Step #5
Finally, check the main.c file if you’d like to change the LED blinking delay or something. Start the build process using the build button or from the top menu select Terminal > Run Build Task. Wait tell completion and you should get an output message like the one shown below, it also shows you the path for the output files. Ideally, you should find everything in the build folder inside the project folder that we’ve created.

Step #6
Let’s now flash the new project firmware to the Raspberry Pi Pico board. Hold the BOOTSEL button of the Raspberry Pi Pico board before connecting it to the USB port of your PC. While holding the BOOTSEL button, connect the Raspberry Pi Pico to your PC’s USB port.
It’ll boot in the bootloader mode and your PC will detect it as a USB storage device, so you’re now free to release the BOOTSEL button.
Drag and drop the UF2 output file to the Raspberry Pi Pico USB drive. It’ll take a couple of seconds to load, then it’ll automatically reboot and start running the new firmware that we’ve flashed to the RP2040 microcontroller.
Raspberry Pi Pico C/C++ SDK LED Blinking Example
This is the Raspberry Pi Pico C/C++ SDK LED blinking example project that we’ve created in the previous section.
main.c (Raspberry Pi Pico)
|
1 2 3 4 5 6 7 8 9 10 11 12 13 14 15 |
/* * LAB Name: Raspberry Pi Pico Arduino IDE (Project Template) * Author: Khaled Magdy * For More Info Visit: www.DeepBlueMbedded.com */ void setup() { pinMode(LED_BUILTIN, OUTPUT); } void loop() { // Toggle onBoard LED digitalWrite(LED_BUILTIN, !digitalRead(LED_BUILTIN)); delay(100); } |
CMakeLists.txt (Raspberry Pi Pico)
|
1 2 3 4 5 6 7 |
cmake_minimum_required(VERSION 3.13) include(pico_sdk_import.cmake) project(LED_BLINK C CXX ASM) pico_sdk_init() add_executable(main main.c) pico_add_extra_outputs(main) target_link_libraries(main pico_stdlib) |
As you can easily tell, it sets the onboard LED pin as an output pin. And toggle its state every 100ms and keeps repeating forever.
If you’re using a Raspberry Pi Pico W board, you need to proceed to the next example project which shows you how to to replicate what we’ve done to fit the Raspberry Pi Pico W board.
This article will give more in-depth information about the Raspberry Pi Pico GPIO pins and their functionalities. And how to choose the suitable pins for whatever functionality you’re trying to achieve and know the fundamental limitations of the device with some workaround tips and tricks.
Raspberry Pi Pico W C/C++ SDK LED Blinking Example
This is a Raspberry Pi Pico W C/C++ SDK LED Blinking example project. You need to follow the exact same steps of project creation as the previous project for the Raspberry Pi Pico. The only difference is: the source code ( main.c) and the ( CMakeLists.txt) files.
main.c (Raspberry Pi Pico W)
|
1 2 3 4 5 6 7 8 9 10 11 12 13 14 15 16 17 18 19 20 21 22 |
/* * LAB Name: Raspberry Pi Pico W C/C++ SDK (Project Template) * Author: Khaled Magdy * For More Info Visit: www.DeepBlueMbedded.com */ #include "pico/stdlib.h" #include "pico/cyw43_arch.h" #define BUILTIN_LED CYW43_WL_GPIO_LED_PIN int main() { stdio_init_all(); if (cyw43_arch_init()) { return -1; } while (1) { cyw43_arch_gpio_put(BUILTIN_LED, 1); sleep_ms(100); cyw43_arch_gpio_put(BUILTIN_LED, 0); sleep_ms(100); } } |
CMakeLists.txt (Raspberry Pi Pico W)
|
1 2 3 4 5 6 7 8 |
cmake_minimum_required(VERSION 3.12) set(PICO_BOARD pico_w) include(pico_sdk_import.cmake) project(main C CXX ASM) pico_sdk_init() add_executable(main main.c) target_link_libraries(main pico_stdlib pico_cyw43_arch_none) pico_add_extra_outputs(main) |
The project’s download links are found near the end of this tutorial. In case you’d like to use them as a reference.
Raspberry Pi Pico C/C++ SDK Project Simulation (Wokwi)
As of writing this tutorial, there is only one Raspberry Pi Pico simulator that looks very promising: the online Wokwi simulator tool. There is a dedicated tutorial guide for “Raspberry Pi Pico project simulation” linked below in this section hereafter.
This is the simulation result for the previous Raspberry Pi Pico LED Blinking example project (C SDK) using Wokwi. You can find the Project Simulation files linked below, so you can save a copy of it into your Wokwi projects dashboard and play around with the simulator environment.
- (Raspberry Pi Pico) LED Blinking Project Simulation
- (Raspberry Pi Pico W) LED Blinking Project Simulation
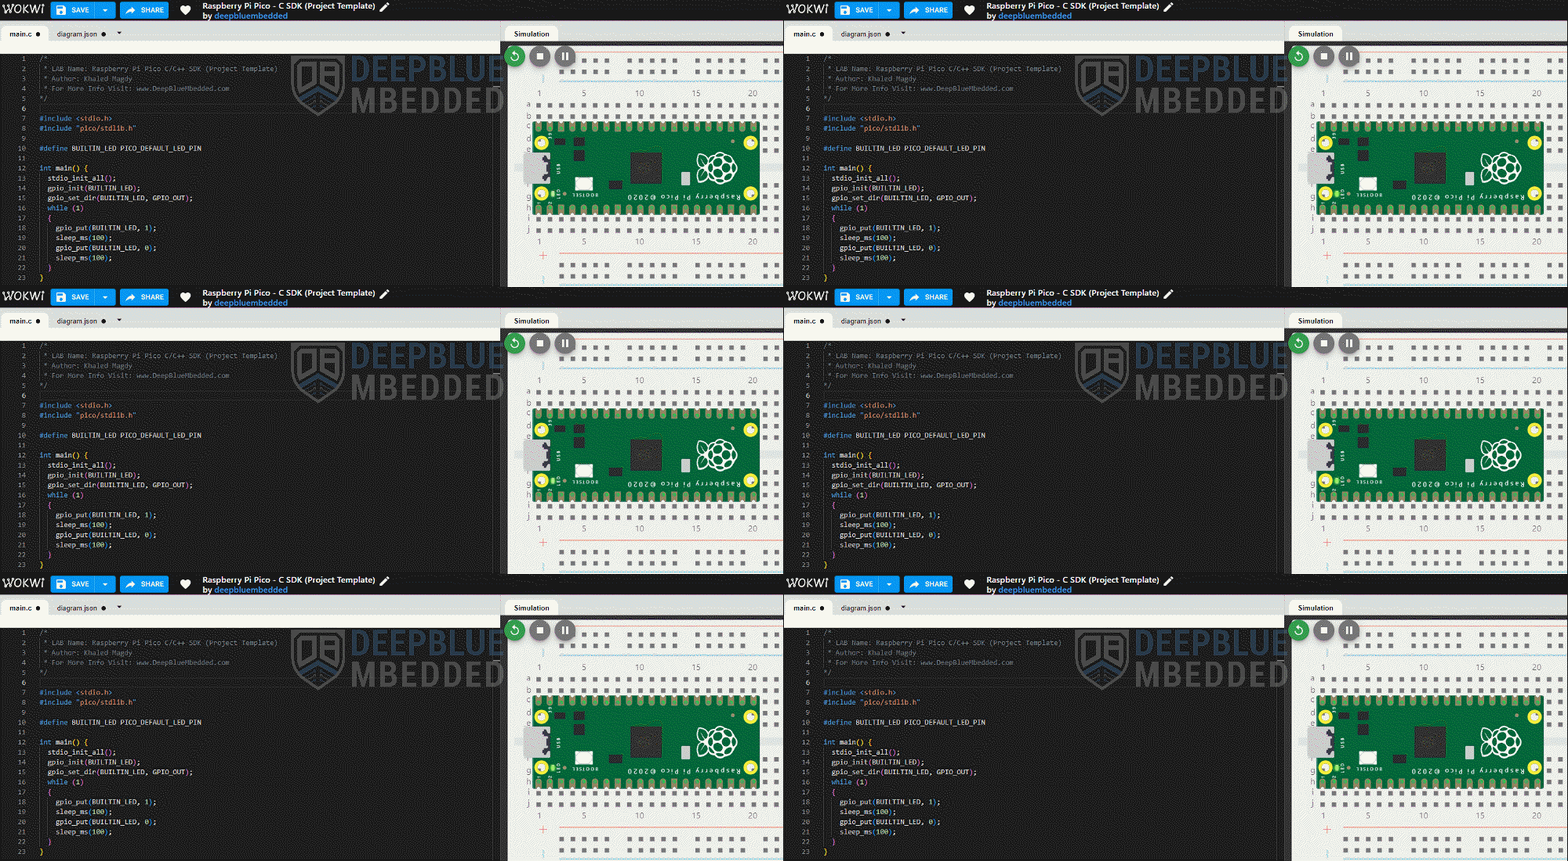
Simulating your Raspberry Pi Pico projects can be really helpful especially when you’re just getting started. This step is not mandatory at all, however, running your project in a simulator environment will help you catch and fix some logic errors in the code or in the circuit wiring connections.
The Wokwi simulation project linked above will be our template for all Raspberry Pi Pico Arduino IDE Tutorials, so you need to take a copy of it into your Wokwi account project dashboard.
This article will provide more in-depth information about simulating Raspberry Pi Pico projects using the online Wokwi simulator tool. You’ll learn how to simulate MicroPython, Arduino, and C SDK projects on Raspberry Pi Pico.
You can download all attachment files for this Article/Tutorial (project files, schematics, code, etc..) using the link below. Please consider supporting my work through the various support options listed in the link below. Every small donation helps to keep this website up and running and ultimately supports our community.
If you’re looking forward to playing around with the Raspberry Pi Pico board to test its capabilities and features, you may just need to get a single board. Just like this one here. However, if you’d like to follow along with the Raspberry Pi Pico series of tutorials published here on our website, you may consider getting the following items:
2x Pi Pico Boards, 2x Pi Pico W Boards, 4x BreadBoards, Resistors, LEDs, Buttons, Potentiometers, etc. The reason behind getting multiple boards is that we’ll be using one board as a PicoProbe debugger for SWD debugging activities. And at least 2x Pico W boards for IoT wireless applications.
The full kit list of the Raspberry Pi Pico series of tutorials is found at the link below, as well as some test equipment for debugging that you may consider getting for your home electronics LAB.
Concluding Remarks
To conclude this tutorial, we can only say that it’s only the first step in the RP2040-based Raspberry Pi Pico C Programming journey. The following tutorials in this series will help you get started with Raspberry Pi Pico programming and learn more topics with practical examples and step-by-step explanations.
Follow this Raspberry Pi Pico Series of Tutorials to learn more about Raspberry Pi Pico Programming in different programming languages’ environments.
If you’re just starting with Raspberry Pi Pico, you should check out the following getting-started guides with the programming language you favor the most. There are 4 variants of the Raspberry Pi Pico tutorials to match your needs and help you along the path that you’re going to choose.
