This tutorial is a getting-started guide for the Raspberry Pi Pico (And Pico W) boards using the MicroPython programming language. The RP2040-based Raspberry Pi Pico boards can also be programmed using (C/C++ SDK, Arduino C++, CircuitPython, and Rust). You can find navigation buttons on the left sidebar to go to the Raspberry Pi Pico tutorials series using the programming language you prefer.
In this tutorial, we’ll set up all the required software tools and get our Raspberry Pi Pico board ready to flash our first LED Blinking test code using MicroPython and Thonny IDE. Without further ado, let’s get right into it!
Table of Contents
- Introducing The Raspberry Pi Pico
- Raspberry Pi Pico Pinout
- Raspberry Pi Pico Peripherals’ Pins
- Raspberry Pi Pico Programming Languages
- Raspberry Pi Pico Setup (Ecosystem)
- Raspberry Pi Pico LED Blinking (MicroPython)
- Raspberry Pi Pico Simulation (Wokwi)
- Common Issues & Fixes
- Concluding Remarks
Introducing The Raspberry Pi Pico
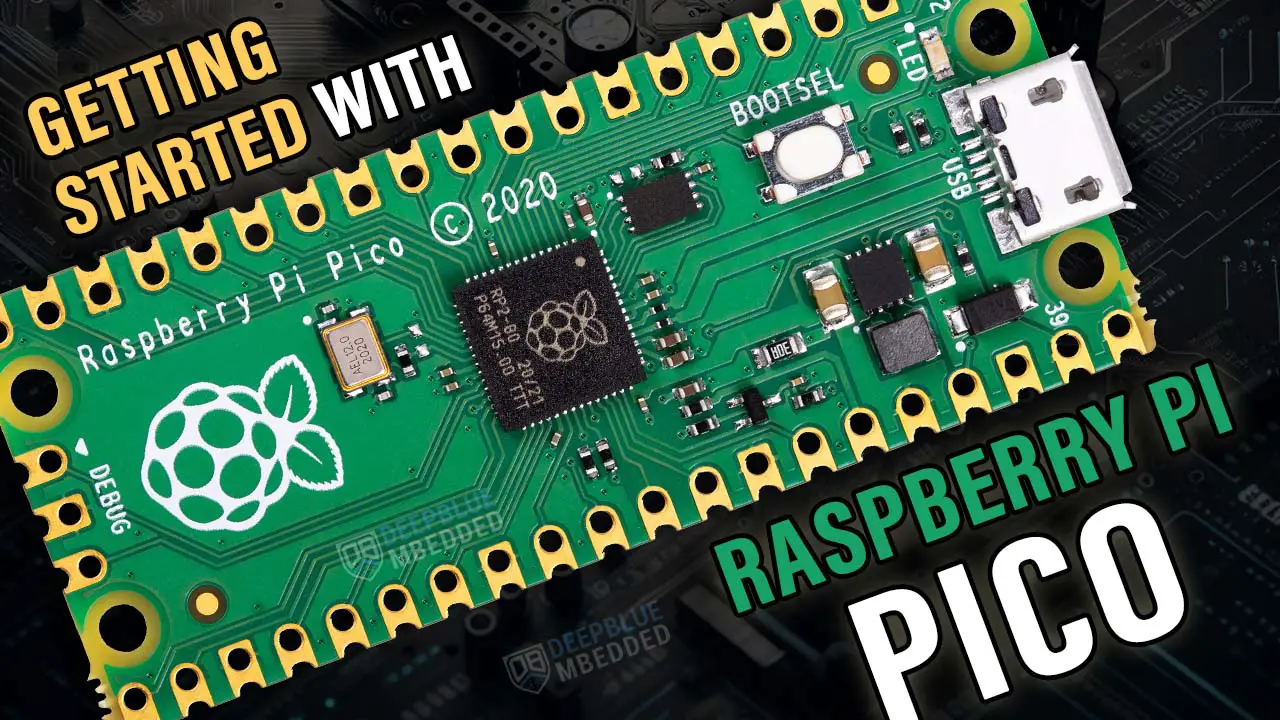
The Raspberry Pi Pico is a development board that’s based on the RP2040 chip from the Raspberry Pi Foundation. It’s a low-cost dual-core microcontroller chip that can be used in embedded systems applications just like Arduino but with a much more powerful processing power.
Unlike the Raspberry Pi SBC boards, the Raspberry Pi Pico is not intended to run a general-purpose operating system (Linux), it can only run small embedded OS (like FreeRTOS) if needed in your project. But generally, you’ll most likely run bare-metal embedded applications with timers & interrupts on that RP2040 chip.
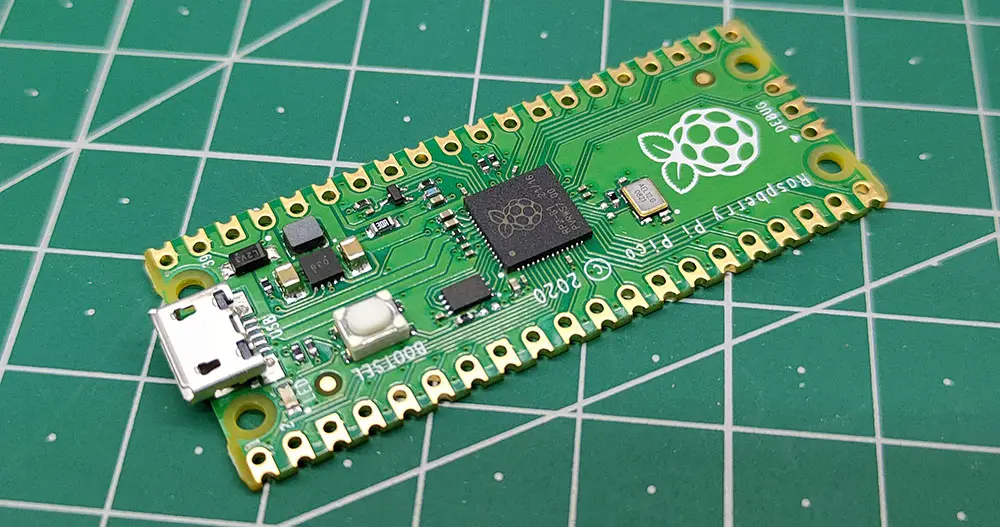
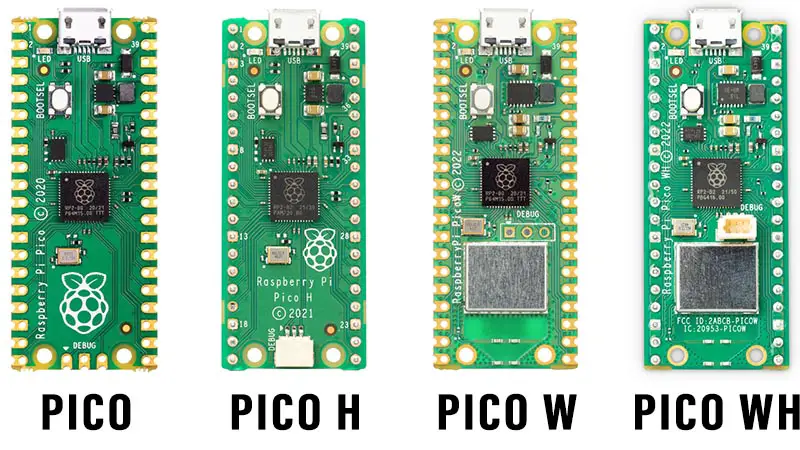
Raspberry Pi Pico & Raspberry Pi Pico W
There are two Raspberry Pi Pico boards that you can get depending on your project’s need for WiFi/Bluetooth connectivity:
- Raspberry Pi Pico: No WiFi/Bluetooth
- Raspberry Pi Pico W: Has WiFi & Bluetooth 5.2
Those two Raspberry Pi Pico boards can come to you with or without pin headers pre-soldered to the board. The version with a pin header soldered has an “H” letter in the name. The entire Raspberry Pi Pico boards family is shown below.
Raspberry Pi Pico Specs
The Raspberry Pi Pico Board Has The Following List of Features / Specs:
- Dual Core ARM Cortex-M0+ @ 133MHz
- 264kB on-chip SRAM Memory
- 2MB External QSPI Flash (Supports up to 16MB)
- 26 GPIO (+3.3V compatible)
- 3× 12-bit ADC pins (500ksps)
- 2x UART, 2x SPI, 2x I2C
- 16x PWM Channels
- 1x Timer (4x Alarms), 1x Real-Time Counter
- SWD Debugging Port
- USB 1.1 PHY (Device or Host)
- Internal Core Temperature Sensor
- 2 × Programmable IO (PIO) blocks, 8 state machines total
The Raspberry Pi Pico W board has all the previous features plus the following additional wireless connectivity features:
- On-board single-band 2.4GHz wireless interfaces: [ WiFi 802.11n + Bluetooth 5.2 ]
- Bluetooth Supports: BLE & Bluetooth Classic
Despite the fact that this article’s main focus is the Raspberry Pi Pico board, it is still however very useful for all other variations of RP2040-based development boards. Especially the Raspberry Pi Pico W.
Buying a Raspberry Pi Pico Kit
If you’re looking forward to playing around with the Raspberry Pi Pico board to test its capabilities and features, you may just need to get a single board. Just like this one here. However, if you’d like to follow along with the Raspberry Pi Pico series of tutorials published here on our website, you may consider getting the following items:
2x Pi Pico Boards, 2x Pi Pico W Boards, 4x BreadBoards, Resistors, LEDs, Buttons, Potentiometers, etc. The reason behind getting multiple boards is that we’ll be using one board as a PicoProbe debugger for SWD debugging activities. And at least 2x Pico W boards for IoT wireless applications.
The full kit list of the Raspberry Pi Pico series of tutorials is found at the link below, as well as some test equipment for debugging that you may consider getting for your home electronics LAB.
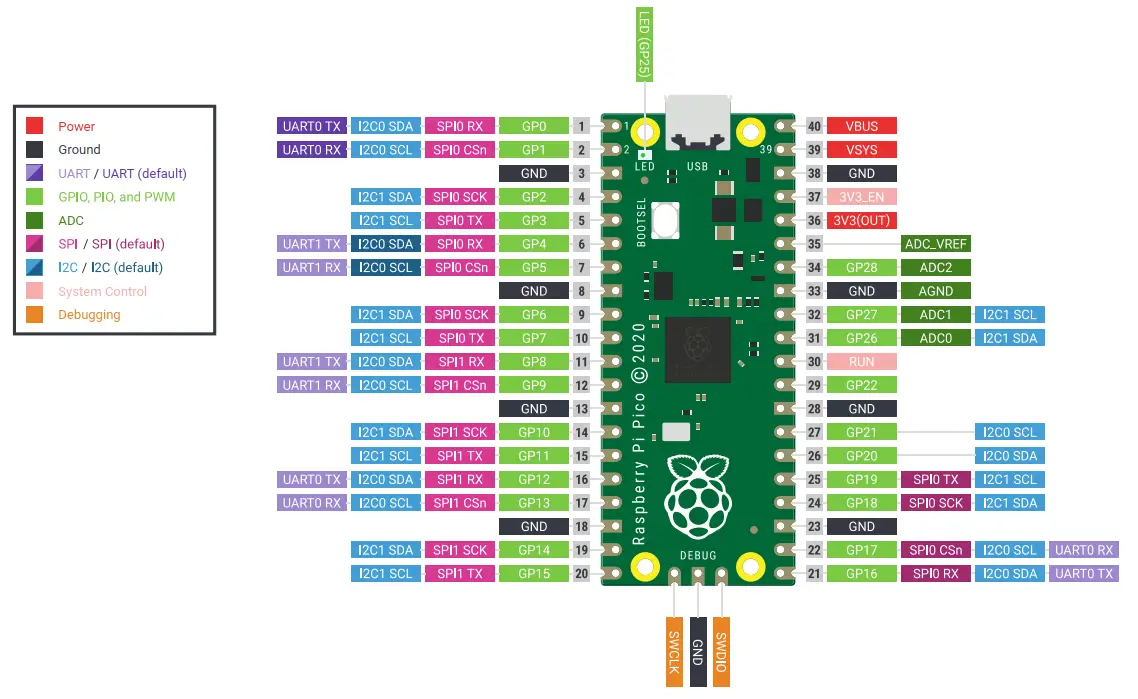
Raspberry Pi Pico Pinout
Here is a detailed Raspberry Pi Pico Pinout Diagram with colored labels and legends to help you easily identify the functionalities that each pin can perform. You can right-click and open it in a new tab to view the full-resolution image and/or download it to your computer for reference.
Raspberry Pi Pico Pinout Diagram
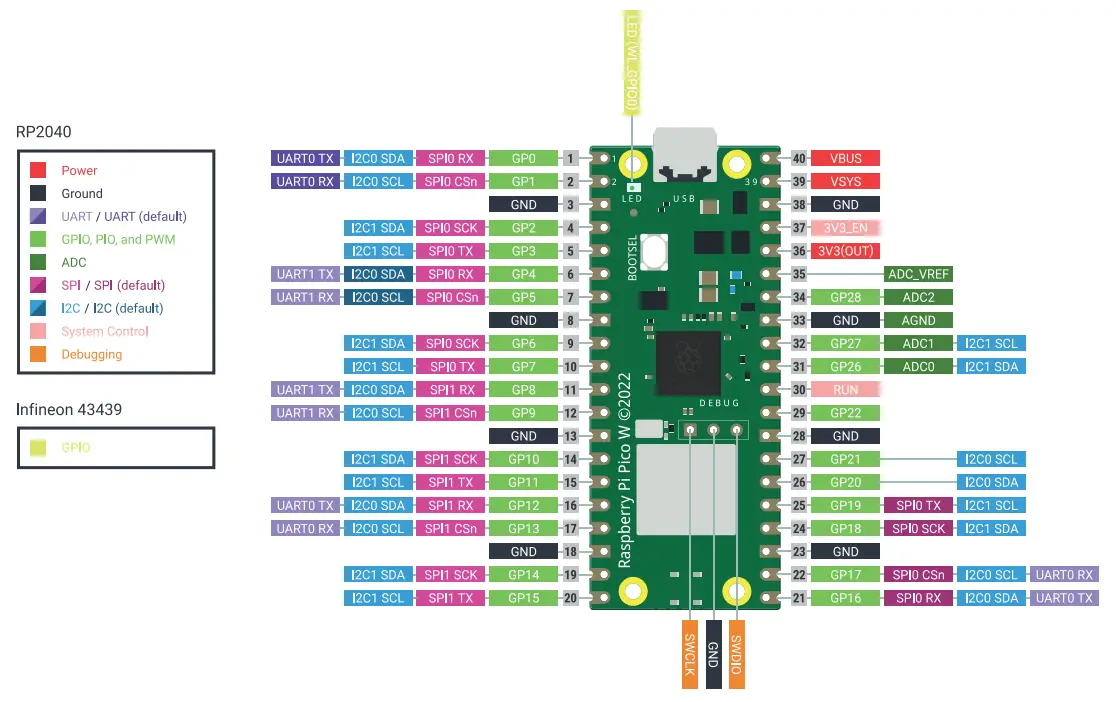
Raspberry Pi Pico W Pinout Diagram
Here is a detailed Raspberry Pi Pico W Pinout Diagram with colored labels and legends to help you easily identify the functionalities that each pin can perform. You can right-click and open it in a new tab to view the full-resolution image and/or download it to your computer for reference.
Raspberry Pi Pico Peripherals’ Pins
Only 26 pins of the 40 pins of the Raspberry Pi Pico board are GPIO pins that can be used for IO operations, the rest are for power and debugging purposes. The GPIO pins of the Raspberry Pi Pico provide the following functionalities depending on the hardware peripherals’ settings you’re using in your project:
- 26x Digital GPIO Pins
- 26x GPIO IRQ Interrupt Pins
- 16x PWM Channels
- 3x ADC Analog Input Pins
- 2x UART Pins
- 2x SPI Pins
- 2x I2C Pins
- SWD Debug Port
Note that the Raspberry Pi Pico GPIO pins are 3.3v logic level and they’re not 5v tolerant, unlike the Arduino GPIO pins. So you need to be careful when dealing with them. The following tutorial (linked below) is a great guide to help you use the Raspberry Pi Pico GPIO pins properly.
This article will give more in-depth information about the Raspberry Pi Pico GPIO pins and their functionalities. And how to choose the suitable pins for whatever functionality you’re trying to achieve and know the fundamental limitations of the device with some workaround tips and tricks.
Raspberry Pi Pico Programming Languages
What Programming Languages Are Supported By The Raspberry Pi Pico?
As of writing this tutorial, the Raspberry Pi Pico supports programming in the following languages: MicroPython, CircuitPython, Arduino C++, Embedded C/C++ (Pico SDK), and Rust. More programming languages are being added to the list as time goes on.
There is already support for Scratch programming to teach kids and beginners. However, the major options currently are the following 4 programming languages that are mostly used to program the Raspberry Pi Pico (RP2040-Based) boards.
|
C/C++ Pico SDK
|
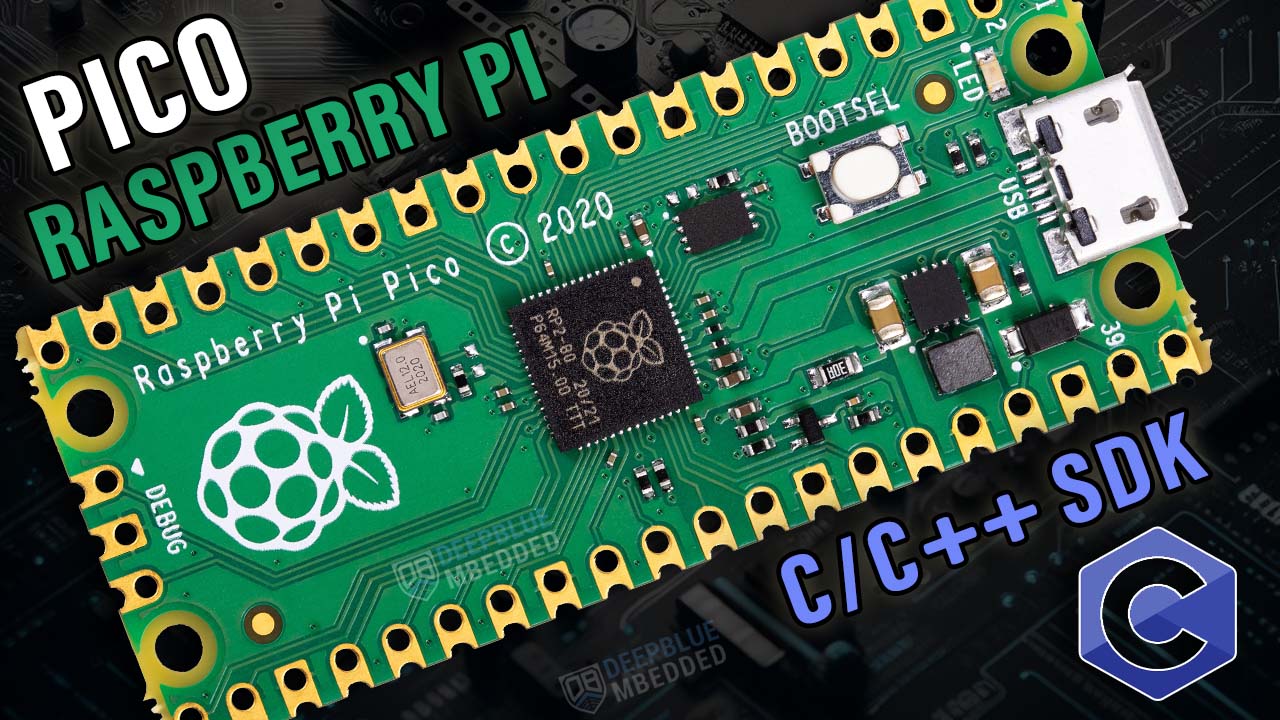
This is the most traditional (conservative) way of programming microcontrollers in the embedded systems industry. The Pico SDK C programming environment will give you some built-in low-level drivers to interface the RP2040 microcontroller’s peripherals (ADC, UART, SPI, etc..). You’ll ultimately have full control over your software that will definitely be running much faster and the code will be way less bloated compared to the other programming language options. |
|
Arduino C++
|
Programming the Raspberry Pi Pico using Arduino C++ is possible thanks to the community-maintained Arduino Core which is based on the Pico C SDK. This is the best option for all beginners as well as advanced makers who are already familiar with the Arduino environment. You’ll enjoy programming with the Arduino IDE and be able to use so many Arduino libraries that can accelerate your prototyping with the Pi Pico. The code will still run much faster and feel less bloated than MicroPython and other High-Level programming languages. |
|
MicroPython
|
This is a less conservative way of programming microcontrollers. It’s a special version of the Python programming language designed to operate on small microcontrollers and has gained a lot of traction over the years. Programming the Raspberry Pi Pico in MicroPython is much easier for beginners and there are so many examples that you can copy & tweak for a rapid prototyping experience. The code will definitely run slower than C/C++ programs but it’s not that big of a deal for a beginner who is just getting started and has some basic Python programming knowledge. |
|
CircuitPython
|
The CircuitPython is a fork of the MicroPython that was created by Adafruit. It’s the easiest programming experience you could think of thanks to the huge libraries list from Adafruit that includes nearly all sensors and modules that are commonly used in the makers’ space. Programming the Raspberry Pi Pico in CircuitPython is of course the easiest option among all and the code will run much slower than C/C++ but, again, this is the most beginner-friendly programming language option out there. |
In this tutorial, we’ll be using the MicroPython programming language to get started with Raspberry Pi Pico Programming.
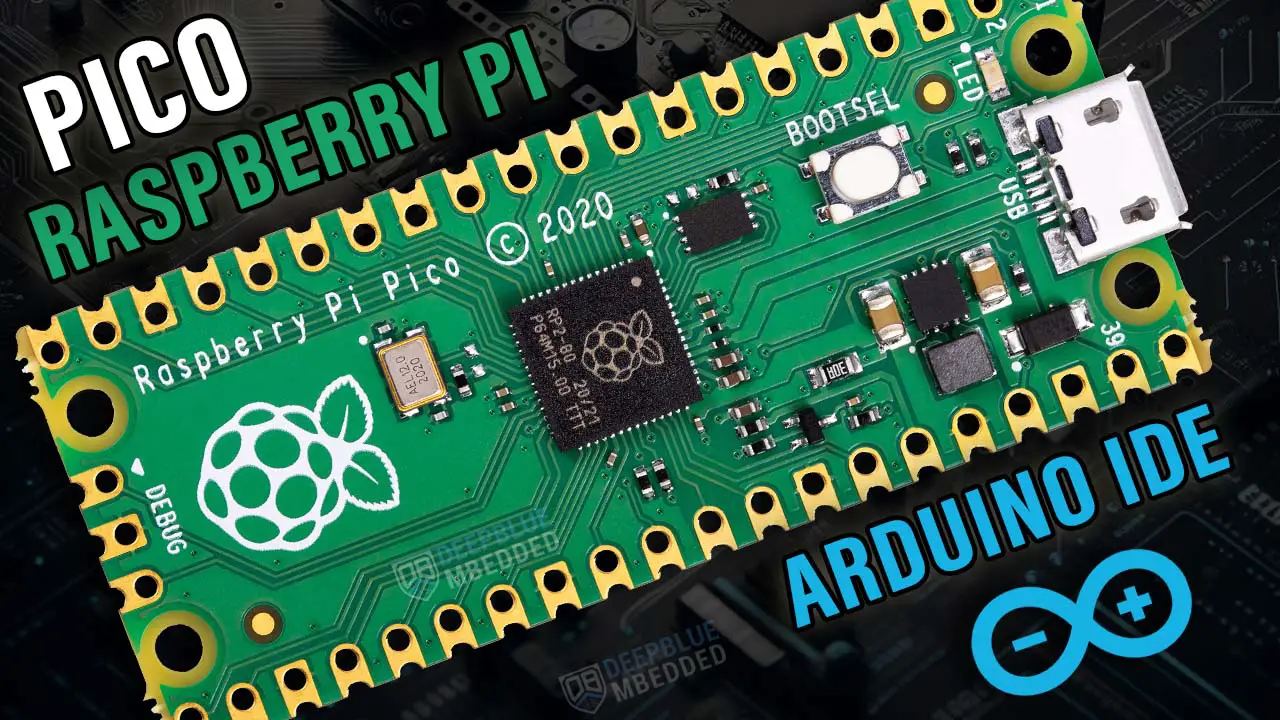
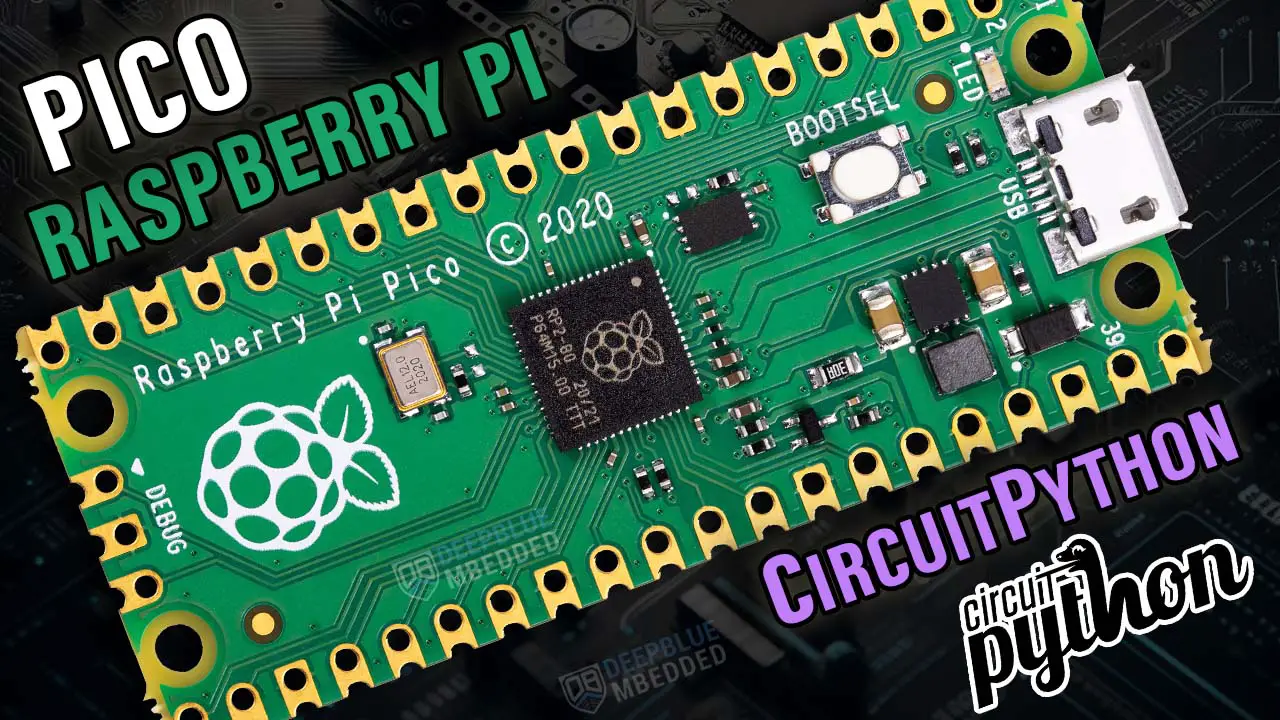
However, you can still use a different programming language. Below are 4x “how to get started guides” that will help you get started with Raspberry Pi Pico using your desired programming language. There is a dedicated series of tutorials for each programming language with the Raspberry Pi Pico that you may need to check out.
Raspberry Pi Pico Setup (Ecosystem)
To get started with the Raspberry Pi Pico using MicroPython programming language, we’ll need the following:
- Hardware: Raspberry Pi Pico (or Pico W) Board + Micro USB Cable
- Software: Install Thonny IDE (MicroPython Development Environment)
- Firmware: Flash The MicroPython Firmware to the Raspberry Pi Pico
By doing the previous steps, you’ll be able to write Python scripts and execute them (in interpreter mode) on the Raspberry Pi Pico or flash the script to the Pi Pico board so it becomes permanently stored in the microcontroller’s memory.
1. Installing Thonny IDE
The IDE we’ll be using to program the Raspberry Pi Pico With MicroPython is Thonny IDE, which you can download here on Thonny.org.
Download the version that suits your operating system and go through the installation steps with all default settings.
2. Flashing The MicroPython Firmware To Raspberry Pi Pico
Now, we need to flash the MicroPython firmware to the Raspberry Pi Pico (or Pico W) board. To do this, follow the steps below:
Step #1
Hold the BOOTSEL button on the Raspberry Pi Pico board. Then, connect the board to the USB port of your PC. This step is required to operate the microcontroller in the bootloader mode to be ready for firmware flashing. After connecting the board to the USB port, you can release the BOOTSEL button.
Note: a new window will open when the USB is connected to your PC, you can just ignore or close it.
Step #2
Open Thonny IDE
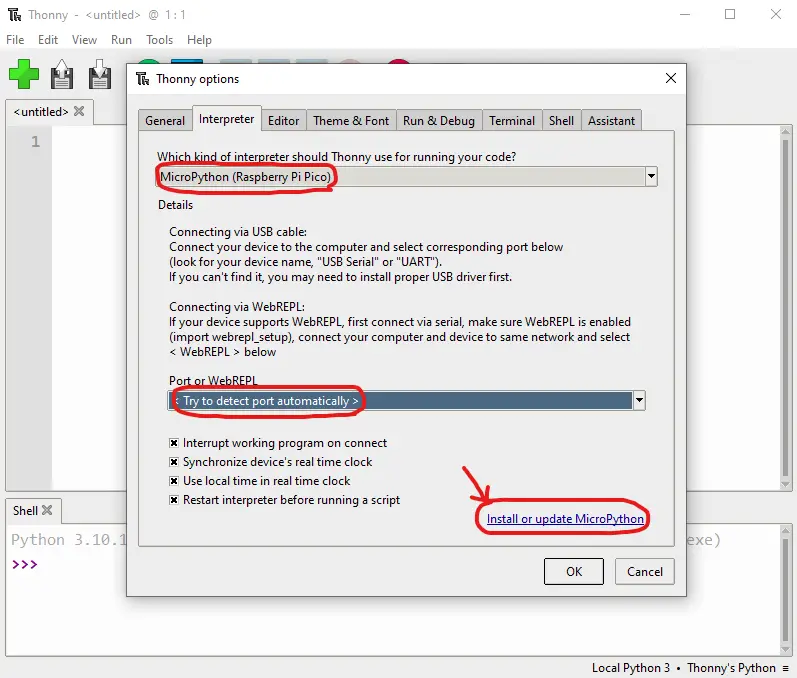
From the menu toolbar select: File > Options > Interpreter tab
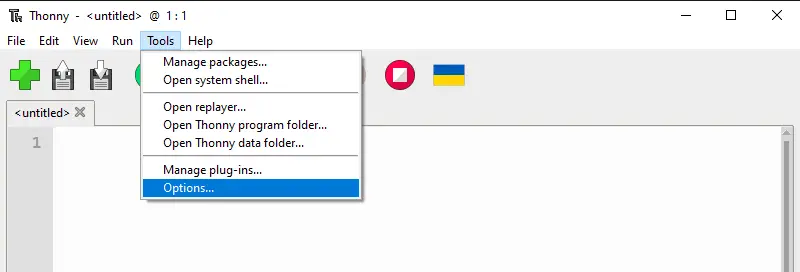
Then, select the following options: MicroPython (Raspberry Pi Pico) as interpreter. And for the port, leave it as “Try to detect port automatically“.
Then, you should click on the install or update MicroPython button.
Step #3
A new window will open as shown in the screenshot below. Here you should select the Raspberry Pi Pico board variant according to what you’re using.
For the Raspberry Pi Pico Board, Select Raspberry Pi Pico / Pico H. For the Raspberry Pi Pico W Board, Select Raspberry Pi Pico W / Pico WH.
Then, you should click the install button. It’ll take a couple of seconds and it’ll give you a done message.
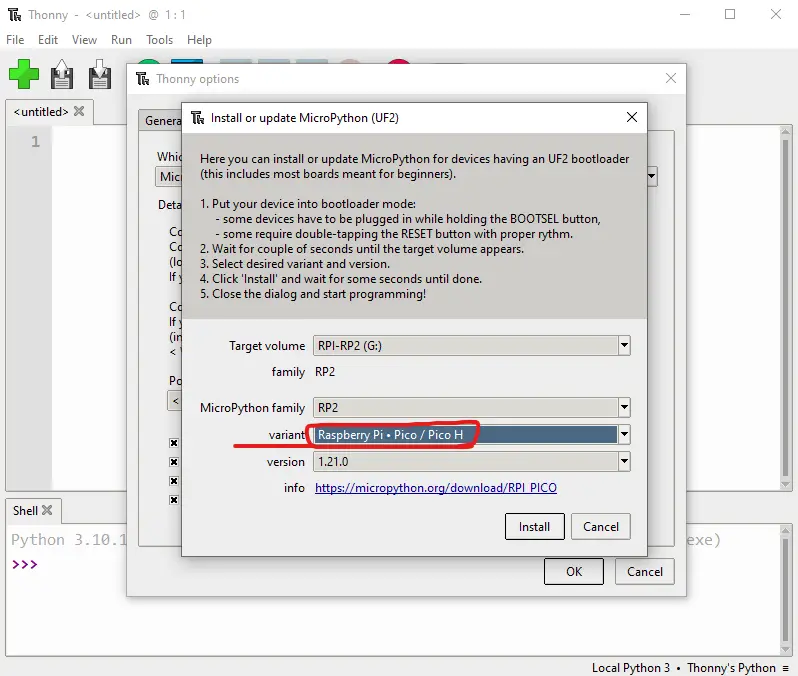
You can close that window, and you should see at the bottom of the IDE window that your board COM port is detected correctly and the interpreter is active.
3. Verifying The MicroPython Installation
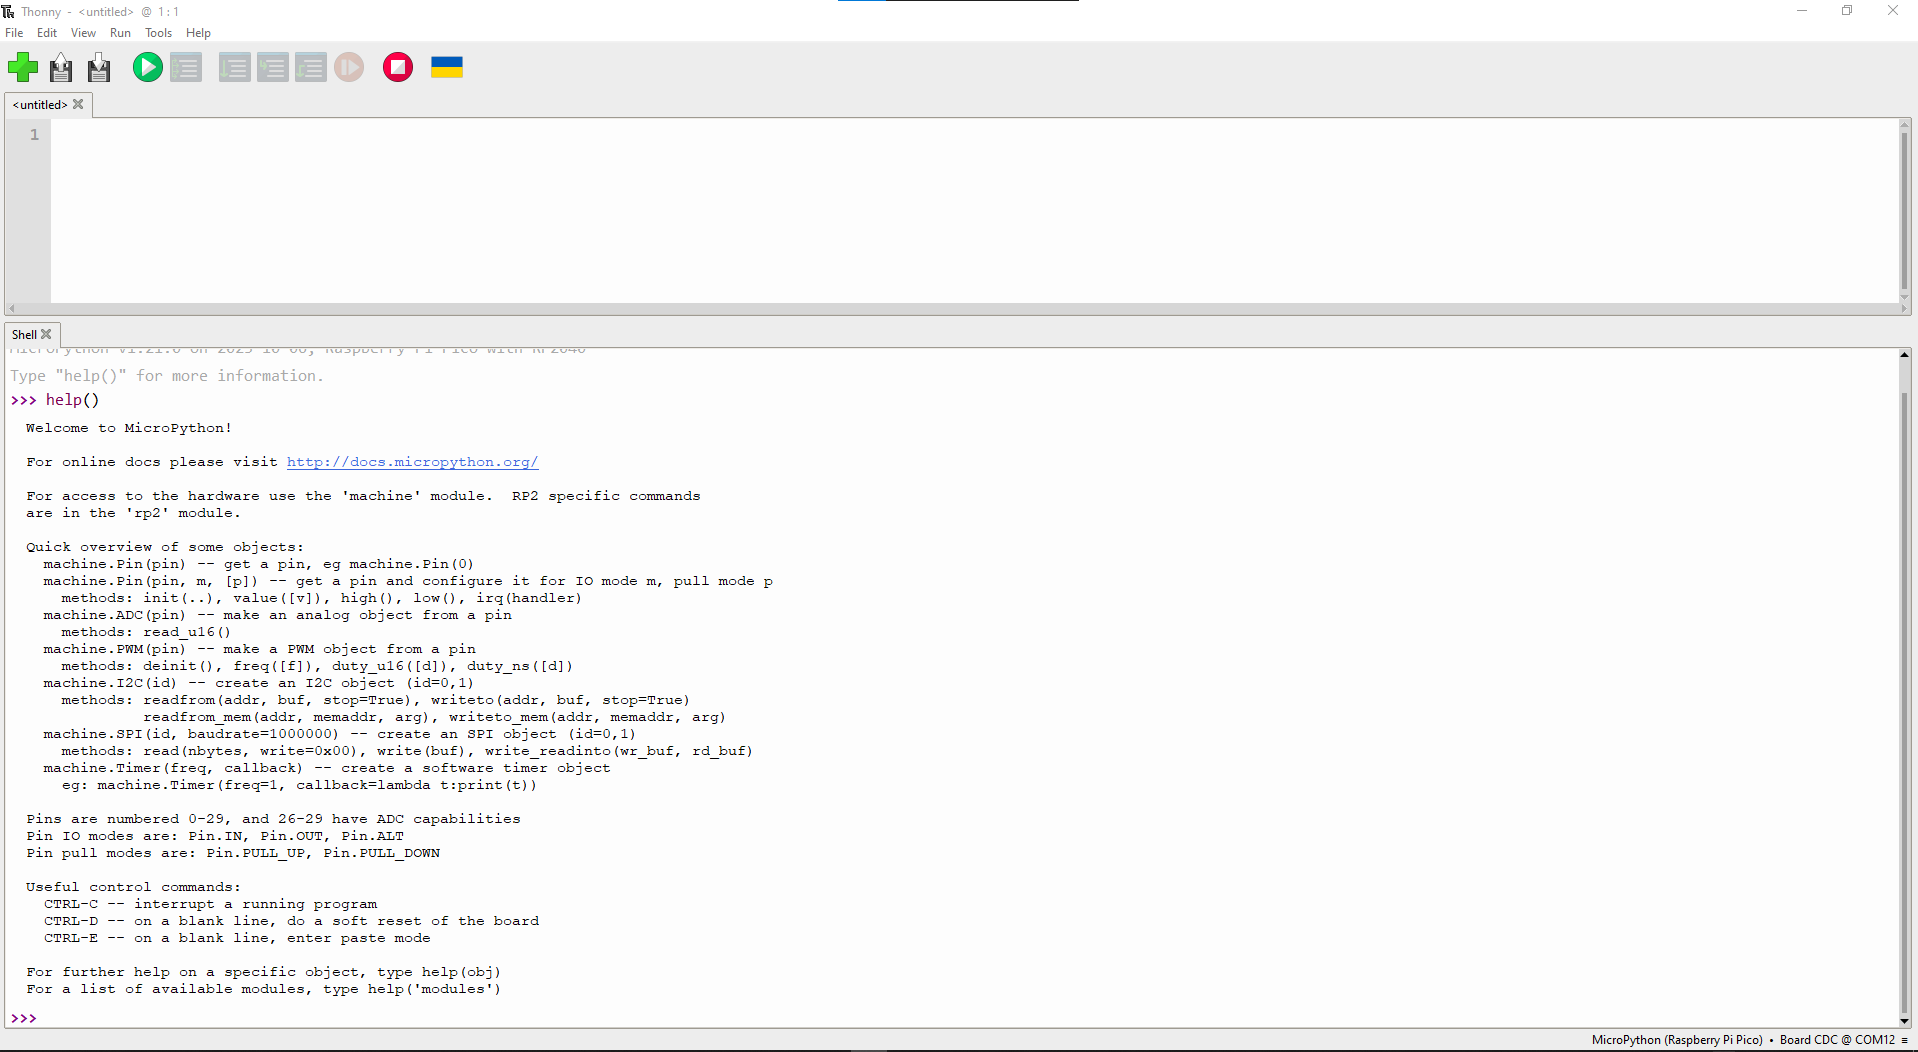
To verify that everything is installed and working properly, just type help() in the shell window in the IDE. You should get something like this:
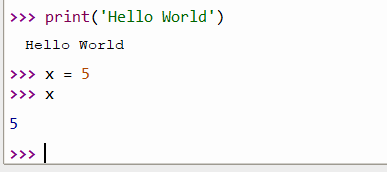
You can print a string message or any test code in the shell and it’ll be interpreted by the Raspberry Pi Pico board and you’ll see the result in the shell window. Just like the following test commands.
Raspberry Pi Pico LED Blinking (MicroPython)
And now let’s write our first LED Blinking MicroPython code script and run it on the Raspberry Pi Pico. Here is the code listing for this example demo project:
Raspberry Pi Pico
|
1 2 3 4 5 6 7 8 |
from machine import Pin from time import sleep BUILTIN_LED = Pin(25, Pin.OUT) while True: BUILTIN_LED.value(not BUILTIN_LED.value()) sleep(0.1) |
Raspberry Pi Pico W
|
1 2 3 4 5 6 7 8 |
from machine import Pin from time import sleep BUILTIN_LED = Pin('LED', Pin.OUT) while True: BUILTIN_LED.value(not BUILTIN_LED.value()) sleep(0.1) |
As you can easily tell, it sets the onboard LED pin as an output pin. And toggle its state every 100ms and keeps repeating forever.
The Raspberry Pi Pico W onboard LED is connected to WL_GPIO0 which is not GPIO0 of the RP2040 main microcontroller. This WL_GPIO0 pin is one of the Infineon CYW43439 Wireless controller chip GPIO pins. That’s why we can’t directly access that pin from the RP2040, it needs to send that command to the wireless controller chip which can turn the LED ON/OFF accordingly. The Pico SDK handles this process and you can easily do it in MicroPython by specifying the pin number as 'LED' instead of GPIO number 0.
Running The LED Blinking MicroPython Script
Copy the code into Thonny IDE, and click on the Run button in the menu toolbar.
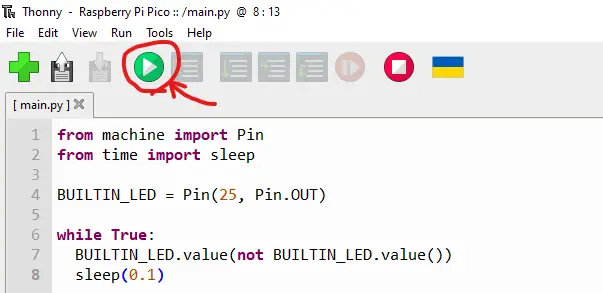
You should see the Raspberry Pi Pico’s onboard LED blinking right now. You can stop the execution using the Stop button in the IDE or press the Ctrl+C key combination. Using the Run functionality in Thonny IDE is very useful for quick testing of new scripts. However, the code is not stored in the flash memory yet.
If you disconnect the board from the PC, it’ll just vanish. In order to flash your code to the Raspberry Pi Pico board permanently and run it as a standalone embedded application, you’ll need to save the script file into the Raspberry Pi Pico board’s filesystem. This is what we’ll do next.
Flashing MicroPython Script To Raspberry Pi Pico
To flash your MicroPython script to the Raspberry Pi Pico board, you should click on the save button in Thonny IDE. It’ll prompt you to select where to save the script file, so you should select Raspberry Pi Pico at this window.
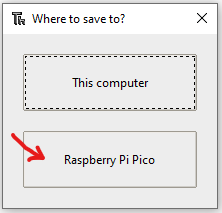
It’ll prompt you to enter the file name to be save. You should name it as follows: main.py
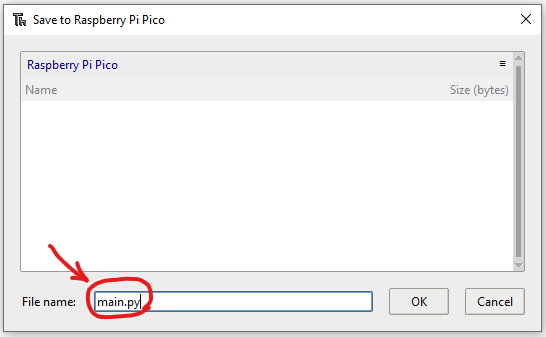
Click ok, and wait till flashing completion. Now, you can remove your Raspberry Pi Pico from the USB port and re-plug it again. You’ll notice that it’s executing the LED blinking script from its memory. You can use an external power supply (like a USB power bank) to verify this.
It’s mandatory to name your script file as main.py so the Raspberry Pi Pico runs it automatically when it boots up. Naming the script file with a different name will cause it to be saved to the memory but it won’t be picked up and executed by the Pi Pico when it boots up. Multi-file project is possible of course but as stated earlier, you need to have only one main.py file in the flash memory.
Raspberry Pi Pico Simulation (Wokwi)
As of writing this tutorial, there is only one Raspberry Pi Pico simulator that looks very promising which is the online Wokwi simulator tool. There is a dedicated tutorial guide for “Raspberry Pi Pico project simulation” linked below in this section hereafter.
This is the simulation result for the previous Raspberry Pi Pico LED Blinking example project (MicroPython) using Wokwi. You can find the Project Simulation file link here, so you can save a copy of it into your Wokwi projects dashboard and play around with the simulator environment.
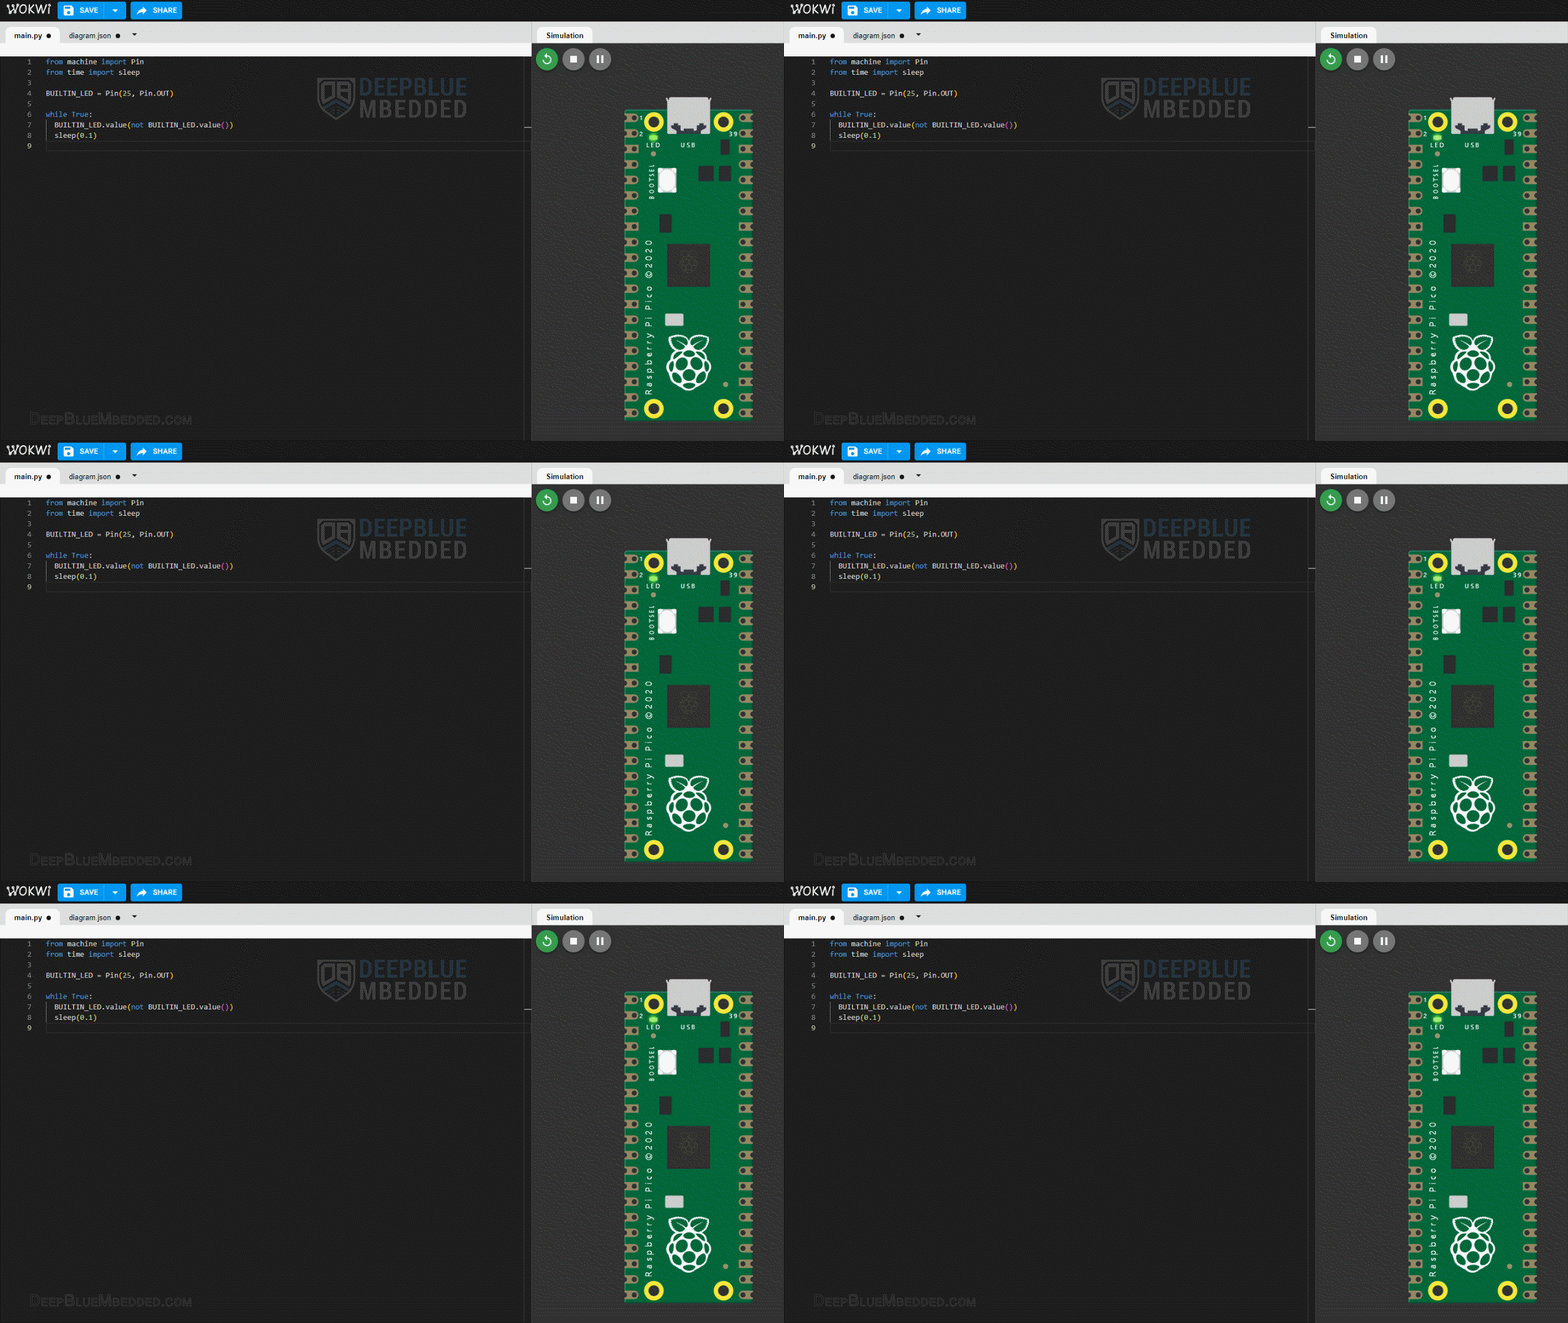
Simulating your Raspberry Pi Pico projects can be really helpful especially when you’re just getting started. This step is not mandatory at all, however, running your project in a simulator environment will help you catch and fix some logic errors in the code or in the circuit wiring connections.
If the code doesn’t run “logically” correct in simulation, it won’t either do in the real world. However, the opposite is not always true. If your project runs in simulation perfectly, it doesn’t mean it’ll also do in the real world. There are many external factors that can affect the application running on a real Pi Pico board. Things like noise, bad wiring, damaged parts, and more other obstacles that can’t be predicted by your simulator.
Moreover, the simulation environment will have its own limitations at the end of the day. It’s going to have a limited number of modules and sensors to use with the Rasbperry Pi Pico, not all RP2040 boards are included, not sufficient measurement tools are available in simulation, and other limitations.
But all in all, it’s a great tool for learning and getting started with Raspberry Pi Pico especially if you don’t have the Pi Pico board or the hardware kit yet. Below is a detailed guide for the Raspberry Pi Pico project simulation using the Wokwi simulator.
This article will give more in-depth information about simulating Raspberry Pi Pico projects using the online Wokwi simulator tool. You’ll learn how to simulate MicroPython, Arduino, and C SDK projects on Raspberry Pi Pico.
Common Issues & Fixes
One of the common issues that you might have is installing the MicroPython UF2 on your Raspberry Pi Pico (or Pico W) board. This can be due to some issues in connection with the MicroPython.org URL itself. Try to access the MicroPython.org website and see if it doesn’t load.
If you can’t access MicroPython.org at any time for some reason, try using a VPN or proxy to access MicroPyhon.org. This happened for me even though the website was accessible most of the time on the same day, I guess the ISP has something to do with this. But anyway, open the following URL in VPN or proxy.
|
1 |
https://micropython.org/download/ |
Scroll to find your Raspberry Pi board variant. It can be Pi Pico, Pico W, or any other RP2040-based pico variant. Open its page, go down to the firmware section, and download the latest release UF2 file.

Now, go to the downloaded file location, hold the BOOTSEL button on your Raspberry Pi Pico board, connect it via USB to your PC, release the BOOTSEL button, and it’ll show up in your PC as a new drive space. Just drag the UF2 and drop it there. The board will reboot after the transfer is done.
And that’s it. You can now test the connection and use the interpreter shell in Thonny IDE and it should be working.
Concluding Remarks
To conclude this tutorial, we can only say that it’s only the first step in the Raspberry Pi Pico Programming journey. The following tutorials in this series will help you get started with Raspberry Pi Pico programming and learn more topics with practical examples and step-by-step explanations.
Follow this Raspberry Pi Pico Series of Tutorials to learn more about Raspberry Pi Pico Programming in different programming languages’ environments.
If you’re just starting with Raspberry Pi Pico, you should check out the following getting-started guides with the programming language you favor the most. There are 4 variants of the Raspberry Pi Pico tutorials to match your needs and help you along the path that you’re going to choose.
- Getting Started With Raspberry Pi Pico Tutorial (MicroPython) <- This is the tutorial you’ve just completed!
- Getting Started With Raspberry Pi Pico Tutorial (C/C++ SDK)
- Getting Started With Raspberry Pi Pico Tutorial (Arduino IDE)
- Getting Started With Raspberry Pi Pico Tutorial (CircuitPython)
