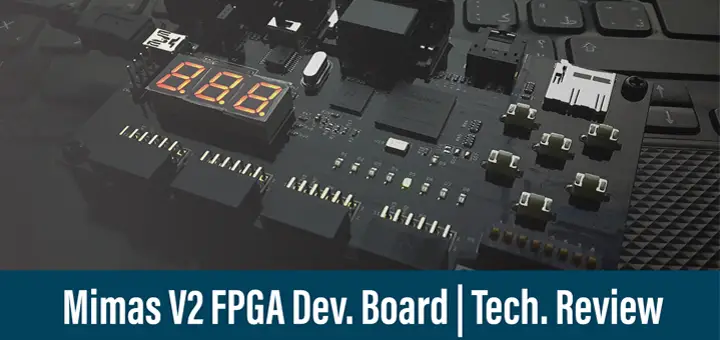
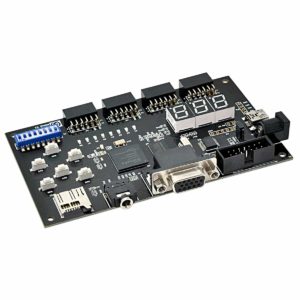
This article will be a detailed overview & tech. review for the Mimas v2 FPGA Dev. Board from Numato LAB. I’ll show you the features of this board. And why I do recommend it for beginners who are just starting out developing FPGA-based hardware design projects. In the end, we’ll power it up and how it works. This post isn’t going to be a tutorial on how to program an FPGA. However, it’ll be followed up by an in-depth tutorial (guide) to show you how to Get Started With Mimas v2 FPGA Board. So let’s get started!
[toc]
Features & Tech. Specs
Core FPGA Chip
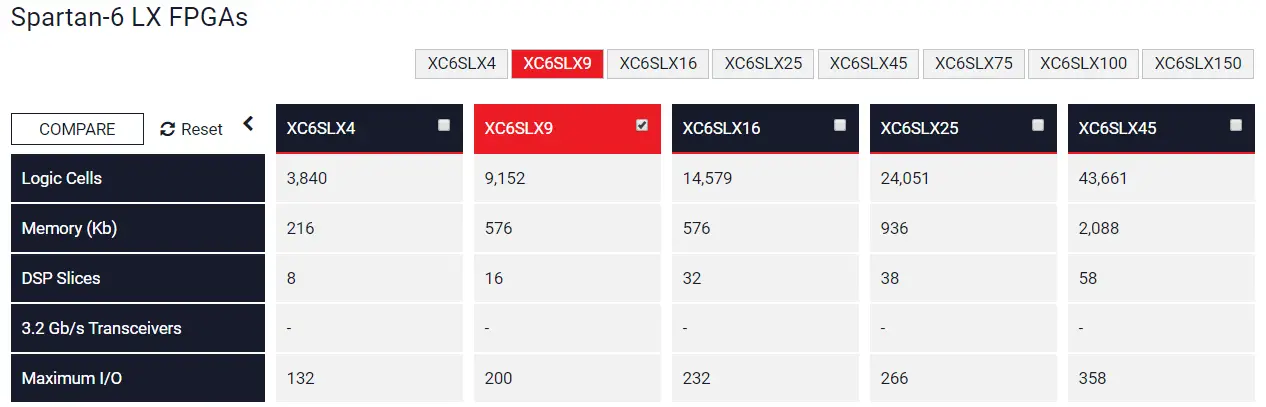
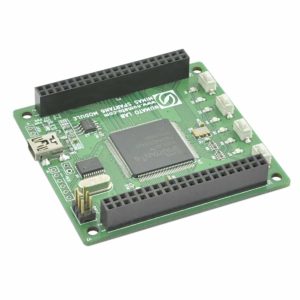
This board features a SPARTAN-6 FPGA from Xilinx which is (Spartan XC6SLX9) in CSG324 package. Which has +9k CLBs (configurable logic blocks). And 200 io pins with plenty of Block RAM & distributed RAM memories, PLLs, DSPs, and much more as you can find out on Xilinx website documentation.
Memory & Storage
The Mimas v2 board has a couple of ways to provide additional memory resources for your projects that include: onboard SDRAM and a microSD card adapter.
- Onboard 512Mb DDR SDRAM.
166MHz 512Mb LPDDR (MT46H32M16LF/W949D6CBHX6E)
- MicroSD card adapter.
You’ve also a 16 Mb SPI flash memory (M25P16) to store the FPGA configurations file which will be automatically copied to the FPGA core upon each power-up process by the PIC24 microcontroller.
IO Capability
On this board, you’ll have as much as 32 IO pins for general purpose usage packed in four 6×2 female headers which provide a convenient way to add some extra modules and sensors in PMOD form as shown below.
- 32 IO for general purpose usage
- Four 6×2 female header connectors
|
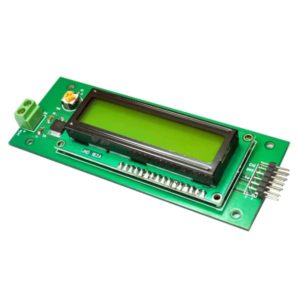
Alphanumeric LCD
|
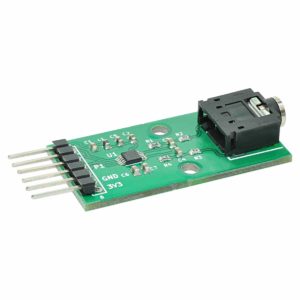
DAC Audio Expansion
|
USB-TTL UART Converter
|
|
ADC Converter Module
|
HDMI Transmitter
|
The board has also some onboard components for easy and fast testing such as dip switches, push buttons and LEDs.
 6 x Momentary Push Buttons
8 x DIP Switches
8 x LEDs
Audio / Video / Display
The Mimas v2 board provides a VGA video output port and an audio stereo jack connector. And you can also extend these ports by connecting expansion boards for audio/video output. You’ve also onboard 7-segment displays.
1 x VGA Connector
1 x Stereo Jack
3 x 7-Segments Display
Clock Options
The Mimas v2 board has a couple of crystal oscillators that generate clock input for both the FPGA core and the PIC24 which empowers the USB configuration functionality. The primary clock oscillates @ 100MHz rate & the other one oscillates @ 12MHz. You can select any of which and divide/multiply the frequency by building frequency dividers or using the PLLs inside the FPGA itself.
100MHz Primary clock
12MHz (optional)
Configuration / Programming Options
You can download the design configuration file to the FPGA on this board via two different ways. First, the JTAG connector can be used alongside with JTAG USB programmer (blaster). On the other hand, there is a Microchip PIC24 microcontroller to provide USB connectivity to a GUI app on your PC which downloads your design configuration file to the onboard SPI Flash then use it to configure the FPGA chip afterward.
USB 2.0 interface
JTAG Connector
What’s Really Nice About Mimas v2
It makes the right balance. This board makes the right balance between low-end and high-end development boards. In terms of price and onboard peripherals. It stays right in the middle of every aspect so it’s an excellent choice for beginners in FPGA development.
As a beginner, what should you consider when choosing an FPGA board?
- Cost
- Chip Manufacturer & Family
- On-Board Peripherals
- Clean Documentation
- IO Pins Count
| Low-End Dev. Boards | High-End Dev. Boards | |
 |
 |
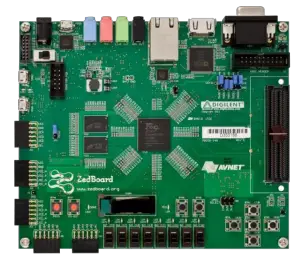 |
| Mimas V1 | Mimas V2 | ZedBoard (Zynq-7000) |
| 35$ | 50$ | 475$ |
Drawbacks of low-end boards
With a low-end board, you’ll only have a bunch of IO pins without any additional peripherals. And you’ve got to connect everything yourself. While working with FPGAs, you must be careful for the voltage level as most FPGAs do not tolerate 5v in/out. The TTL level is mostly 3.3v. So you should pay more attention while connecting IO pins. And that’s why getting a pre-wired board with a few peripherals seems more advantageous for beginners.
Drawbacks of high-end boards
With a SOC, you’ll have more than what you might be in need to as a beginner. You’ll get what you pay for in fact. A powerful FPGA alongside an ARM core or maybe 2 of them with plenty of memory and audio/video connectors and much much more. Which will end up costing you around 400$. The problem here is you may find yourself not interested in that field of knowledge. So it may be a wise decision to start exploring this field with a moderately low budget.
The Cool Thing About Mimas V2
The Mimas v2 board has plenty of onboard peripherals without being too expensive or too large in size. It lets you evaluate as many projects as you can until you get familiar with FPGA programming. Then you can buy a SOC from Xilinx or Intel. You’ll find clear documentation with a couple of tutorials on their website to help you get started. And much more. The only drawback that I can see is that it features a SPARTAN-6 FPGA which requires the old IDE from Xilinx called ISE. Which has been reported to be problematic for windows 10 users.
First-Time Power-Up
When you power the Mimas v2 board up for the first time, it will show the following pattern of LED blinking and 7-segments counting.
You’ll need to download the following materials to get started.
The USB CDC Drivers (Download)
Mimas V2 Configuration Tool (Download)
User Constraints File (Download)
User Manual (Download)
Where To Buy This Board
You can get this board on Amazon @ This Link
Or from Numato LAB’s website @ This Link
In the next few days, I’ll post a tutorial guide to show you how to get started with Verilog HDL programming using the Mimas V2 board. So stay tuned!