In this article, we’ll compare Active Buzzer vs Passive Buzzer in terms of working principles and How to interface Active & Passive With Arduino. We’ll also highlight the Differences Between Active Buzzer and Passive Buzzer devices so you can choose whichever is more suitable for your project.
Piezo buzzers are a type of audio transducer that can be used to generate sound. They are a popular choice for simple sound effects, alarms, and tone-generation applications due to their small size, low cost, and ease of use. Here is an interactive tool that you can play with to experience what a buzzer sounds like!
A piezo buzzer is a polarized electronic device which means it has a positive lead & a negative lead. And it needs a voltage of 3.3v up to 12v to work, the working voltage is stated on the manufacturer page so make sure you get a 5v buzzer which is going to work just as fine with all microcontrollers.

Piezo Buzzers Working Principles
Applying voltage to the piezo buzzer terminals will cause a slight deformation in the piezo disc and by changing this voltage the piezo disc will vibrate and produce the buzzer sound we all know. This is called a Passive Buzzer.
Another type of buzzer doesn’t need a varying voltage, you just give it constant voltage and it has an internal chopper (oscillator) circuit that turns the constant voltage to a square wave and feeds that to the piezo disc to generate a fixed-frequency tone. And that type is called Active Buzzer.
Active Buzzer
Active Buzzers are the easiest to use, as they have internal oscillators. You only need to feed it with constant voltage and it’ll play a continuous buzzer tone until you drive it LOW. It acts like a digital output device (like an LED or something) that you either turn ON or OFF.
The working voltage of an Active buzzer falls in the range of 3.3v up to 12v and you need to check the manufacturer data to know the exact working DC voltage for your buzzer. For example, a 6v buzzer will work with a DC voltage in the range (4v-8v).
Keep in mind that buzzers are polarized electronic devices which means they have a positive lead & a negative lead (like LEDs, capacitors, etc). So be careful when you’re hooking it up with a microcontroller or any drive circuit.
Technical Specs of an Active Buzzer
Those are the specs of an active buzzer (6v DC) as found in its datasheet.
| Rated Voltage | 6V DC |
| Operating Voltage | 4 to 8V DC |
| Rated Current | ≤30mA |
| Sound Output at 10cm | ≥85dB |
| Resonant Frequency | 2,300 ±300Hz |
| Tone | Continuous |
Inside an Active Buzzer
Let’s take a look inside an Active Buzzer to see how it’s made.

Inside an active buzzer, you can find the piezoelectric disc, the oscillator driver PCB, and a backside casing of resin or plastic. Note that there is a hole in the top casing which allows the sound waves to travel through.
Passive Buzzer
Passive Buzzers on the other hand need an AC voltage signal in order to vibrate and make sound. Therefore, it’s a little bit harder to control compared to Active buzzers. But it also allows us to generate whatever note frequency we want to play.
Compared to the fixed tone that active buzzers generate, passive buzzers are more suitable for projects where you need to control the audio tone frequency. And it only needs a PWM signal that you can feed to the passive buzzer using a Timer555 circuit or an Arduino board.
Technical Specs of a Passive Buzzer
Those are the specs of a passive buzzer as found in its datasheet.
| Rated Voltage | 3 ~ 5 V |
| Sound Output at 10cm with 2048Hz Square Wave | ≥85 dB |
| Frequency Range | 50 ~ 14,000 Hz |
| Resonant Frequency | 2,048 Hz |
Inside a Passive Buzzer
Let’s take a look inside a Passive Buzzer to see how it’s made.

Inside a passive buzzer, you can find the piezoelectric disc, a PCB, and it has no backside cover. Note that there is a hole in the top casing which allows the sound waves to travel through.
Active Buzzer Vs Passive Buzzer
Here is how you can easily differentiate between an Active buzzer and a passive buzzer:
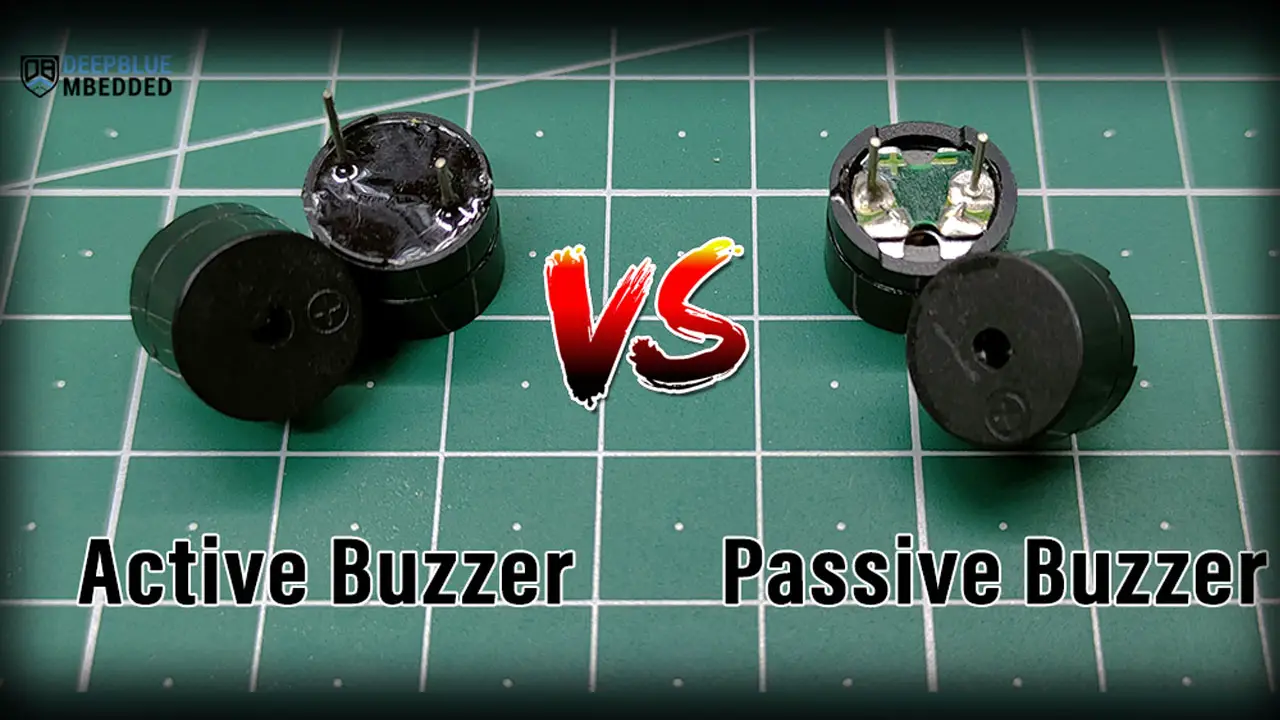
1- By looking at the back of the buzzer
As you can see in the picture below, the passive buzzer doesn’t “usually” have a backside cover, unlike the Active buzzer. This can ease your task of identifying an Active buzzer from a passive buzzer. However, it’s not guaranteed to always look like this and that’s why we need another test to make sure that what we think is an Active buzzer is actually correct.

2- By connecting the buzzer to a 5v DC supply
By connecting the buzzer to a +5v DC supply, we can easily identify the Active buzzer from the passive buzzer. Because both of them have a different response to a constant +5v DC voltage, and it goes like this:
- Active Buzzer: will generate a continuous tone of buzzing sound until you disconnect the DC voltage supply.
- Passive Buzzer: will do a “click” sound (like a relay) the moment you apply DC voltage to it. Disconnect the voltage source and reconnect it again to hear the clicking sound again.
And that’s how you’d differentiate between an active buzzer and a passive buzzer.
Passive buzzers will draw significantly more current compared to active buzzers when your supply it with a DC voltage source. Make sure you’re connected to a current limited source (set the limit to 50mA). Alternatively, you can use a 100Ω series resistor for current limiting to stay on the safe side.
Arduino Buzzer Interfacing Examples
It’s highly recommended to check out the tutorial below to learn more about Arduino (Active & Passive) Buzzer Interfacing with code examples.

This tutorial will give you more information about Active & Passive buzzers interfacing with Arduino. You’ll also learn to use Buzzers with Arduino through some code examples.