In this short tutorial, we’ll be installing ESP32 in Arduino IDE step-by-step. If you’re willing to follow this course (series of tutorials) for ESP32 Programming with Arduino IDE, you need to complete the steps in this tutorial to be able to get started!
The goal is to have the ESP32 Arduino Core installed in the Arduino IDE, so we can choose the board from the board manager as any other Arduino board. This step can be done manually by downloading the ESP32 Arduino Core files from GitHub or by using the URL for the ESP32 board as we’ll be doing hereafter.
Get The ESP32 Boards & Hardware Kit We’ll Be Using In This Course
[toc]
Install Arduino IDE
It’s essential before starting to get Arduino IDE installed on your machine. Visit Arduino Website and get the latest version of the IDE, and install it on your computer. It’s a very easy “next-next-finish” kind of installation process.
After having installed the Arduino IDE, open it, and let’s move to the next step. Which is to install the ESP32 Arduino Core using the board manager tool as shown next.

Installing ESP32 Board in Arduino IDE
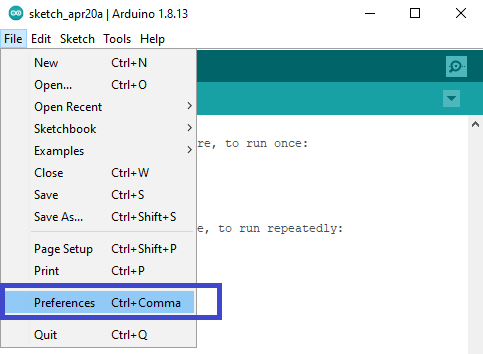
1- Open the Arduino IDE, go to the File menu. Select File > Preferences
2- Type in the following URL link inside the Additional Board Manager URLs textbox and click OK.
https://dl.espressif.com/dl/package_esp32_index.json
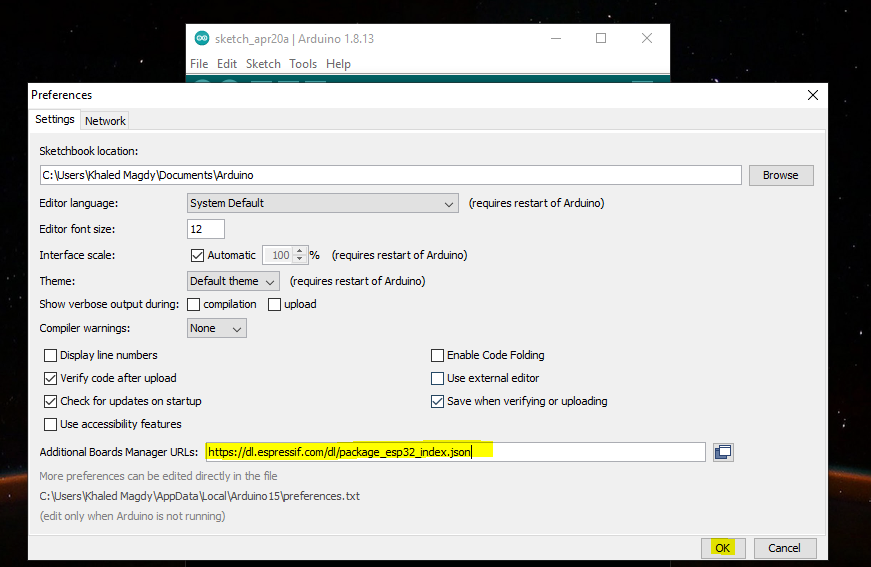
If you’ve got other boards URLs, just separate them with a comma “,” in the same textbox.
3- Open the board manage menu. Tools > Board > Boards Manager. Search for “esp32” and make sure it’s by espressif and click install.
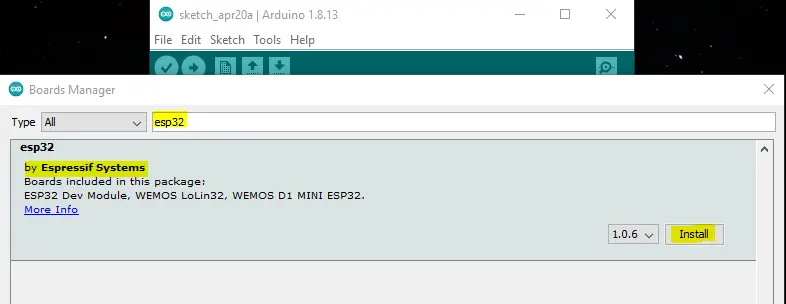
Note: this step will take some time for downloading the ESP32 Arduino Core files (it was around 100MB).
This was the last step! Now, we’ve installed the ESP32 Arduino Core in the Arduino IDE and we’re ready to go. Let’s just test the fluidity of the toolchain by flashing the LED blinking example code to the ESP32 board and make sure it’s working. This will compile, build, flash the code to the target microcontroller. So it’s basically, a full test for the functionality of the toolchain.
LED Blinking Test
Now, open Arduino IDE, plug in your ESP32 board’s USB to your PC.
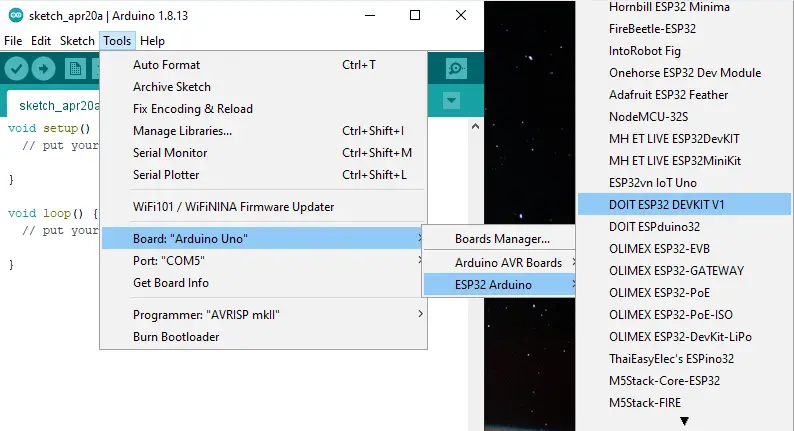
Open the tools menu to select the board. Tools > Board > Your Board (My boars is ESP32 DOIT DEVKIT v1)
Now, check the COM port and paste this example code in the editor.
|
1 2 3 4 5 6 7 8 9 10 11 12 |
#define LED_BUILTIN 2 // On-Board LED Pin void setup() { // initialize digital pin LED_BUILTIN as an output. pinMode(LED_BUILTIN, OUTPUT); } // the loop function runs over and over again forever void loop() { digitalWrite(LED_BUILTIN, HIGH); // turn the LED on (HIGH is the voltage level) delay(250); digitalWrite(LED_BUILTIN, LOW); // turn the LED off by making the voltage LOW delay(250); } |
Hit upload and press the BOOT button until Arduino IDE starts flashing the code and display log messages at the bottom window, then you can release the BOOT button.
After flashing completion, the board will reset by hardware command by order of the loader tool in Arduino IDE or you’ll have to restart the board yourself by pressing the EN button once. Here is the result of this test.
Back To “Getting Started With ESP32” Tutorial
We’re now done with installing ESP32 Arduino Core in our Arduino IDE and ready to go on with the rest of this series of tutorials. You most probably came here from the Getting Started With ESP32 Tutorial. Click the link to get back to that introductory tutorial, and keep progressing all your way through the tutorials!
When I followed these instructions, it basically seemed to work. However, it did not create esp32 board under the C:\Program Files (x86)\Arduino\hardware\arduino folder. There’s an avr folder there, but not esp32 Why is that?
Hi Mark!
Does it work? Do you find the ESP32 in your board manager?
in folder options show “Hidden Folders” and go to
C:\Users\name..\AppData\Arduino15\packages
there you’ll find the “esp32” folder. If not, then it’s an installation issue. To fix it, you need to delete the Arduino15 folder. This will also remove all add-ons you have installed in Arduino IDE. But when you follow the URL board installation steps, it’ll be installed just as fine.
Another solution I’ve found online is re-installing both “Java” and “Arduino” because some users have a lot of problems if one of the 2 software packages is outdated compared to the other.
Hope this helps!
Regards,
Khaled M.